The Okta/Axomo SAML integration currently supports the following features:
For more information on the listed features, visit the Okta Glossary.
Sign in to your Axomo account.
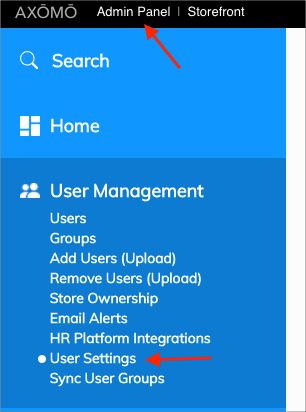
Go to Admin Panel > User Management > User Settings:
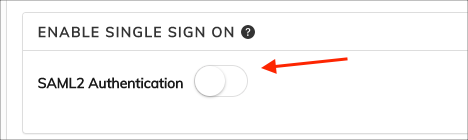
Scroll down to the ENABLE SINGLE SIGN ON section and enable SAML2 Authentication:
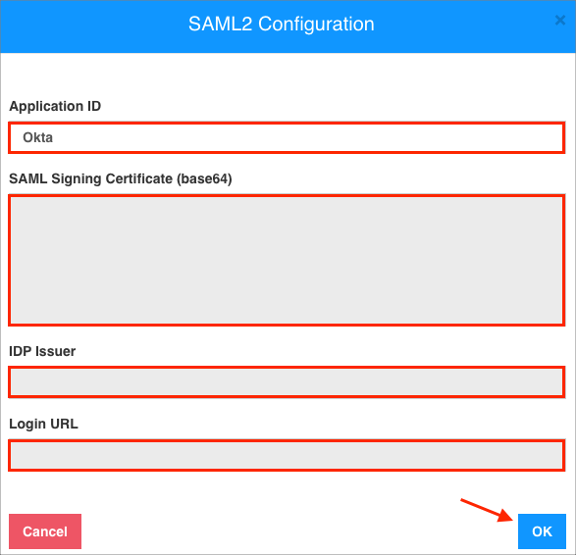
Enter the following:
Application ID: Enter a preferred name.
SAML Signing Certificate (base64): Copy and paste the following:
Sign into the Okta Admin Dashboard to generate this variable.
IDP Issuer: Copy and paste the following:
Sign in to the Okta Admin app to have this variable generated for you.
Login URL: Copy and paste the following:
Sign in to the Okta Admin app to have this variable generated for you.Click OK:
Still on USER SETTINGS, click Save Changes.
In Okta, select the Sign On tab for the Axomo SAML app, then click Edit:
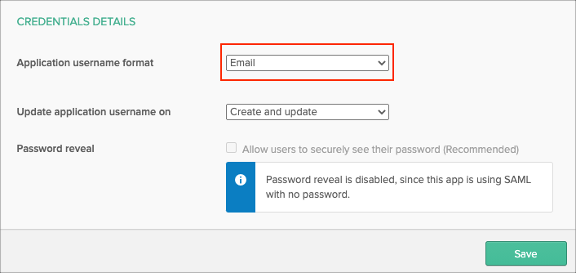
Scroll down to CREDENTIALS DETAILS.
Application username format: select Email.
Click Save
Done!
Make sure that you entered the correct value in the Subdomain field under the General tab in Okta. Using the wrong value will prevent you from authenticating via SAML to Axomo.
The following SAML attributes are supported:
| Name | Value |
|---|---|
| firstname | user.firstName |
| lastname | user.lastName |
| user.email |
Go to: https://[your-subdomain].axomo.com/.
Click Login, then click Sign in with SSO:
![go to https://[your-subdomain].axomo.com/, click Login, then click Sign in with SSO](images/apps/axomo5.png)
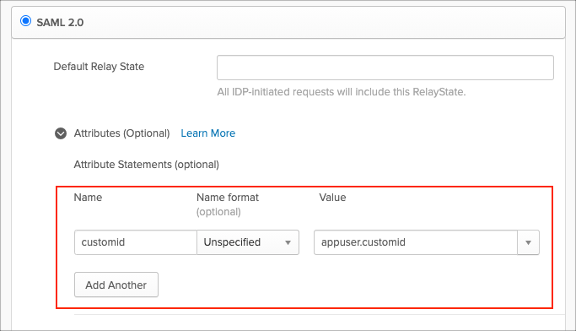
OPTIONAL
By default Okta only sends 3 SAML attributes in the SAML assertion: firstname, lastname, and email. To send the custom attributes customid, follow the steps below:
In Okta, select the Sign On tab for the Axomo SAML app, then click Edit.
Select Attributes (Optional) and set customid as a Name and appuser.customid as a Value.
Click Save:
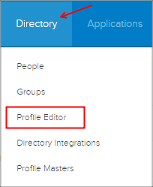
Go to Directory > Profile Editor:
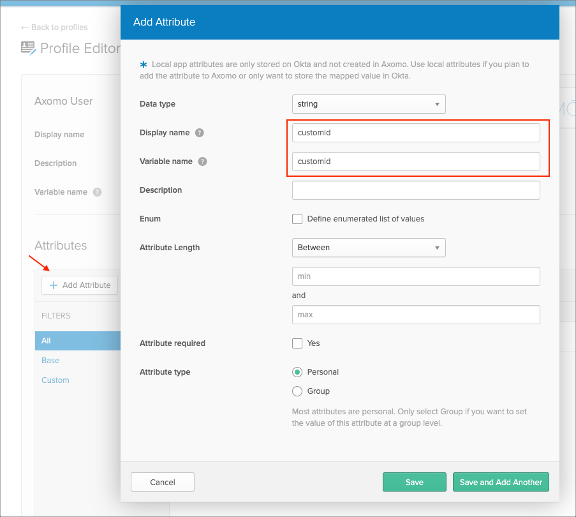
Search for your Axomo app, then click Profile:

Display Name: Enter customid
Variable name: Enter customid
Click Save:
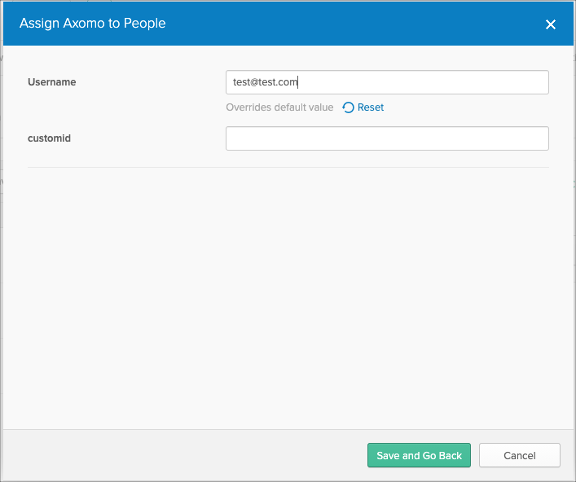
Now, when you assign users to the Axomo SAML app, you can now specify the value of the customid attribute:
Done!