

The Okta/Amazon AppStream 2.0 SAML integration currently supports the following features:
For more information on the listed features, visit the Okta Glossary.
Okta’s Amazon AppStream 2.0 integration allows end-users to authenticate AWS AppStream applications using single sign-on with SAML. Okta admins can also set the duration of the authenticated session of users via Okta.
Configuring SAML 2.0 for Amazon AppStream 2.0 consists of the following three steps:
In order to use SAML for Amazon AppStream 2.0, you need to set up Okta as an identity provider in AWS and establish the SAML connection, as follows:
Sign in to the AWS Management Console and open the IAM console at https://console.aws.amazon.com/iam/
Select Identity Providers in the navigation pane, then click Create Provider:
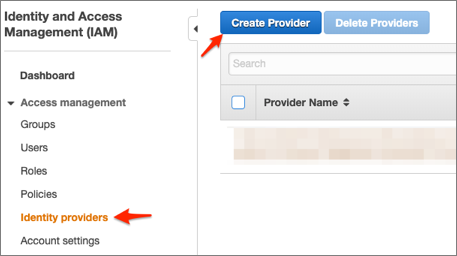
Follow the steps below:
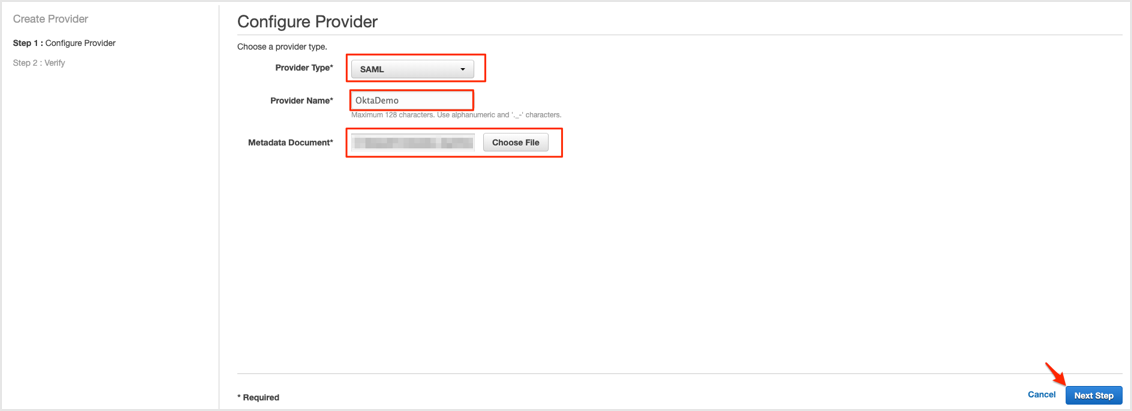
Provider Type: Select SAML from the dropdown.
Provider Name: Enter a name for the identity provider.
Metadata Document: Save the following as metadata.xml, then click Choose File and upload it.
Sign into the Okta Admin dashboard to generate this value.
Click Next Step:
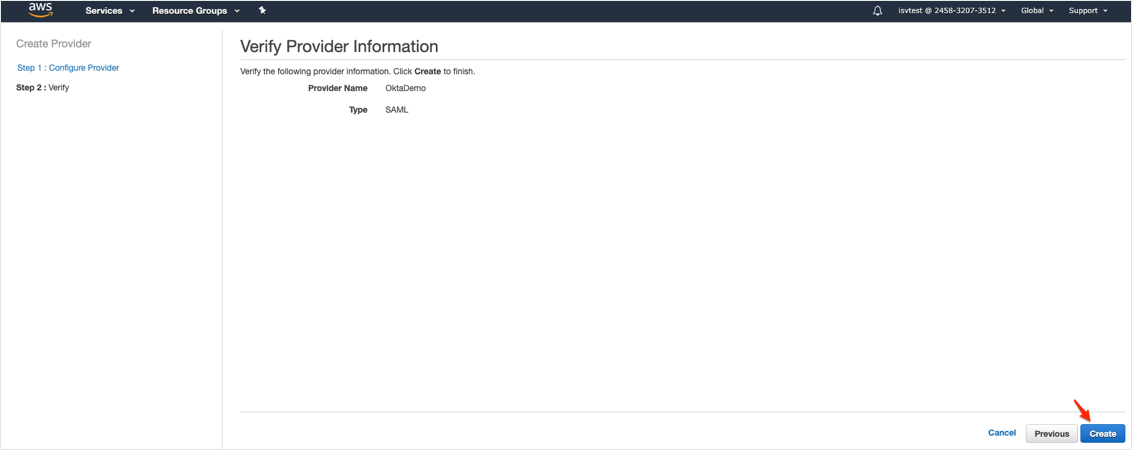
Click Create:
Locate the Identity Provider you created. Click on the name, and make a copy of your Provider ARN value. You will need it later during this configuration.

Next, create a SAML 2.0 federation IAM role. This step establishes a trust relationship between IAM and Okta, which identifies Okta as a trusted entity for federation. The role also defines which users authenticated by Okta are allowed to access an AppStream 2.0 stack. See Amazon documentation here for more information.
In the navigation pane, select Roles > Create role:
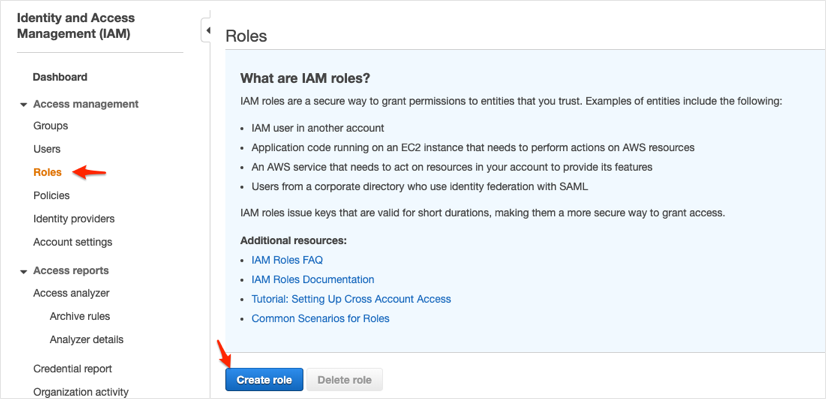
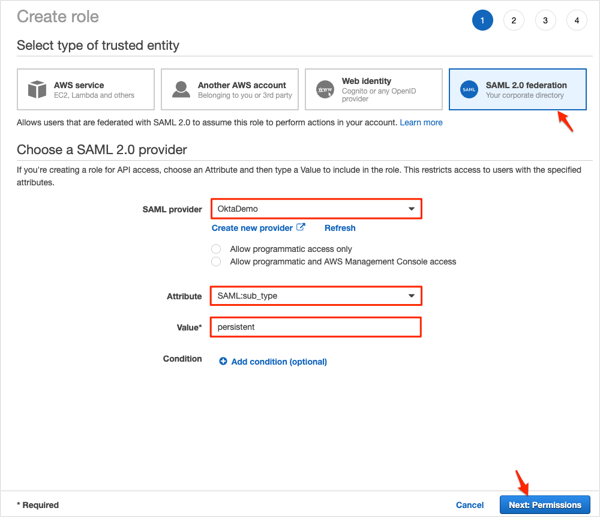
Select SAML 2.0 federation, then follow the steps below:
SAML provider: Select the SAML IdP that you created.
IMPORTANT: Do not choose either of the two SAML 2.0 access methods (Allow programmatic access only or Allow programmatic and AWS Management Console access).
Attribute: Select SAML:sub_type.
Value: Enter persistent.
Click Next: Permissions:
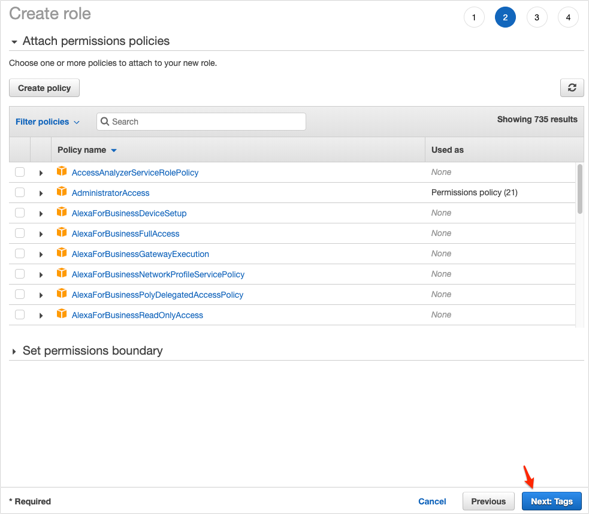
On the Attach permissions policies page embed an inline IAM policy for your role. Refer to Amazon documentation here for more information. Then click Next: Review:
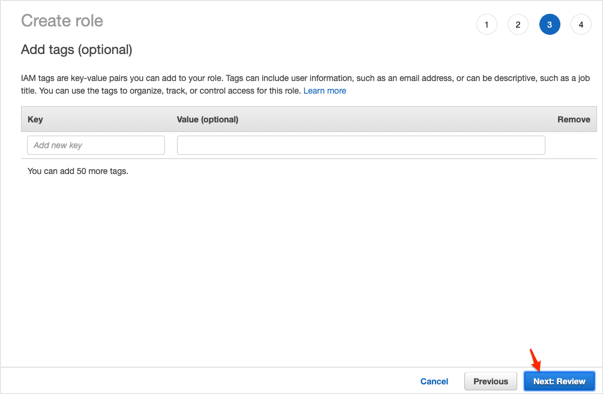
Click Next: Review:
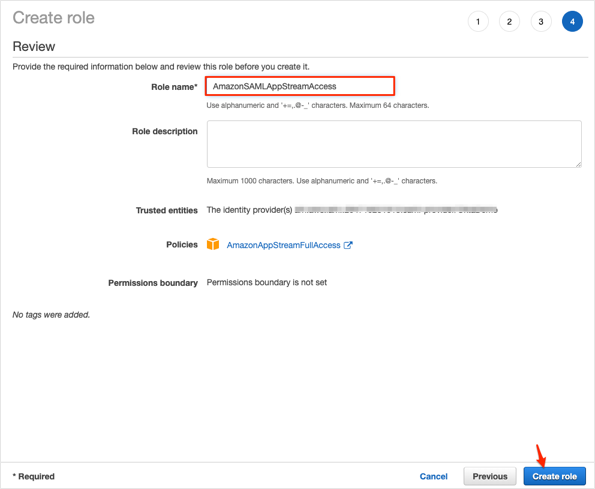
Follow the steps below:
Role name: Enter a name that helps you identify the purpose of this role. Because various entities might reference the role, you cannot edit the name of the role after it has been created.
Role description (optional): Enter a description for the new role.
Click Create role:
Locate the IAM role you created. Click on the name, and make a copy of your Role ARN value. You will need it later during this configuration.
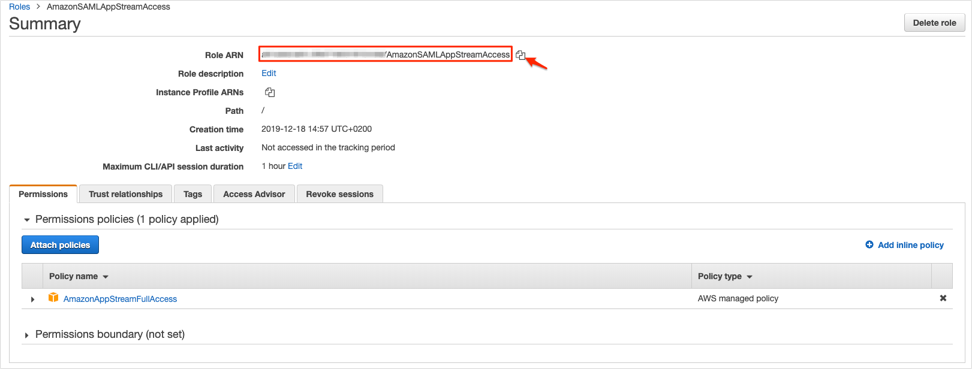
Now that you have finished the required steps to be performed in the AWS console, open the Amazon AppStream 2.0 app integration configuration in Okta and perform the following steps:
In Okta, go to the the Sign On tab for the Amazon AppStream 2.0 app and click Edit. Enter the Role ARN and the Provider ARN values that you stored earlier during this configuration in the Role ARN and Idp ARN field, as comma separated values.
For example if your Role ARN is: arn:aws:iam::123456789012:role/okta-access-role and your IDP ARN is arn:aws:iam::123456789012:saml-provider/okta, enter (no whitespaces): arn:aws:iam::123456789012:role/okta-access-role,arn:aws:iam::123456789012:saml-provider/okta
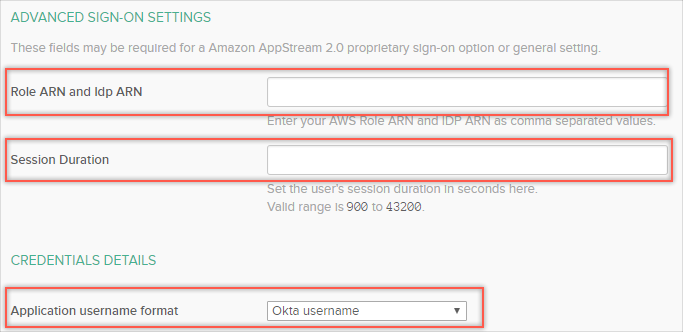
Set the user’s desired session duration in seconds in the Session Duration field.
(Optional) If the AppStream 2.0 stack has a domain-joined fleet, select the AD user principal name for Application username format (otherwise leave as Okta username).
The last step is to configure the Relay State parameter for the application. It should follow the following format:
https://relay-state-region-endoint?stack={stackname}&accountId={aws-account-id-without-hyphens}
For details, see Amazon’s documentation on How to Configure the Relay State for your Federation.
Click Save.
You are now ready to assign users to the application and test SAML.
The following SAML attributes are supported:
| Name | Value |
|---|---|
| https://aws.amazon.com/SAML/Attributes/Role | Comes from Role ARN and Idp ARN fields on the Sign On tab |
| https://aws.amazon.com/SAML/Attributes/RoleSessionName | user.userName |
| https://aws.amazon.com/SAML/Attributes/SessionDuration | Comes from Session Duration field on the Sign On tab |