The Okta/Alchemer (formerly SurveyGizmo) SAML integration currently supports the following features:
For more information on the listed features, visit the Okta Glossary.
Sign in to Alchemer as an administrator.
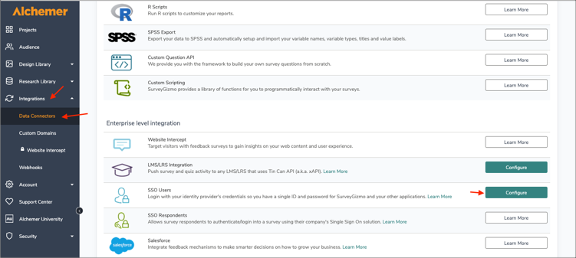
Go to Integrations > Data Connectors, scroll down to SSO Users and click Configure:
Enter the following:
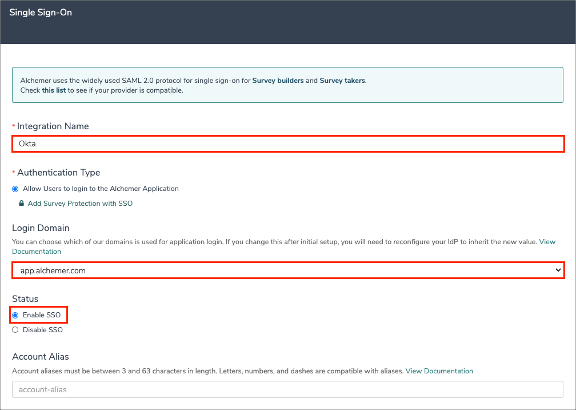
Integration Name: Enter an appropriate name.
Login Domain: Make sure this is set to app.alchemer.com
Status: Select Enable SSO.
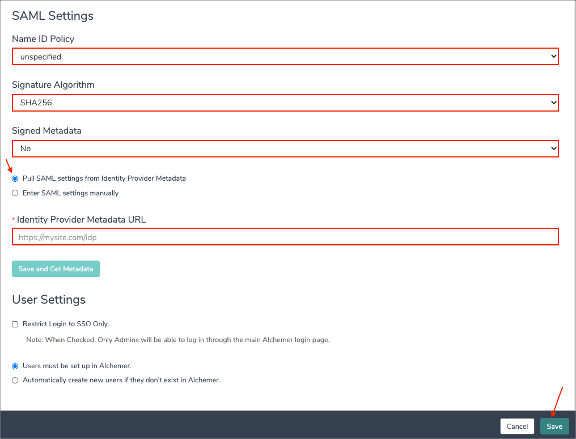
Name ID Policy: Select unspecified.
Signature Alogrithm: Select SHA256.
Signed Metadata: Select No.
Select Pull SAML settings from Identity Provider Metadata.
Identity Provider Metadata URL: Copy and paste the following:
Sign into the Okta Admin dashboard to generate this value.
(Optional) Restrict Login to SSO Only: Check this option if you wish to only allow users to access Alchemer via Okta. Admins still will be able to log in through the main login page.
(Optional) Automatically create new users if they don't exist in Alchemer: Select this option to enable JIT Provisioning. For more information refer to step 8 of the Alchemer-Side Setup.
Click Save:
Still on the Data Connectors page in front of the integration you created, click Edit:

Scroll down to the Login Link. Make a copy of your Login Link (it will be used for SP-init flow). Also make a copy of your Base URL and Customer ID:
For example: If your Login Link is http://app.alchemer.com/login/initiatelogin/idp/a1b2c3d4
Your Base URL is app. alchemer.com, your Customer ID is a1b2c3d4
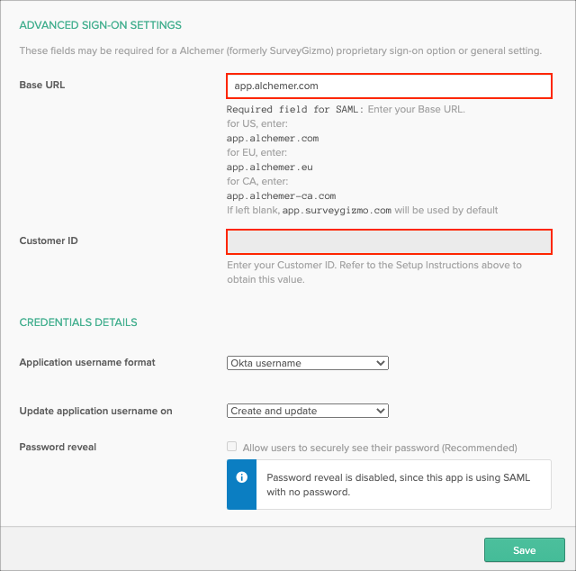
In Okta, select the Sign On tab for the Alchemer (formerly SurveyGizmo) SAML app, then click Edit:
Enter your Customer ID and Base URL values (step 5) into the corresponding fields.
Click Save:
Done!
Go to the Login Link you made a copy of in step 5.