This document includes the following topics:
Depending on the custom application configuration, the Okta/Akamai Enterprise Application Access SAML integration currently supports the following features:
Log in to Akamai Luna control center with administrative privileges.
Select the correct contract that is provisioned for Enterprise Application Access (EAA).
In the selected contract, click CONFIGURE, then select Enterprise Application Access from the available list of Akamai products.
The Akamai Luna control center will redirect you to EAA management console.
In the EAA management console, select Applications > Identity Providers:
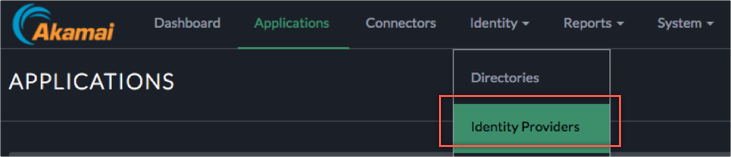
In the Identity Providers configuration menu, click Add Identity Provider, to add OKTA as a SAML IdP.
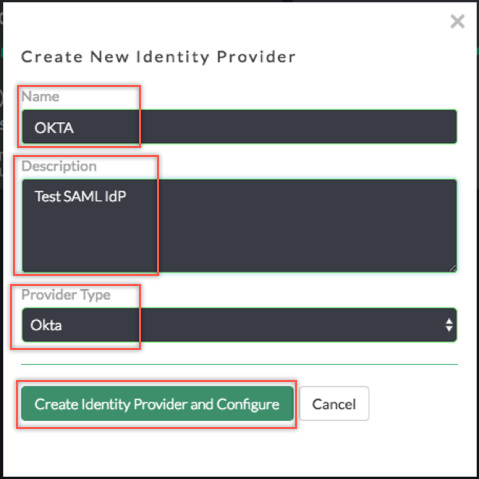
In the Create New Identity Providers box, enter the following:
Name and Description: Enter a name (we used OKTA in our example) and description.
Provider Type: Select Okta from the dropdown menu.
Click Create Identity Provider and Configure.
A new configuration pages appears. Enter the following:
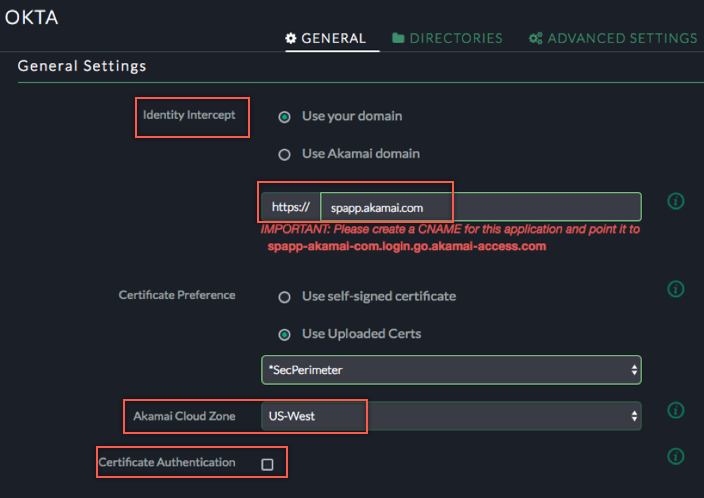
General Settings:
Identity Intercept: Enter custom or Akamai domain to identify the Service Provider’s Base URL or ACS URL.
Note: If you choose Use your domain option, also configure the CNAME in your external DNS as generated by the UI.
Note: Upload and use your own certificate for custom domain.
Akamai Cloud Zone: Select the EAA Cloud zone from the dropdown menu closest to the users.
Certificate Authentication (Optional): Select the checkbox and configure required parameters if you want to enable Client Certificate authentication.
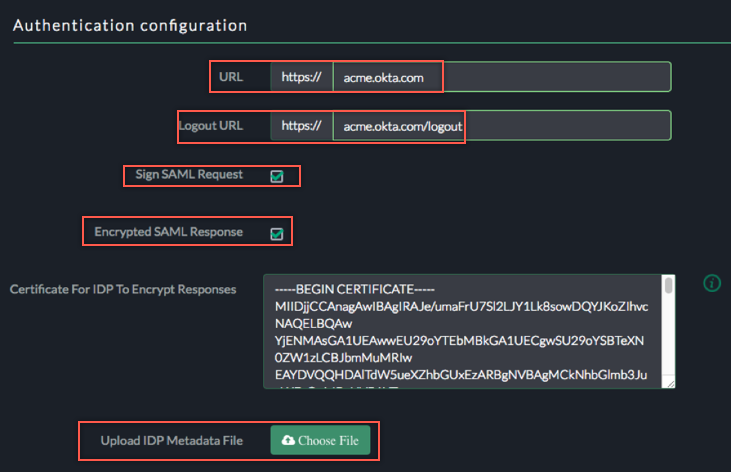
Authentication Configuration:
URL (Optional): Enter your Okta subdomain (we used acme in our example).
Logout URL: Sign into the Okta Admin Dashboard to generate this variable. Copy and paste the logout url from OKTA Admin dashboard.
Sign SAML Request (Optional): In a SP-initiated flow, if OKTA requires Signed SAML request, then you can enable this checkbox which will send the signed SAML assertion to OKTA.
Encrypted SAML Response: Enable this if OKTA sends encrypted SAML response to EAA (SP). Use the certificate required to encrypt responses.
Upload IDP Metadata File: Click Choose File to locate, then upload the metadata.xml file you have downloaded from OKTA dashboard for Akamai EAA SAML SP endpoint.
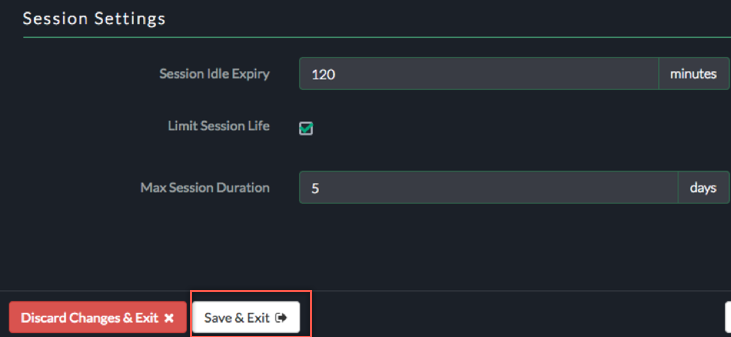
Session Settings:
Leave the Session Settings default values, then click Save & Exit:
For access applications, EAA can provide Single Sign On (SSO) using custom headers. EAA uses various attributes, it receives as part of SAML assertion from OKTA and injects X-forwarded-for headers with custom attributes.
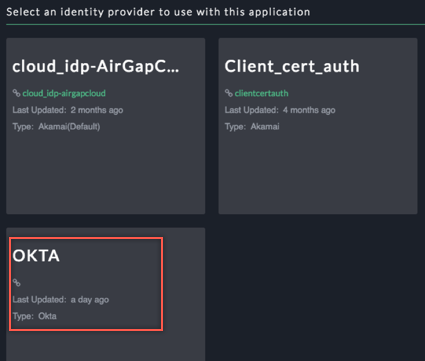
In your EAA access application configuration, select the AUTHENTICATION tab, then click Assign Identity Provider for new applications or Change Identity Provider for existing applications:

Select the OKTA as the Identity Provider:
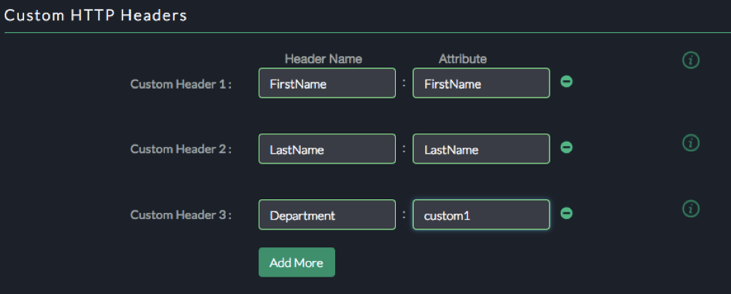
Click save, select the ADVANCED SETTINGS tab, then scroll down to the Custom HTTP Headers section:
Configure attribute mapping as follows:
Header Name: Enter a required header name.
Attribute: Select Custom.
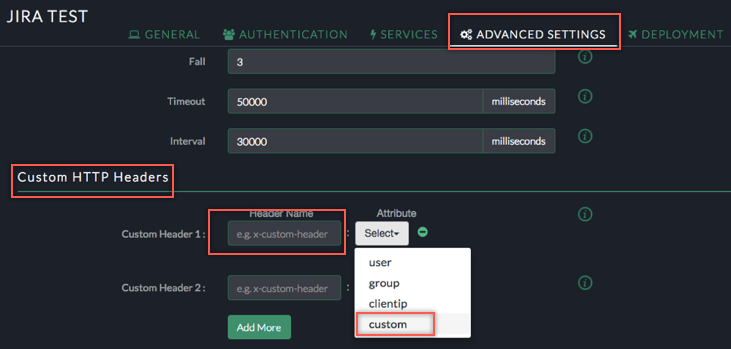
Enter appropriate SAML attribute name(s).
See the List of Supported Attributes. In our example below we added three headers (FirstName, LastName, Department) and mapped them to the FirstName, LastName and custom1 attributes from the SAML assertion received from OKTA.
After configuring custom HTTP headers, save and deploy the the application configuration.
Done!
You can find more information on how to setup your first application with the Akamai Enterprise Application Access platform in the EAA Quick Start Guide.
Follow the instructions here: Simulating an IDP-initiated Flow with the Bookmark App. Use the Akamai application URL for the Okta Bookmark app URL field.
Open your application URL.
Okta sends the following attributes as part of the SAML assertion: FirstName, LastName. These attributes are mapped to the corresponding fields in the Okta Base User Profile.
In addition to the default attributes, Okta supports the following five custom attributes: custom1, custom2, custom3, custom4, custom5.
Here is an example describing how to add and use additional custom attributes:
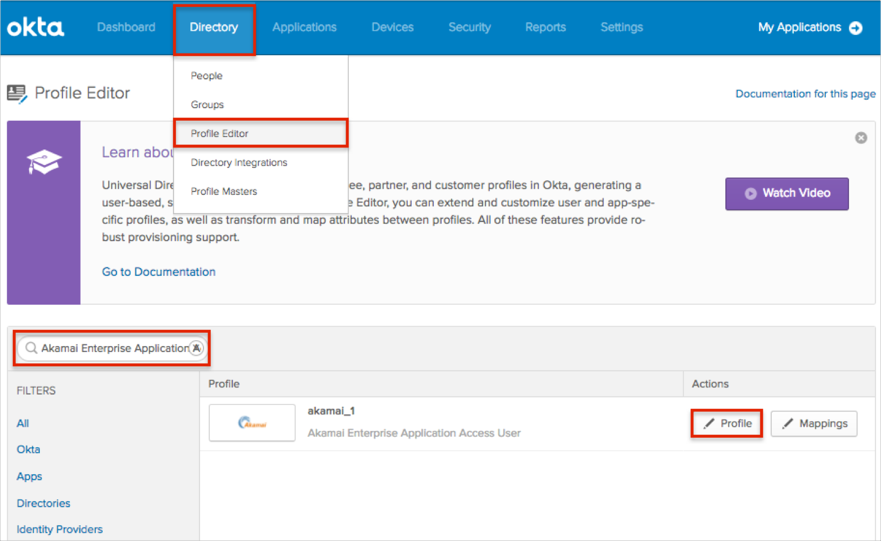
In Okta, navigate to Directory > Profile Editor.
Search for the Akamai Enterprise Application Access app, then click Profile.
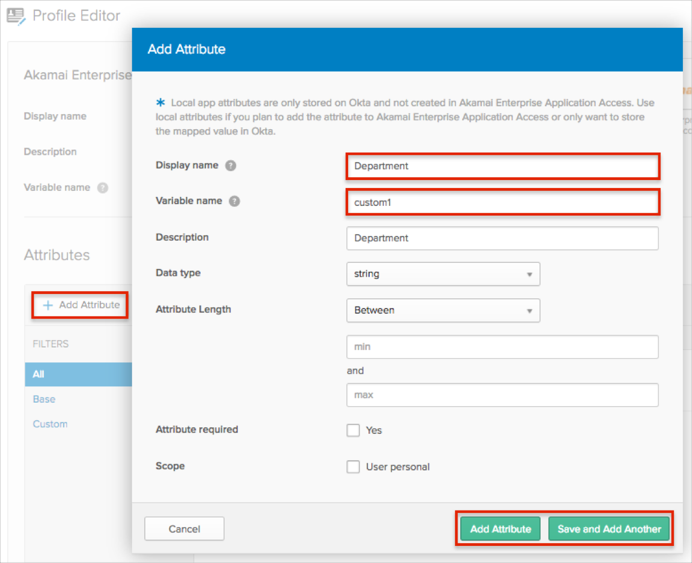
Click Add Attribute, then enter the following:
Display Name: Enter the preferred attribute name. In our example we used Department.
Variable Name: If you are adding one attribute, enter custom1; for other attributes the value will be custom2, custom3, custom4, or custom5.
Click either Add Attribute if you are adding just one attribute, or Save and Add Another to add more.
Note: Scope (optional): If you check user personal, the current attribute will be available once you assign the user to the Akamai Enterprise Application Access app and will not be available once you assign the group to the app.
Click Map Attributes:
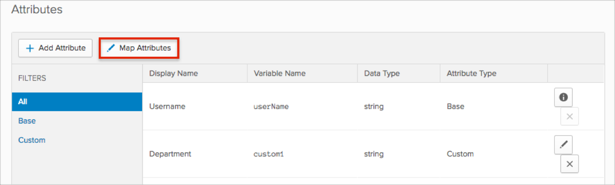
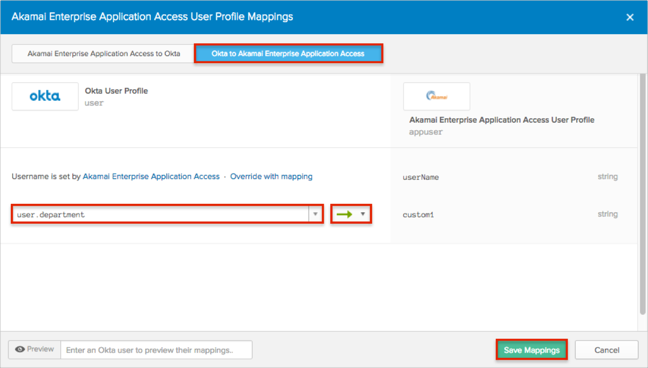
Select the Okta to Akamai Enterprise Application Access tab, then do the following:
Start typing the required attribute from the Okta base user profile (or use the dropdown list) and select the attributes you want to map.
In our example, we have selected the Department attribute, then the green arrows (Apply mapping on user create and update).
Click Save Mappings.
Click Apply updates now:
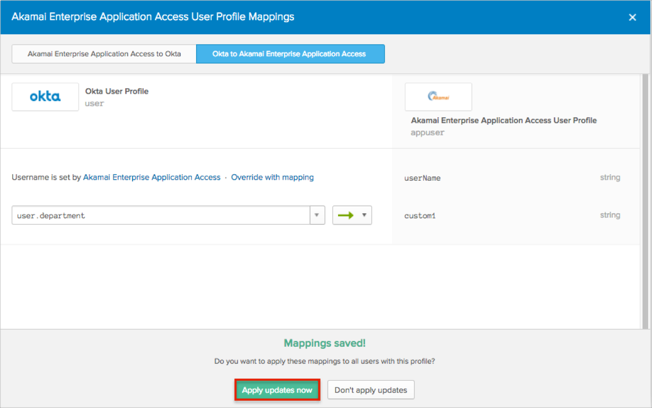
Now Okta will pass custom1 attribute with the value of the Department field from the Okta base user profile.
You can use the custom1 attribute key for the SAML attribute name during attributes mapping in the Akamai Enterprise Application Access (step 4).
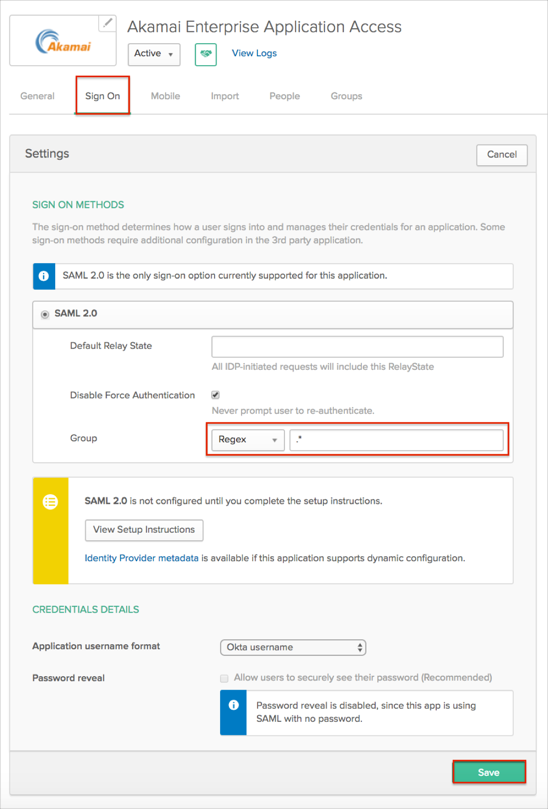
Select the Sign On tab for the Akamai Enterprise Application Access, then click Edit:
Select a preferred group filter for the Group attribute (the Regex rule with the value ".*" in order to send *all* groups to the Akamai instance we used in our example).
Click Save.