The Okta/IAM Identity Center SAML integration currently supports the following features:
For more information on the listed features, visit the Okta Glossary.
Save Okta’s IdP SAML metadata:
Sign in to the Okta admin dashboard, add the AWS IAM Identity Center app.
Select the Sign On tab.
Under SAML Signing Certificates, select View IdP Metadata from the Actions drop-down menu.
Save the contents as metadata.xml.
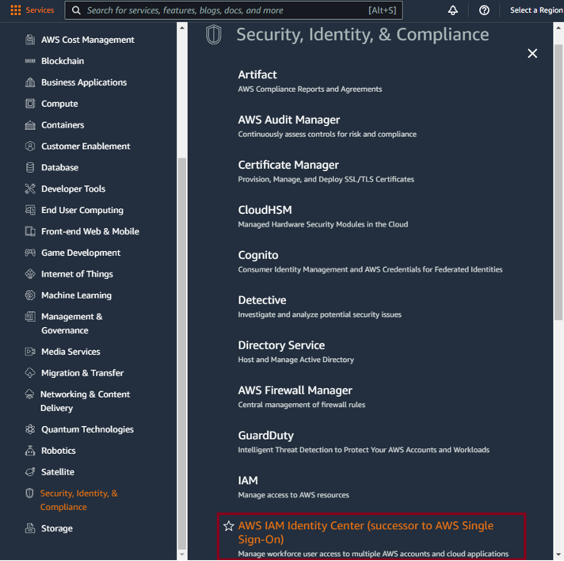
Sign in to the AWS Management Console.
Go to Security, Identity, & Compliance > IAM Identity Center:
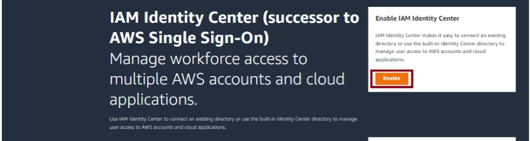
Click Enable in the upper right:
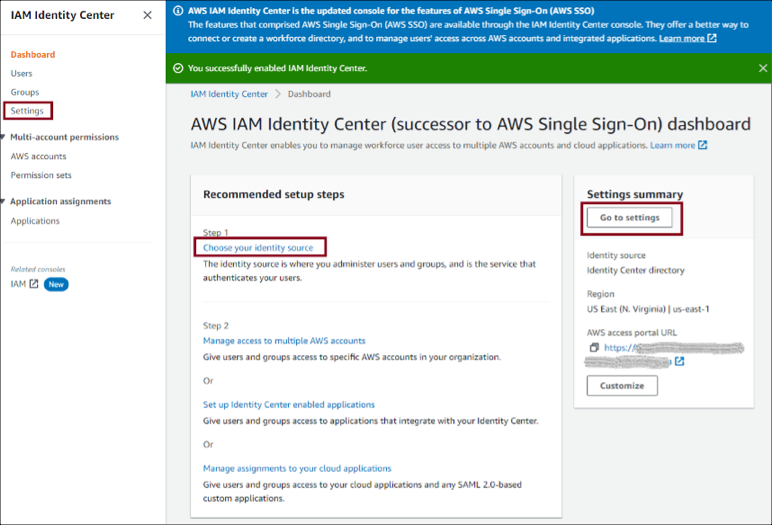
Select Settings (on the left), Go to settings on the right, or Choose your identity source (in the middle). All three take you to the Settings page where you can choose your identity source:
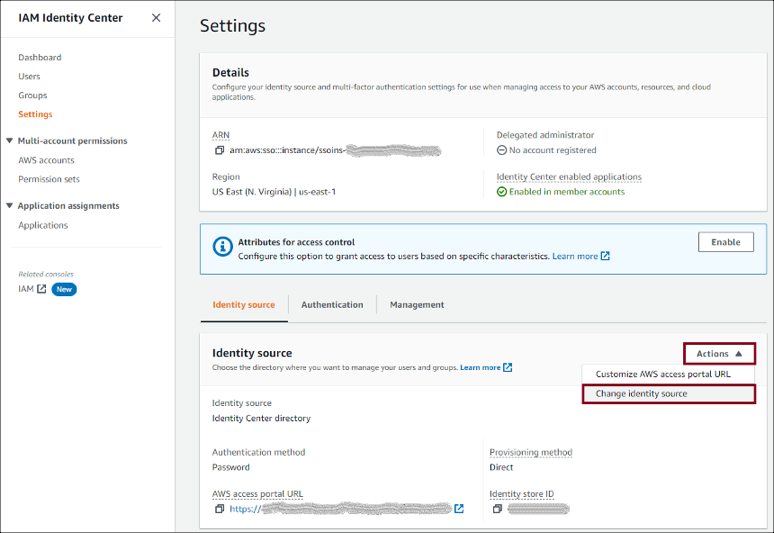
Under Identity source, select Change identity source from the Actions drop-down menu:
On the next page select External identity provider, then click Next.
Configure the external identity provider.
IdP SAML metadata: Click Choose file to upload Okta’s IdP SAML metadata you saved in step 1.
Make a copy of the AWS access portal sign-in URL, IAM Identity Center ACS URL, and IAM Identity Center issuer URL values. You'll need these values later on.
Click Next.
Important: Changing your source to or from Active Directory removes all existing user and group assignments. You must manually reapply assignments after you have successfully changed your source.

Review the list of changes. Once you are ready to proceed, type ACCEPT, then click Change identity source.
In Okta, select the Sign On tab IAM Identity Center SAML app, then click Edit:
Enter your AWS IAM Identity Center SSO ACS URL and AWS IAM Identity Center SSO issuer URL values (step 8) into the corresponding fields.
Application username format: Select one of the options from the drop-down menu.
Note: All users in AWS IAM Identity Center SSO require a unique username, so the mapped value should be unique within your organization.
Click Save.
Done!
Go to the AWS IAM Identity Center Sign-in URL (step 8).