The Okta/AWS ClientVPN SAML integration currently supports the following features:
For more information on the listed features, visit the Okta Glossary.
Log in to AWS Management Console as an IAM user.
In the upper left corner, select Services > Security, Identity, & Compliance > IAM.
In the navigation pane, select Identity providers, then click Add provider.
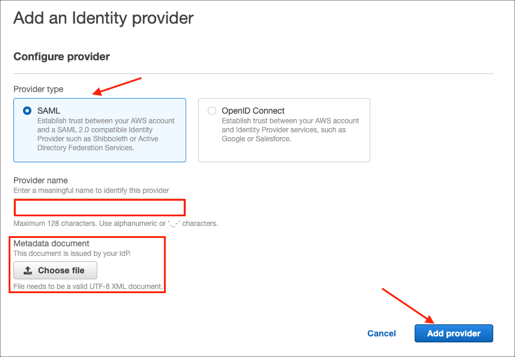
Enter the following:
Provider type: Select SAML.
Provider name: Enter a preferred name.
Metadata document: Download and save the following as metadata.xml, then click Choose file to locate and upload it:
Sign into the Okta Admin dashboard to generate this value.
Click Add provider:
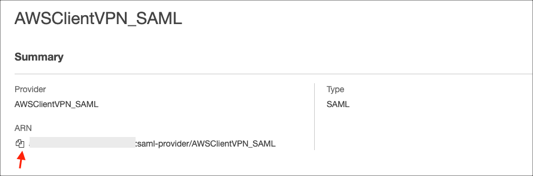
Select the SAML provider you just created and make a copy of your provider ARN value:
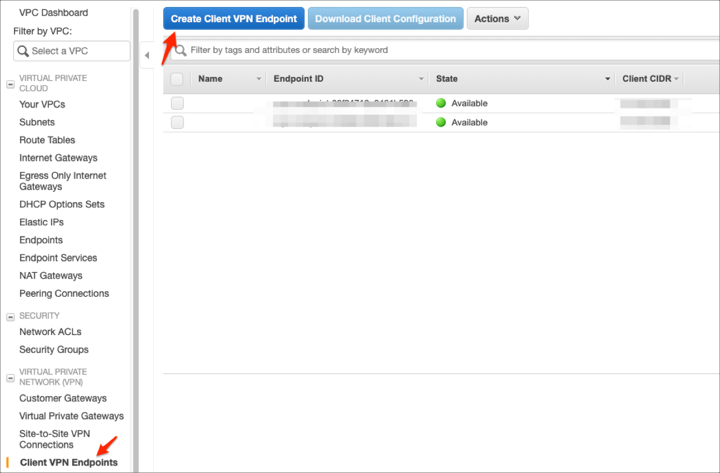
Open the Amazon VPC console: https://console.aws.amazon.com/vpc/
Go to Client VPN Endpoints, then click Create Client VPN Endpoint:
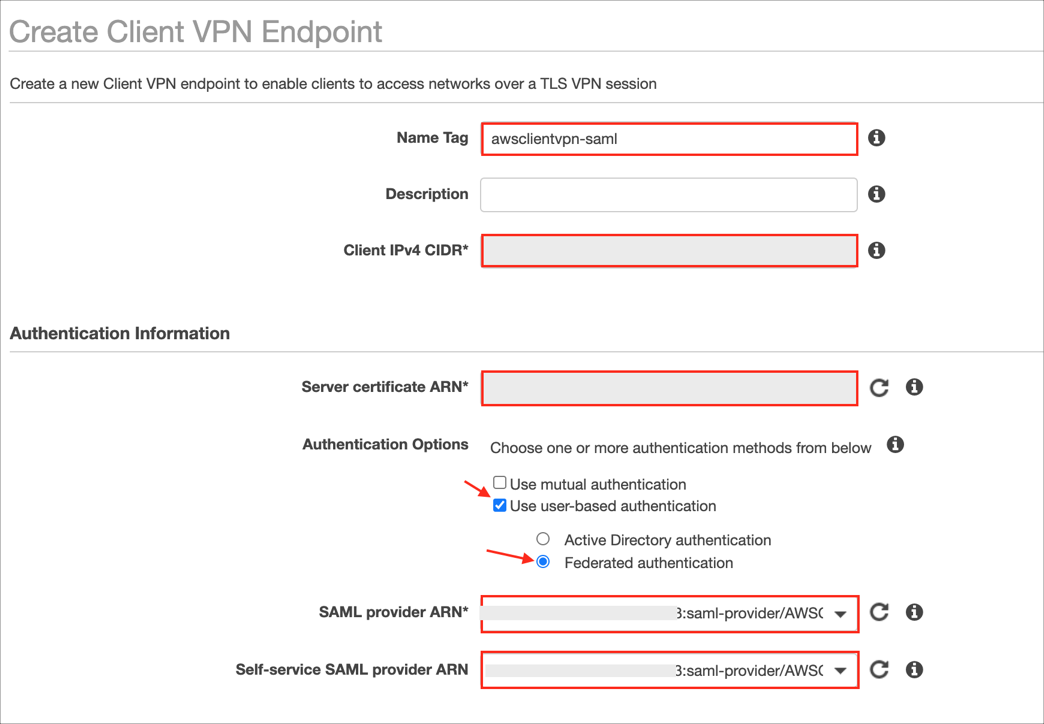
Enter the following:
Name Tag: Enter a preferred name.
Client IPv4 CIDR: Specify an IP address range in CIDR notation, from which to assign client IP addresses. For more details refer to the Create a Client VPN endpoint guide.
Server certificate ARN: Enter the ARN of the server certificate.
Authentication Options: Check Use user-based authentication.
Select Federated authentication.
SAML provider ARN: Select your provider ARN you made a note of in step 5.
Self-service SAML provider ARN: elect your provider ARN you made a copy of in step 5.
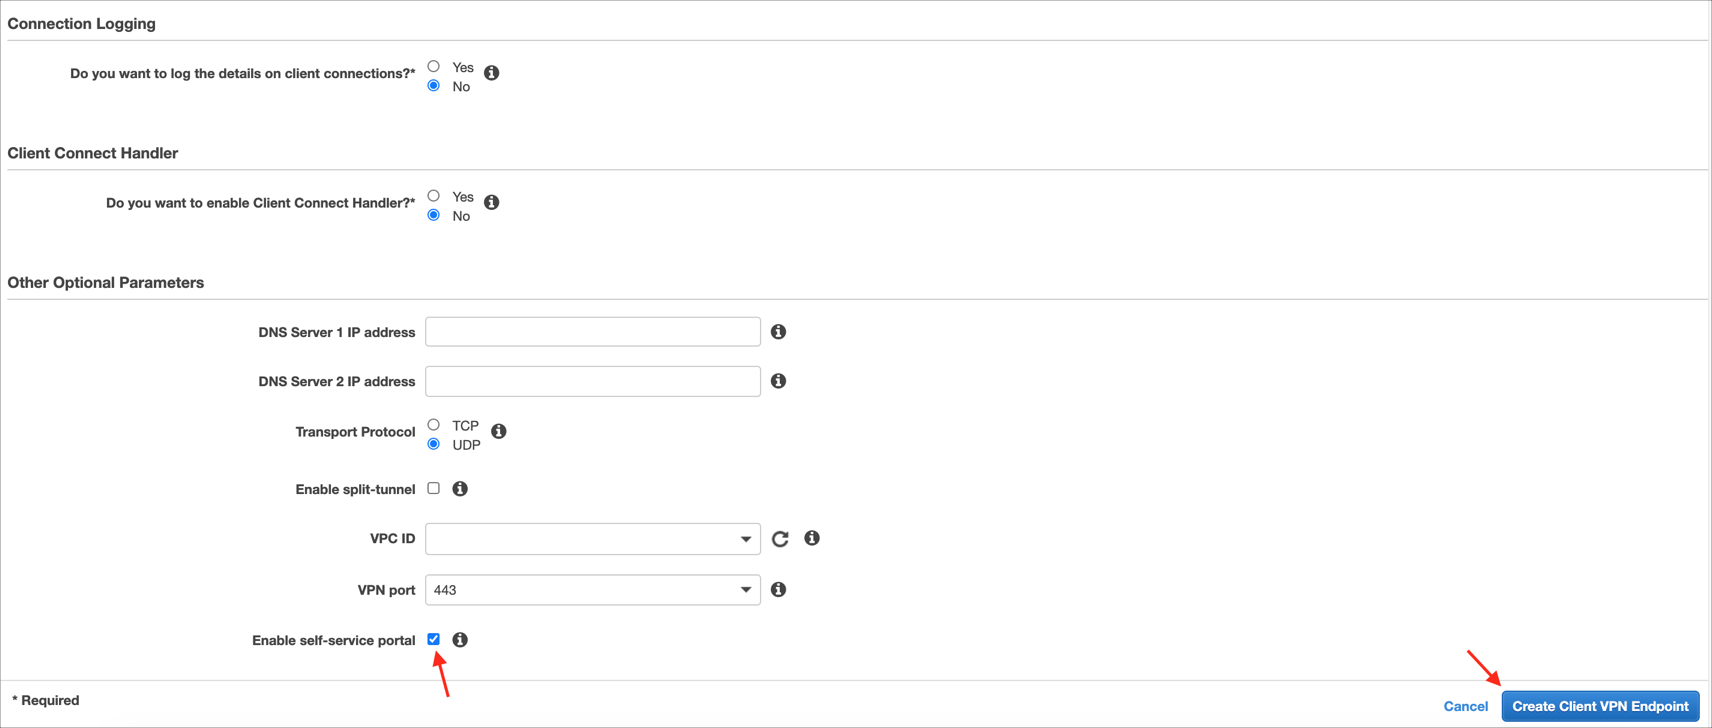
Do you want to log the details on client connections?: Select Yes/No based on your preference.
Add/select other optional parameters as needed.
Check Enable self-service portal.
Click Create Client VPN Endpoint.
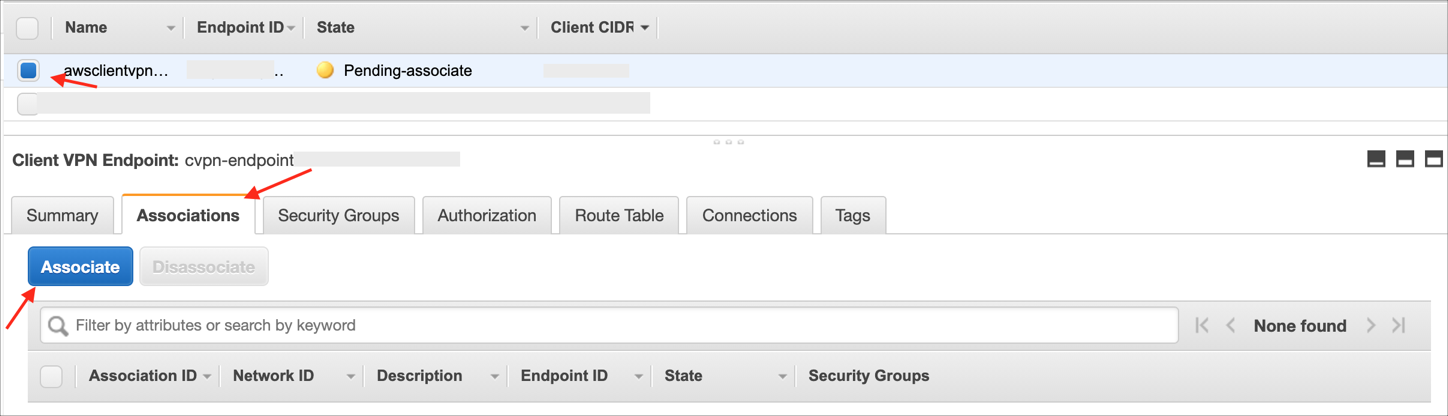
To enable clients to establish a VPN session, you must associate a target network with the Client VPN endpoint:
Select your Client VPN Endpoint you created, select the Associations tab, then click Associate:
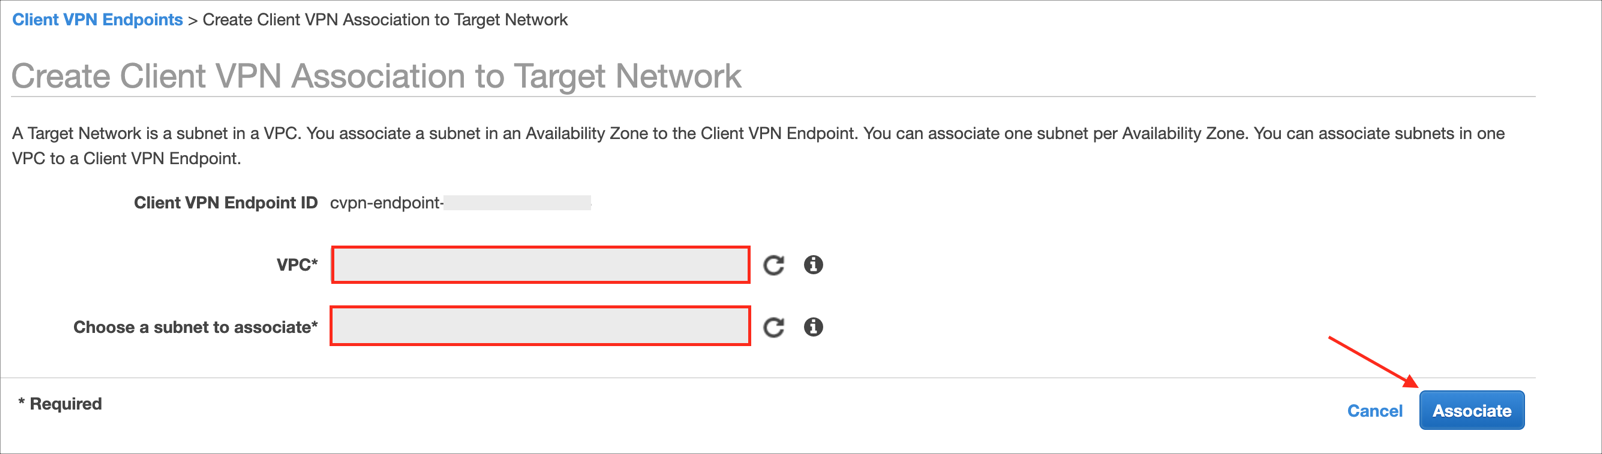
VPC: Choose the VPC in which the subnet is located. If you specified a VPC when you created the Client VPN endpoint, it must be the same VPC.
Choose a subnet to associate: choose the subnet to associate with the Client VPN endpoint.
Click Associate:
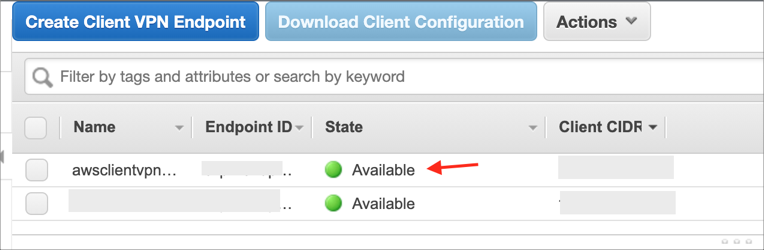
Wait until the state of your Client VPN endpoint changes to Available:
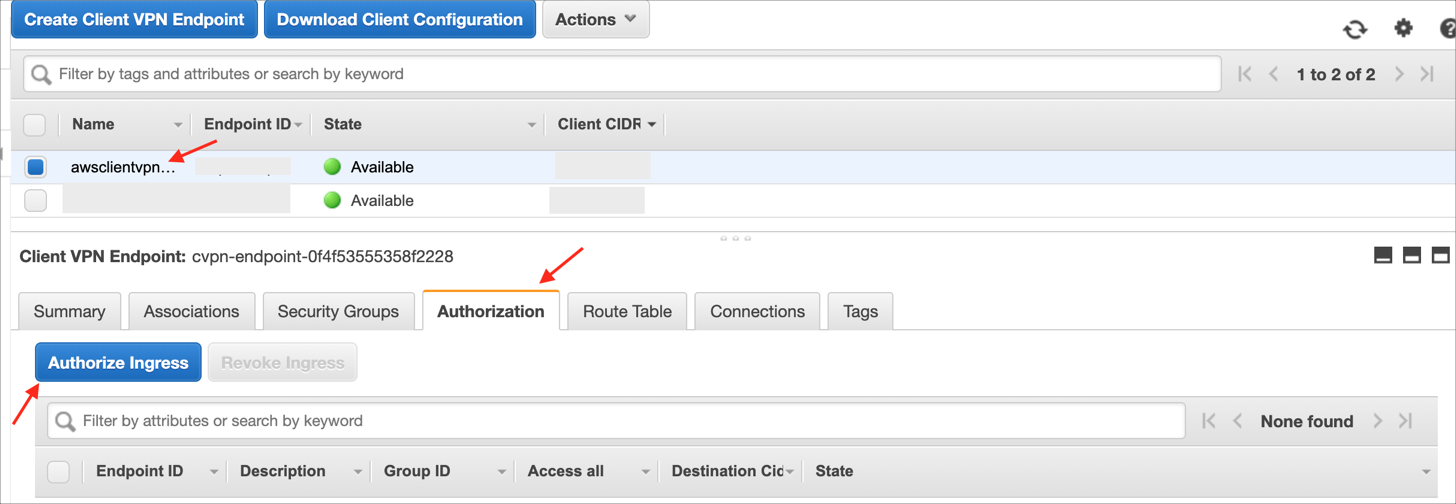
To authorize clients to access the VPC in which the associated subnet is located, you must create an authorization rule. The authorization rule specifies which clients have access to the VPC. Select your Client VPN endpoint, choose Authorization, then choose Authorize Ingress:
Enter the following:
Destination network to enable: Enter the IP address, in CIDR notation, of the network for which you want to allow access.
Grant access to: Specify the clients that are allowed to access the specified network. If you want to grant access to specific Okta group, select Allow access to users in a specific access group, then enter the group name for the Access group ID field.
Click Add authorization rule:

Wait until the rule status changes to Active:
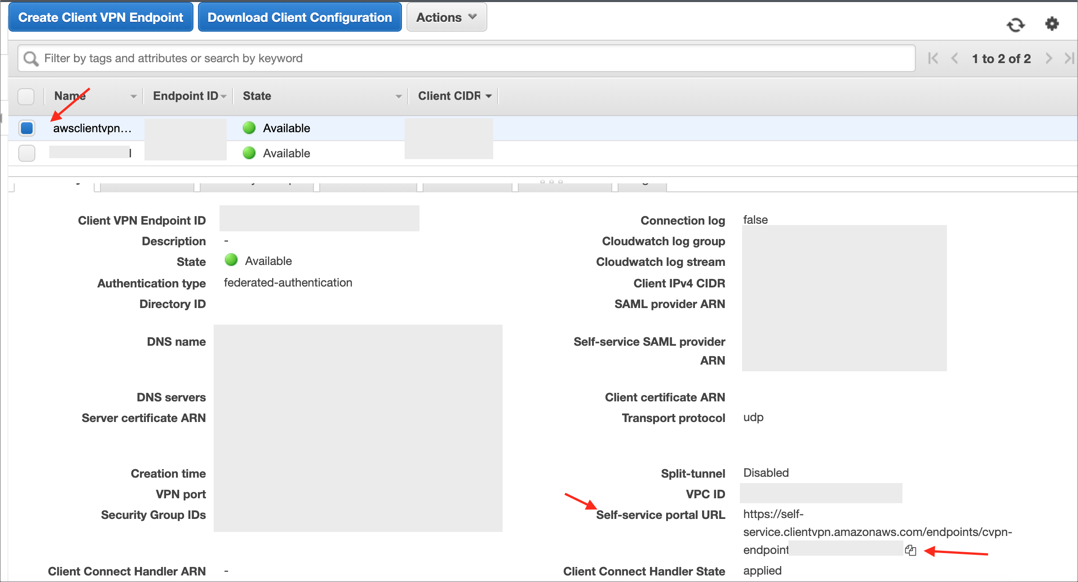
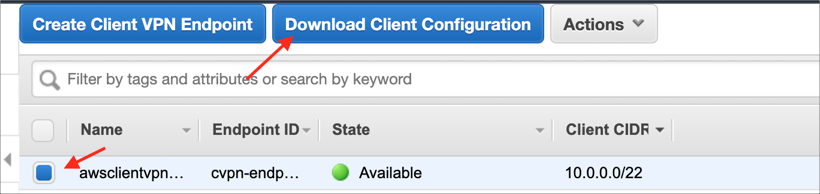
Download the Client VPN endpoint configuration file. Select your Client VPN endpoint and click Download Client Configuration:
Go here to download the AWS Client VPN application. Install and open it.
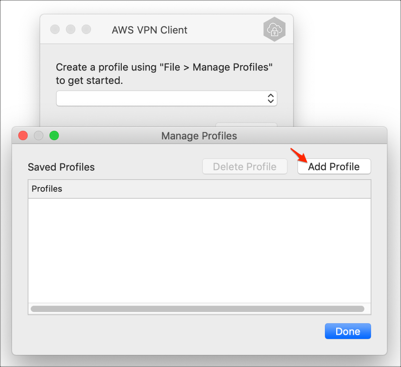
Navigate to: File > Manage Profiles.
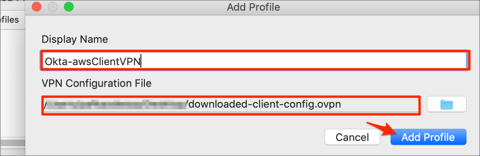
Click Add Profile:
Display Name: Enter a preferred name.
VPN Configuration File: Locate your Client VPN endpoint configuration file you downloaded in step 15.
Click Add Profile: Enter a preferred name.
Click Done:

Group Attribute Steps:
Note: This step is required if you selected Allow access to users in a specific access group in step 13 above.
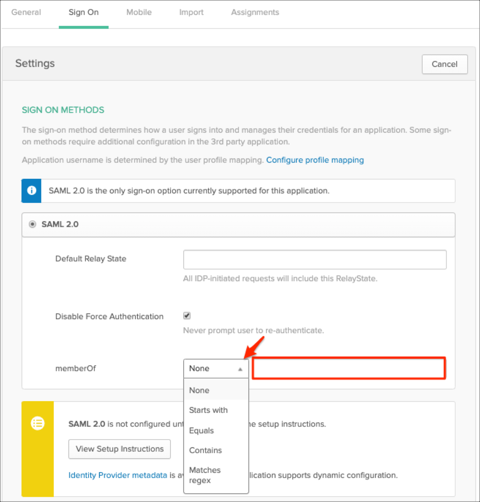
To send groups as a part of SAML assertion, in Okta select the Sign On tab for the AWS ClientVPN app, then click Edit.
Select the appropriate filter from the dropdown menu, then type the preferred value into the field.
Click Save:
Done!
The following SAML attributes are supported:
| Name | Value |
|---|---|
| FirstName | user.firstName |
| LastName | user.lastName |
| memberOf | This is configured in the app UI, see step 18 above |
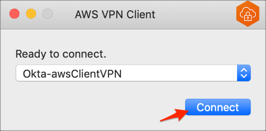
Open the AWS VPN Client application.
Click Connect:
To log into AWS Client VPN Self-Service Portal go to your Self-service portal URL: