Ask your Service-Now representative to enable SAML 1.1 in your instance.
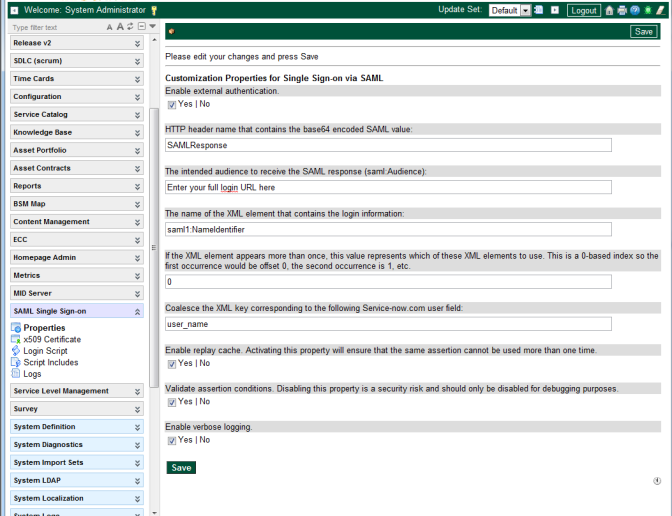
As the system admin, go to the SAML Single Sign-on section in Service-Now.
Click on the Properties section.
Enter the following values in the Properties section. Leave the rest as defaults, and then click Save.
The intended audience to receive the SAML response (Saml:Audience)
Please use your ServiceNow Login URL as the Audience
The name of the XML element that contains the login information:
Saml1:NameIdentifier
Coalesce the XML key corresponding to the following ServiceNow user field:
user_name
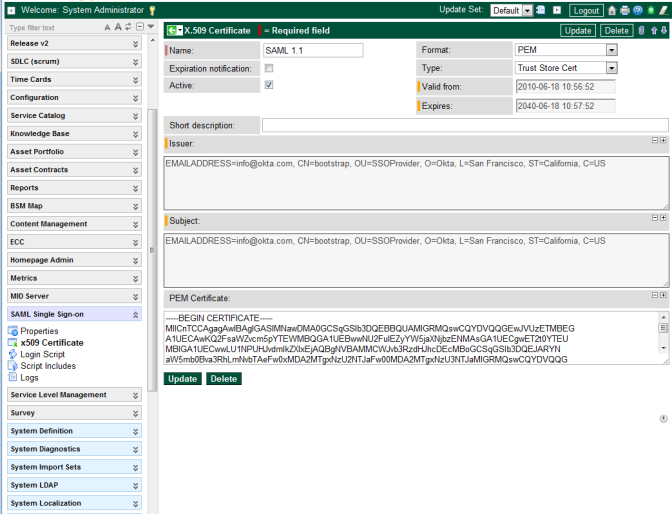
Go to the x509 Certificate section.
Add a new certificate with the following properities:
NameSAML 1.1
FormatPEM
TypeTrust Store Cert
PEM Certificate – cut and paste the following certificate including the BEGIN CERTIFICATE and END CERTIFICATE lines into the PEM Certificate field.
Sign in to the Okta Admin app to have this variable generated for you.
Your users are ready to single sign-on to Service-Now!