The Okta/Okta Org2Org SAML integration currently supports the following features:
For more information on the listed features, visit the Okta Glossary.
The Org2Org connector application is used to push/match users from one Okta organization to another. By configuring this application, users are authenticated via SAML from a Spoke (source) Okta org into a Hub (target) Okta org. The Org2Org application was specifically designed for a Hub/Spoke configuration.
Note: The Org2Org application needs to be set up in your Spoke (source) org. These instructions assume that you are viewing this configuration guide from an Org2Org SAML Application added in your Spoke (source) org.
Note: Any incoming SAML assertion should include the required attributes during user create and user update.
Sign in to your Hub (target) Okta org and select Admin.
Go to Security > Identity Providers and click Add identity provider.
Select SAML 2.0 IdP, and then click Next to create a new inbound SAML endpoint for the spoke/source affiliate.
Note: All inbound SAML configurations are created using the spoke/source affiliates name.
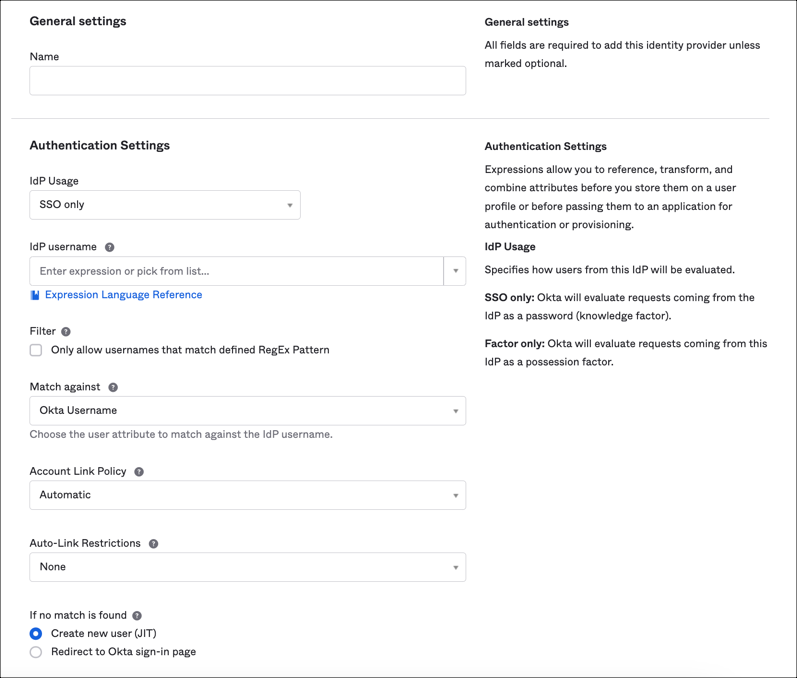
Under General Settings:
Name: Enter the Spoke (source) name.
Configure Authentication Settings:
IdP Usage: Select SSO only.
IdP Username: Select from the dropdown menu. This field specifies how to construct the subject's username from the SAML assertion using an Okta Expression Language transform of attributes defined in the IdP User Profile.
Filter: Select Only allow usernames that match defined RegEx Pattern to only authenticate users with transformed usernames that match a regular expression pattern in the text field that appears. This filters the IdP username to prevent the IdP from authenticating unintended users. Users are only authenticated if the transformed username matches the regular expression pattern.
Note: When you use Okta for B2B or multi-tenancy use cases, select this checkbox. This helps you scope a subset of users in the org and enforce identifier constraints, such as email suffixes.For example, you could restrict an IdP for use only with users who have @company.com as their email address using the following expression: ^[A-Za-z0-9._%+-]+@company\.com.
Match against: Select your preferred option from the dropdown menu. This field specifies what attribute(s) of existing users in Okta are compared to the transformed username to determine whether the authentication response is for a new or existing user. Choose the user attribute to match against the transformed username.
Account Link Policy: Specify whether Okta automatically links the user's IdP account with a matching Okta account. For security reasons, this setting is disabled by default.
Auto-Link Restrictions: If Acccount Link Policy is enabled, indicate whether you want to restrict linking to specified user groups.
If no match is found: Select your preferred option. If Create new user (JIT) is selected, a user's profile is created in the target org if the user does not exist in the target org. This field specifies the action for authentication responses that do not match an existing user in the Okta organization.
Note: For the Create new user (JIT) option, you must enable JIT provisioning in two places:
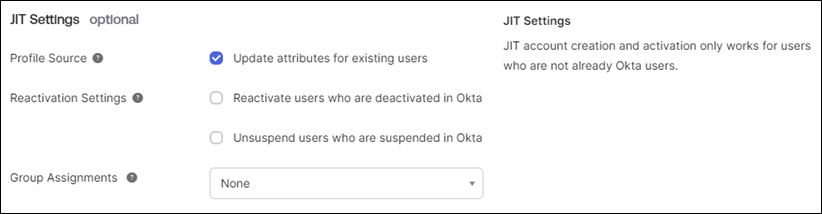
Configure JIT Settings:
Profile Source: Select your preferred option. This field determines if the IdP should act as a source of truth for user profile attributes. The IdP must be prioritized with other Profile Sources if the user is assigned to additional apps or directories that are also Profile Sources. See About profile sourcing for more information.
Note: If the Org2Org application is configured to update user profiles and you set the IDP as a profile source, the user updates will cause provisioning errors. Our recommendation in this scenario is to have this option deselected.
Reactivation Settings: Select your preferred option. This field determines if deactivated or suspended users are reactivated/unsuspended during provisioning. This setting only appears if the profile source setting is set to Update attributes for existing users.
Group Assignments: Select your preferred option. This field specifies the behavior of group assignments during provisioning.
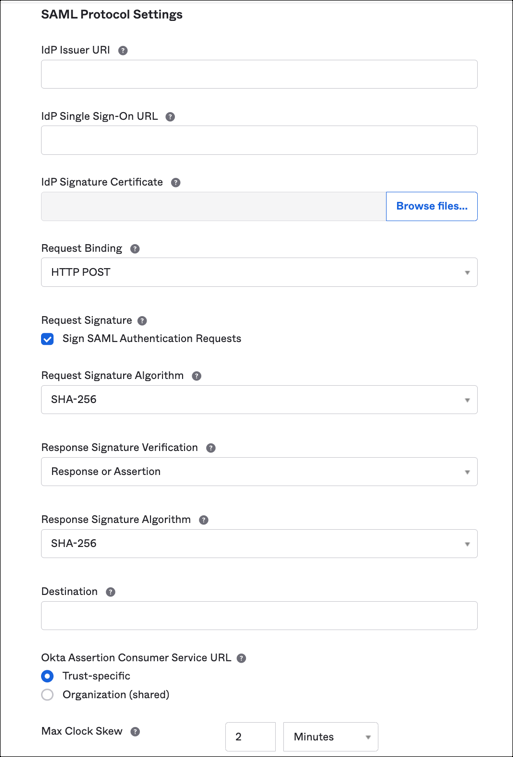
Configure SAML Protocol Settings:
IdP Issuer URI: Copy and paste the following:
Sign into the Okta admin app to have this variable generated for you.
IdP Single Sign On URL: Copy and paste the following:
Sign in to the Okta Admin app to generate this variable.
IdP Signature Certificate: Download and save the following as okta.crt, then upload the X509 Certificate (below):
Sign into the Okta admin app to have this variable generated for you.
Request Binding: Select HTTP POST.
Request Signature: Select Sign SAML Authentication Requests.
Request Signature Algorithm: Select SHA 256.
Response Signature Verification: Select Response or Assertion.
Response Signature Algorithm: Select SHA 256.
Destination: The destination attribute sent in the SAML authN request. If you do not enter a destination and you sign the authN request by selecting the Request Signature option, Okta automatically sends the destination attribute as the URL specified in the IdP Single Sign-On URL field (the SSO URL).
Okta Assertion Consumer Service URL: Specify whether to use a trust-specific assertion consumer service (ACS) URL or one that is shared across the organization.
Max Clock Skew: Specify how long the assertion is valid. Enter a number and select the units. The authentication process calculates the difference between the current time and the time on the assertion timestamp to verify that the difference is not more than the Max Clock Skew value.
Click Finish.
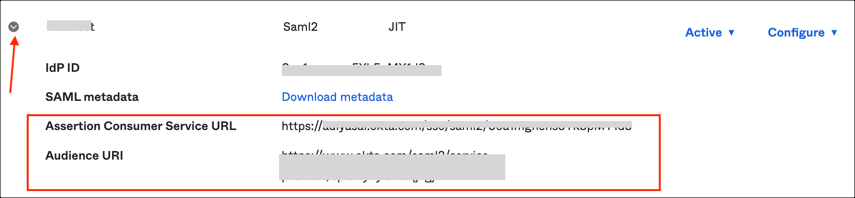
Once completed, you are returned to the Hub's (target's) main Identity Providers page:
Locate the Identity Provider you just added. Click the arrow to expand the details for that Identity Provider. Make a copy of your Assertion Consumer Service URL and Audience URI values.
Go back to your Spoke (source) org to your Okta Org2Org application select the Sign On tab, then click Edit:
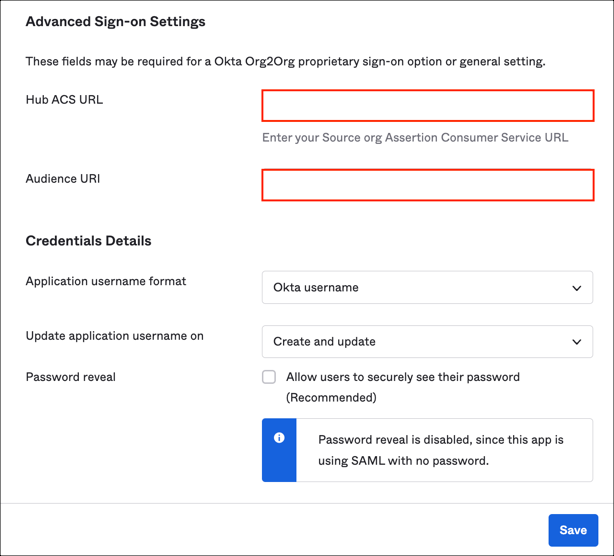
Scroll down to Advanced Sign-on Settings.
Enter your Assertion Consumer Service URL and Audience URI you made a copy of into the Hub ACS URL and Audience URI fields.
Click Save.
The following instructions enable users in the Spoke (source) org(s) to login to an application that's managed and provisioned by a single Hub (target) org.
The following example will walk you through the exact steps to perform, using Google Workspace as an example.
Note: Ensure that the application works correctly in the Hub (target) (Hint: You can connect to the application successfully) before configuring the Spoke (source).
In the Hub (target) org, configure the application that you want to share with the Spoke (source) org. For this example, we used Google Workspace with SAML sign on mode.
Log into your Spoke (source) org, and go to the Admin console. Click on Add Application, then add Bookmark App.
Type in an Application label (Hint: Name of the application you are creating - Google Workspace in case of our example).
You will need 3 things to construct the URL, as follows:
Copy and paste the IdP Single Sign On URL (obtained from Step 6 above under the Configure the Hub/target Org (Inbound SAML) section) to the URL field.
Still in the URL field, add the following at the end of the value from the previous step:
?RelayState=
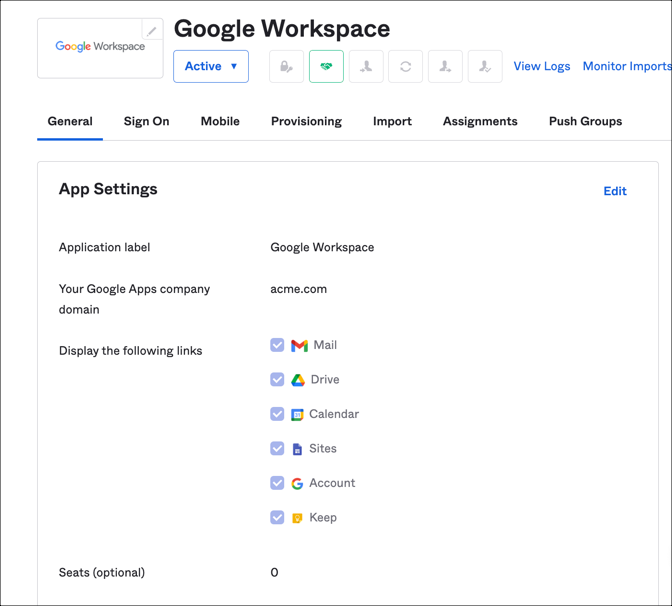
This is followed by the Embedded link of the application in the Hub (target). This value is found under the General tab of the application you want to connect to in the Hub (target) org. In this example, since we want to connect to Google Workspace, as an admin, open the Google Workspace application you added in your Hub (target) org. Under the General tab, scroll down until you see the App Embed Link section. Copy the value from the Okta Org Admin URL field and add this to your Bookmark URL after the string you added from the previous step.
The value for your Bookmark URL should look similar to the example below:
http://sourceorg.okta.com/app/okta_org2org/exkidkmZXAoxbgwz20g3/sso/saml?RelayState=http://huborg.okta.com/home/google/0oaiqwYT8RpdS8I6D0g3/26
Done!
Now users can seamlessly log in to Google Worskpace from the Spoke (source) org even though Google Workspace is configured in the Hub (Target) org.
The following SAML attributes are supported:
| Name | Value |
|---|---|
| FirstName | user.firstName |
| LastName | user.lastName |
| user.email |