This guide provides the steps required to configure Provisioning for SolarWinds Service Desk.
The following provisioning features are supported:
Push new users.
New users created through OKTA will also be created in the third party application.
Push profile update.
Updates made to the user's profile through OKTA will be pushed to the third party application.
Push user deactivation.
Deactivating the user or disabling the user's access to the application through OKTA will deactivate the user in the third party application.
Import new users.
New users created in the third party application will be downloaded and turned in to new AppUser objects, for matching against existing OKTA users.
Import profile updates.
Updates made to a user's profile in the third party application will be downloaded and applies to the profile fields stored locally in OKTA. If the app is the system of record for the user, changes made to core profile fields (email, first name, last name, etc) will be applied to the Okta user profile. If the app is NOT the system of record for the user, only changes made to app-specific fields will be applied to the local user profile.
Group push.
Groups and their members can be pushed to remote systems. More about using group push operations you can find here: Using Group Push
Before you begin, you need to obtain your Authentication Token from SolarWinds, as follows:
In your SolarWinds Service Desk tenant, log in using administrator credentials.
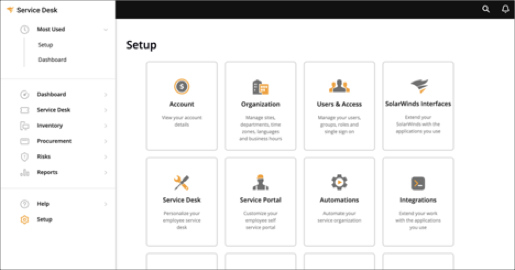
Select Setup from the left menu:
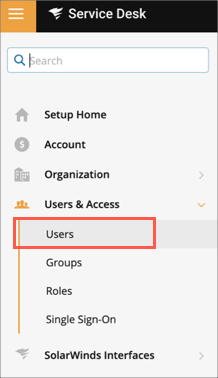
Navigate to Users:
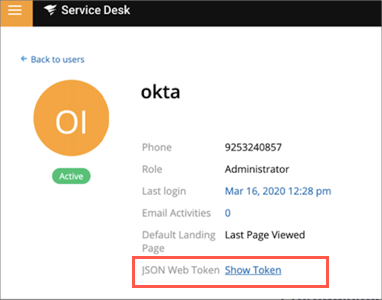
Find and select the admin user you used to setup provisioning between Okta and SolarWinds.
Click Show Token and copy the value. You will need it for configuring Provisioning:
In Okta, navigate to your SolarWinds App Instance to proceed.
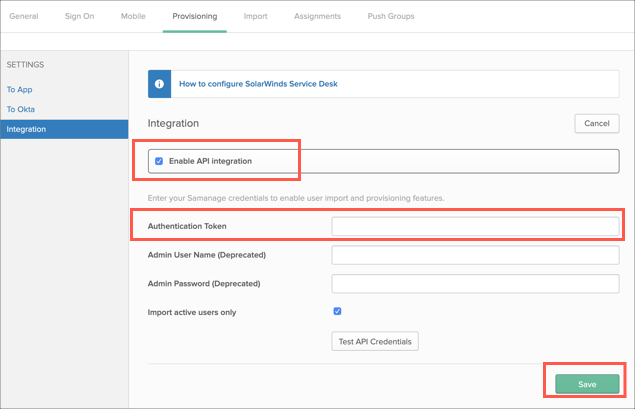
Configure your Provisioning settings for SolarWinds Service Desk as follows:
Check the Enable API Integration box.
Enter your SolarWinds Service Desk API Credentials
Authentication Token: Copy and paste the Authentication Token you made a copy of earlier.
Import active users only: If you enable this flag, you can import only active users from SolarWinds Service Desk. Otherwise all users will be imported.
Username and Password authentication is being deprecated by SolarWinds and will be removed soon. Please use Authentication Token instead.
Select To App in the left panel, then select the Provisioning Features you want to enable.
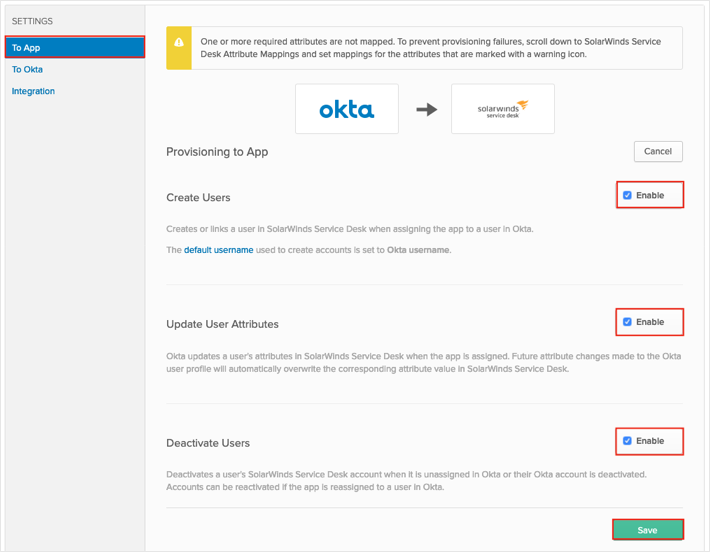
Click Save.
You can now assign people to the app (if needed) and finish the application setup.
SolarWinds Service Desk supports User's Schema Discovery, so you can add some extra attributes to User's Profile, to do that, follow the instructions below:
In Okta, from the Admin dashboard, select Directory > Profile Editor.
Select the APPS section in the left navigation bar, then find your app in the list.
Check the list of attributes, and if you decide you need more, click Add Attribute. A list of extended attributes will appear:
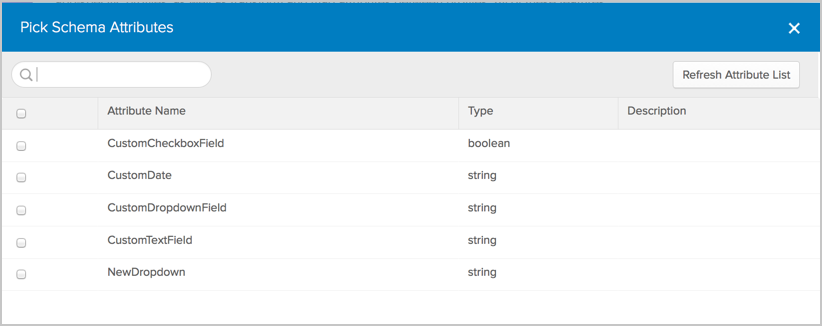
Select the attributes you want to add, then click Save.
You can now import and push these user attribute values to/from SolarWinds Service Desk.