Netskope SAML proxy is required to direct the cloud app traffic sanctioned by your company to the reverse proxy running in your tenant instance in the Netskope cloud.
When an end user goes to a SaaS application, end user traffic is redirected to Okta via SAML for user authentication. Once that user is authenticated, traffic is redirected to the Netskope reverse proxy engine for deep analysis.
This document provides instructions to configure Netskope as SAML Proxy to steer Salesforce traffic to the reverse proxy running in a customer’s tenant instance in the Netskope cloud. In this case Okta is the idP (identity provider) and the target application (Salesforce) is the SP (service provider). We used Salesforce.com application as example. Please check with Netskope regarding the full applications list and specific applications configuration. The SAML configuration is similar for all the apps.
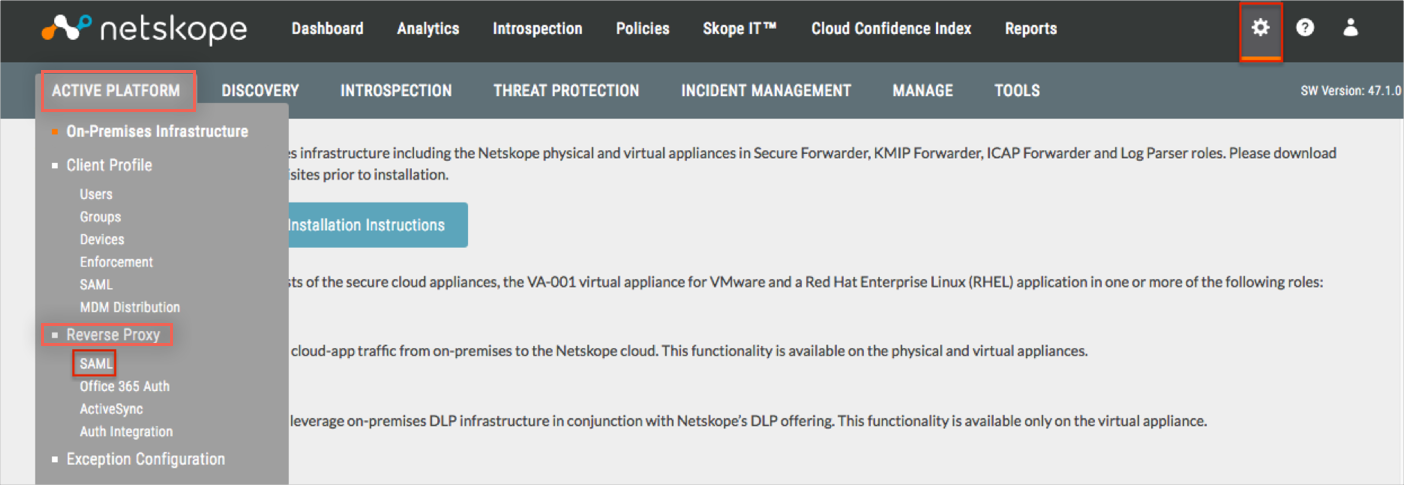
Login to Netskope as an administrator.
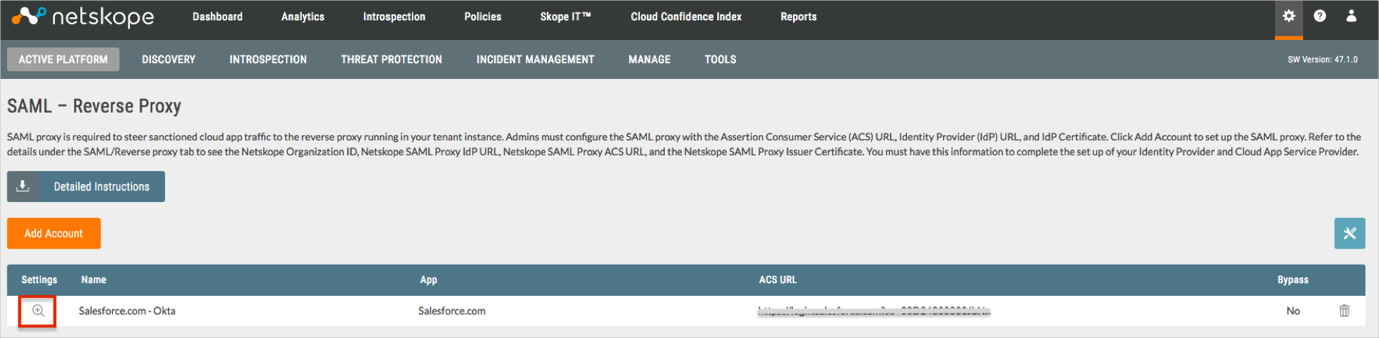
Navigate to Settings > Active Platform > Reverse Proxy > SAML:
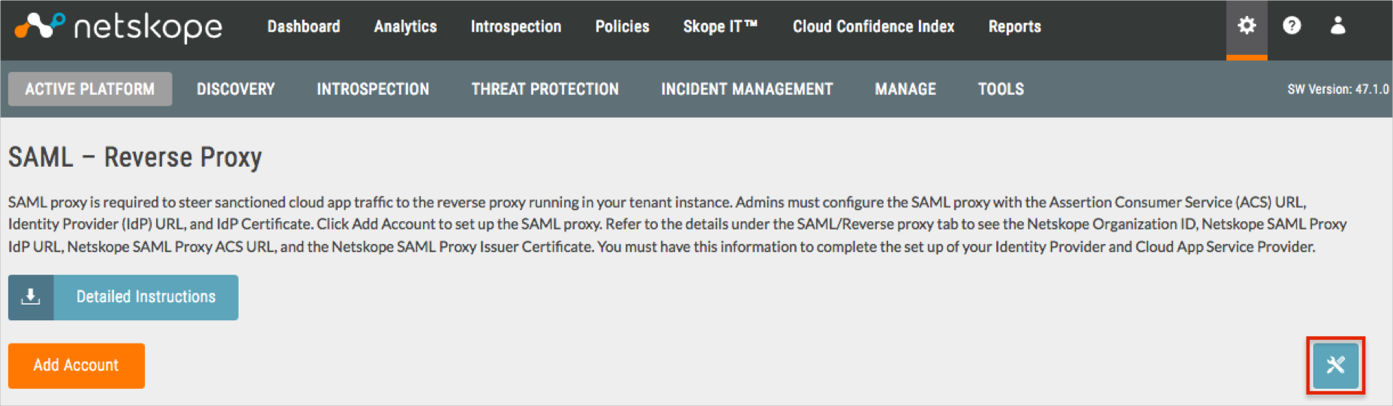
Select SAML Proxy configuration:
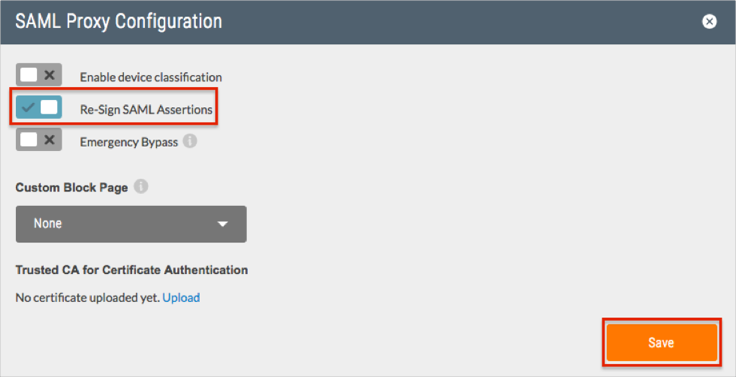
Enable the Re-Sign SAML Assertions option, then click Save:
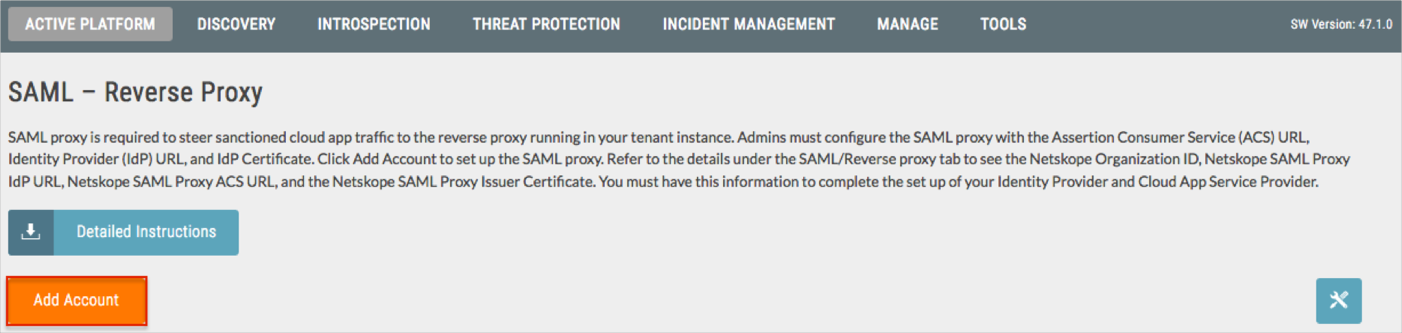
Click Add Account:
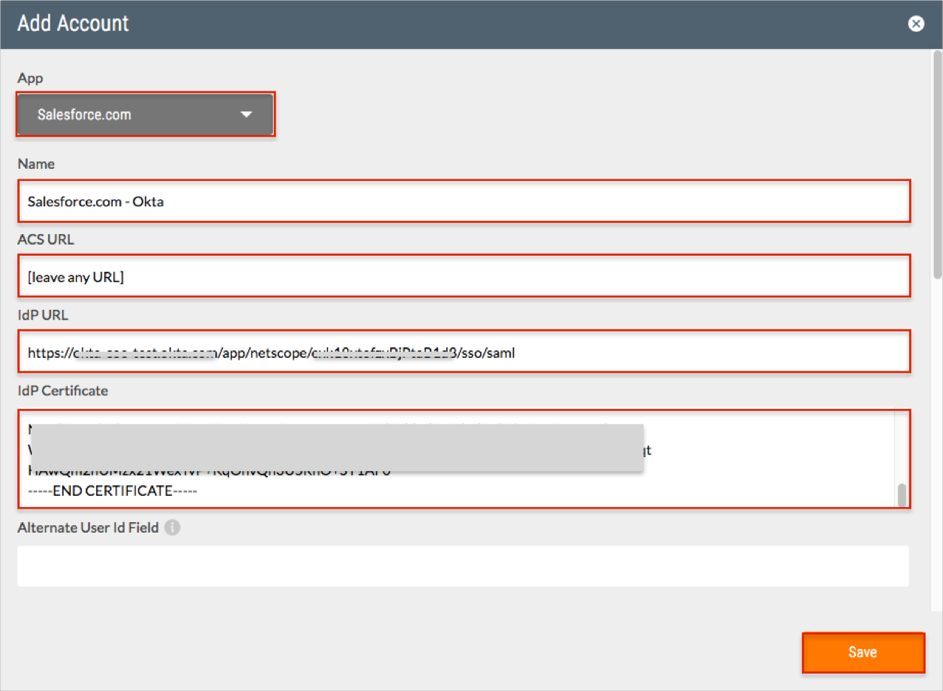
Enter the following (see screen shot at end of step for reference):
App: Select Salesforce.com.
Name: Enter a required name. We used Salesforce.com – Okta in our example.
ACS URL: Enter any URL value. For example: https://acme.com/.
IdP URL: Copy and paste the following:
Sign into the Okta Admin Dashboard to generate this variable.
IdP Certificate: Copy and paste the following:
Sign into the Okta Admin Dashboard to generate this variable.
Leave the default values for the rest of the fields.
Click Save.
Click the Settings icon:
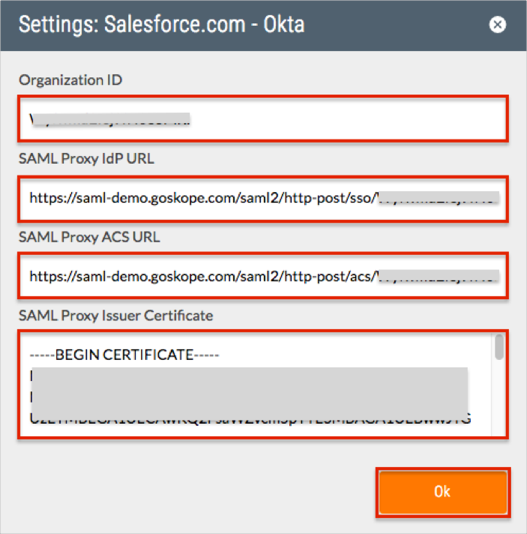
Do the following:
Save the Organization ID value.
Save the SAML Proxy ACS URL and SAML Proxy IdP URLvalues.
Copy the SAML Proxy Issuer Certificate value into a text editor and save it as netskope.cert.
Click Ok.
Login to the Salesforce.com instance as administrator.
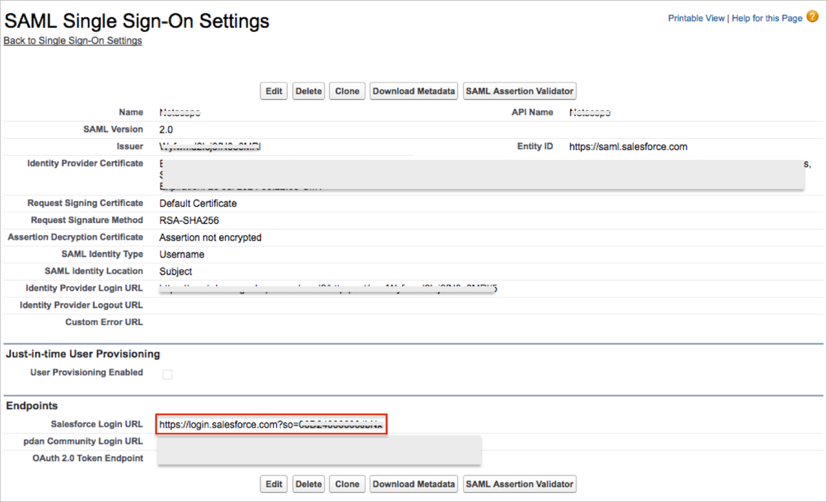
Navigate to Security Controls > Single Sign-On Settings.
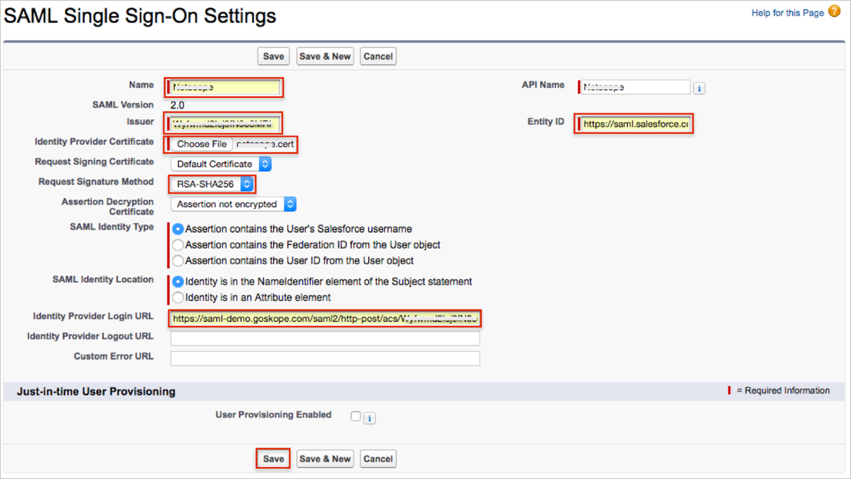
Click New and enter the following:
Name: Enter a required name. We used Netskope in our example.
Issuer: Enter the Organization ID value you saved earlier (step 8).
Identity Provider Certificate: Click Choose File to locate then upload the netskope.cert file you save earlier (step 8).
Request Signature Method: Select RSA-SHA256.
Identity Provider Login URL: Enter the SAML Proxy IdP URL value you saved earlier (step 8).
Entity ID: Enter https://saml.salesforce.com (save this value).
Click Save.
Save the Salesforce Login URL value:
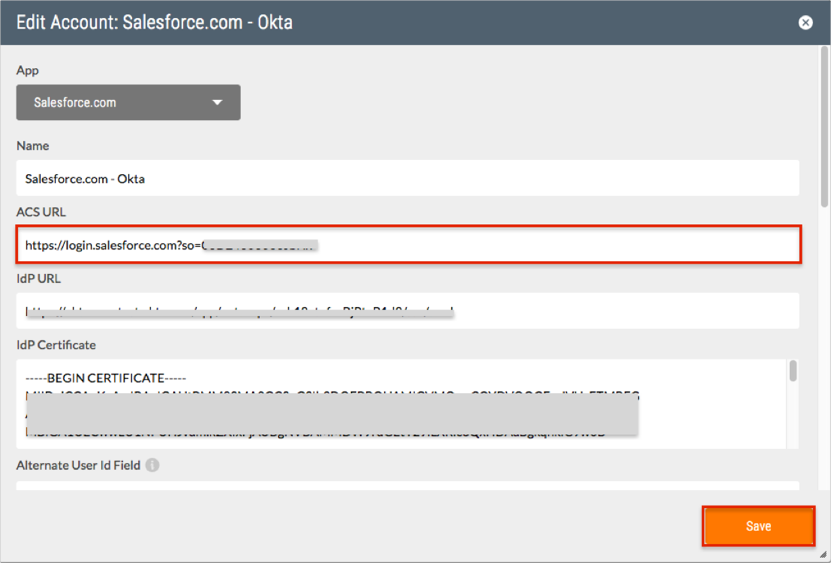
Go back to Netskope Salesforce.com - Okta app settings:
Enter the Salesforce Login URL value you saved earlier (step 12) into the ACS URL field.
Click Save.
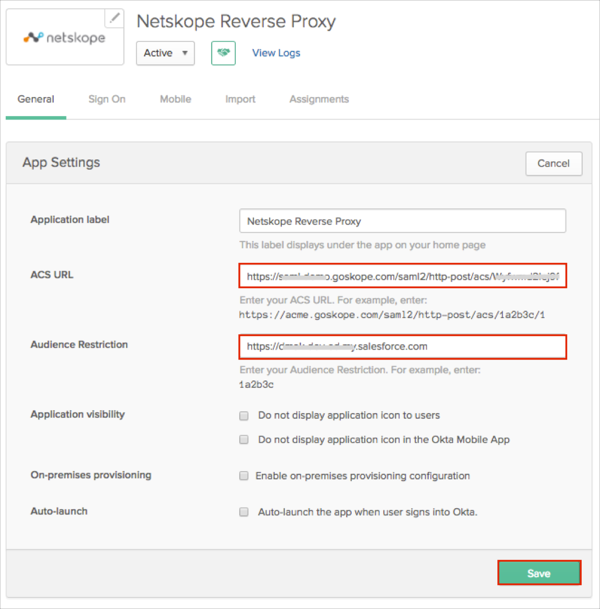
In Okta, select the General tab for the Netskope Reverse Proxy app, then click Edit.
Enter the Entity ID value from the Salesforce.com instance (step 11) into the Audience Restriction field.
Enter the SAML Proxy ACS URL value from the Netskope instance (step 8) into the ACS URL field.
Click Save.
Done!
Notes:
IDP-initiated flows, SP-initiated flows and Just In Time (JIT) provisioning are handled by SaaS application side. It is not related to the Netskope SAML proxy configuration.