The Okta/Skilljar SAML integration currently supports the following features:
For more information on the listed features, visit the Okta Glossary.
Send an email to Skilljar and request that they enable SAML 2.0 for your account. Include the following information:
IDP Metadata Link: Save this file and then attach:
Sign into the Okta Admin dashboard to generate this value.
IDP Issuer/Entity ID: Copy and paste the following:
Sign into the Okta Admin Dashboard to generate this variable.
x509 Certificate: Copy and paste the following certificate in PEM text format:
Sign into the Okta Admin Dashboard to generate this variable.
Login URL/SignOn URL: Copy and paste the following:
Sign into the Okta Admin Dashboard to generate this variable.
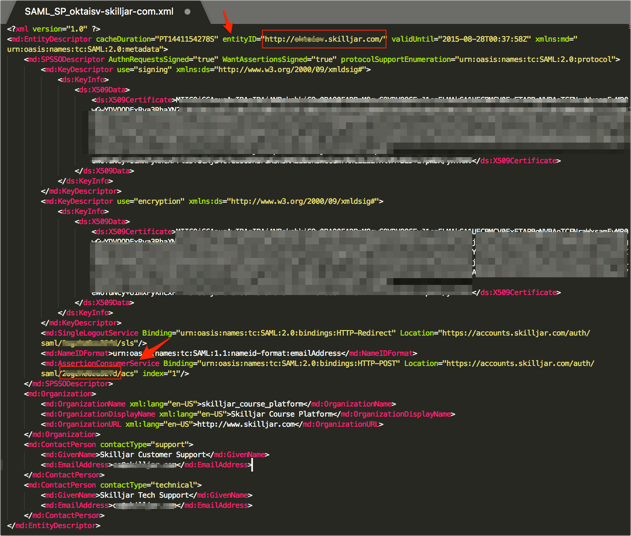
Skilljar will provide you with the SP Metadata xml. Open the xml file, then follow the steps below:
Make a copy of the entityID value marked in red in the screenshot below. This is your SP EntityId.
Make a copy of the AssertionConsumerService value marked in red in the screenshot below. This is your UID.
In Okta, select the Sign On tab for the Skilljar app, then click Edit.
Enter the UID and SP EntityID values you made a copy of in step 2 into the corresponding fields.
Click Save.
Done!
The following SAML attributes are supported:
| Name | Value |
|---|---|
| FirstName | ssfn:escapeHtml(user.firstName) |
| LastName | ssfn:escapeHtml(user.lastName) |
Go to http://[your-subdomain].skilljar.com/ and click Sign In.
By default Okta only sends two saml attributes in SAML assertions: FirstName and LastName. You can also add optional attributes in the application settings as described below.
In Okta, select the Sign On tab for the Skilljar SAML app, then click Edit.
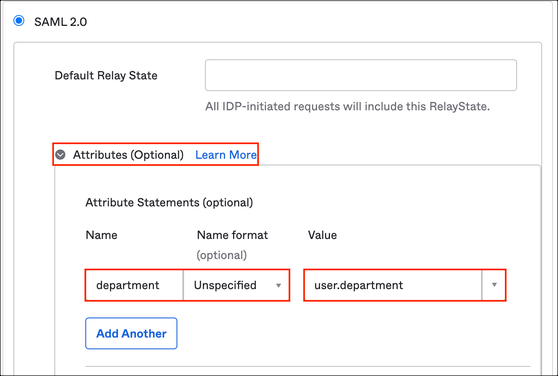
Extend the Attributes (Optional) section in the SAML 2.0 Sign on method.
Enter an attribute Name (we used department in our example).
Select a Name format for the attribute (unspecified is the default).
Enter a Value for the attribute. You can enter any text value or select a user field from the Okta base user profile (we used user.department in our example). Click Learn more for the details.
Add more attributes if needed.
Click Save.