The Okta/eLeap SAML integration currently supports the following features:
For more information on the listed features, visit the Okta Glossary.
Contact the eLeaP Support team at support@eleapsoftware.com and request that they enable SAML 2.0 for your account.
Save, then attach the following metadata file to your request:
Sign into the Okta Admin dashboard to generate this value.
The eLeaP Support team will process your request. After receiving a confirmation email, you can start assigning people to the application.
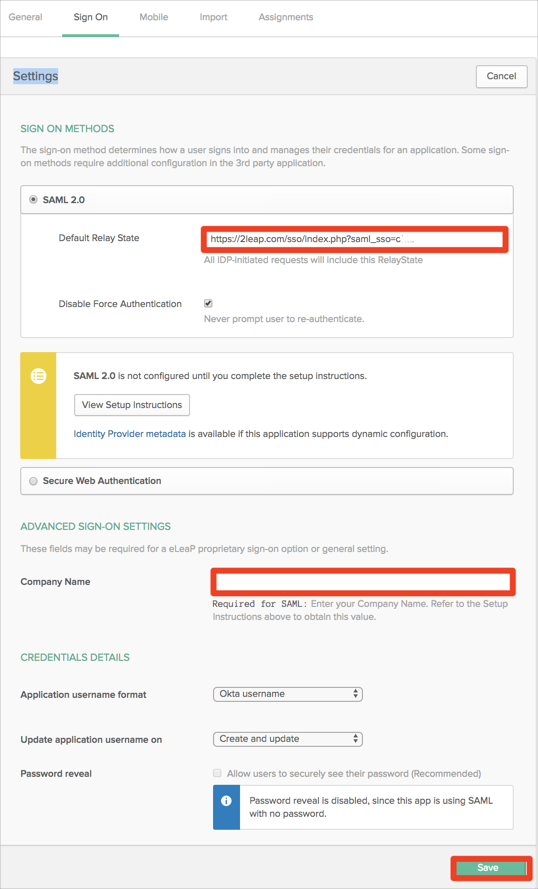
In Okta, select the Sign On tab for the eLeaP app, then click Edit.
Enter the following value into the Default Relay State field: https://2leap.com/sso/index.php?saml_sso=[yoursubdomain]
For example, if you log into https://acme.2leap.com, yoursubdomain is: acme.
If you are unsure of what your Default Relay State value is, contact eLeaP at support@eleapsoftware.com.
Still in the Sign On tab, enter the Company Name value into the corresponding field.
For example, if your ACS URL is https://2leap.com/sso/simplesamlphp/www/module.php/saml/sp/saml2-acs.php/acme, your Company Name is: acme.
Click Save.
Done!
Make sure that you entered the correct value in the Subdomain field under the General tab in Okta. Using the wrong value will prevent you from authenticating via SAML to eLeap.
The following SAML attributes are supported:
| Name | Value |
|---|---|
| FirstName | user.firstName |
| LastName | user.lastName |
| user.userName | |
| subdomain | Comes from Subdomain field |