The Okta/Zendesk SAML integration currently supports the following features:
For more information on the listed features, visit the Okta Glossary.
Notes:
Login to Zendesk security settings in Admin Center at https://[your-subdomain].zendesk.com/admin/account/security/sso.
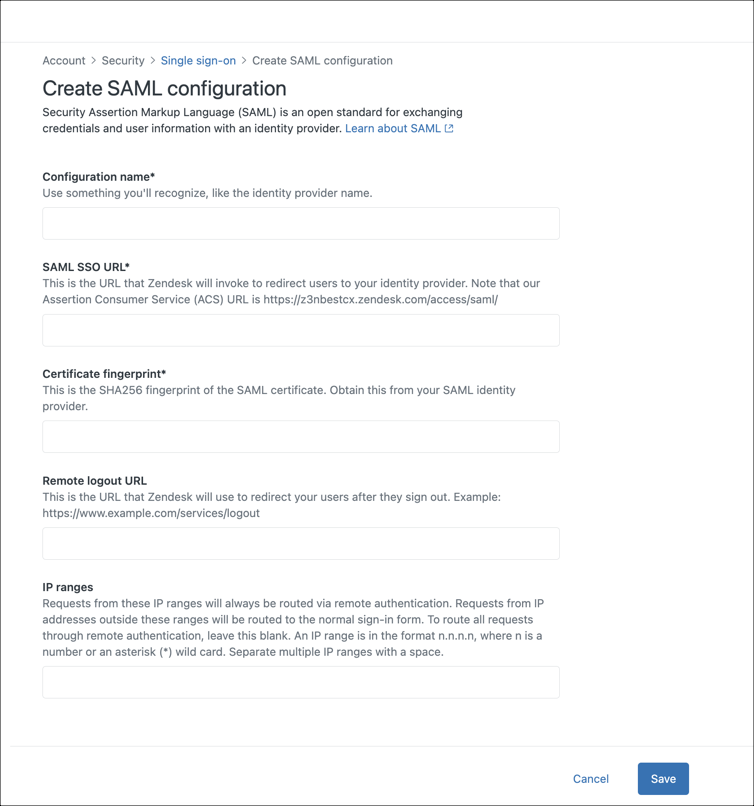
Click Create SSO configuration, then select the SAML option from the menu.
Enter the following:
Configuration name: Enter a name for your configuration. Up to two SAML and two JWT configurations are possible.
SAML SSO URL: Copy and paste the following:
Sign in to the Okta Admin app to have this variable generated for you.
Certificate fingerprint: Copy and paste the following:
Sign into the Okta Admin Dashboard to generate this variable.
Remote logout URL: Copy and paste the following:
Sign in to the Okta Admin app to have this variable generated for you.
(OPTIONAL) IP ranges: Enter your IP ranges. Requests from these IP ranges will always be routed via remote authentication. Requests from IP addresses outside these ranges will be routed to the normal sign-in form.
Click Save.
After creating your SAML configuration, you must activate it by assigning it to end users or team members.
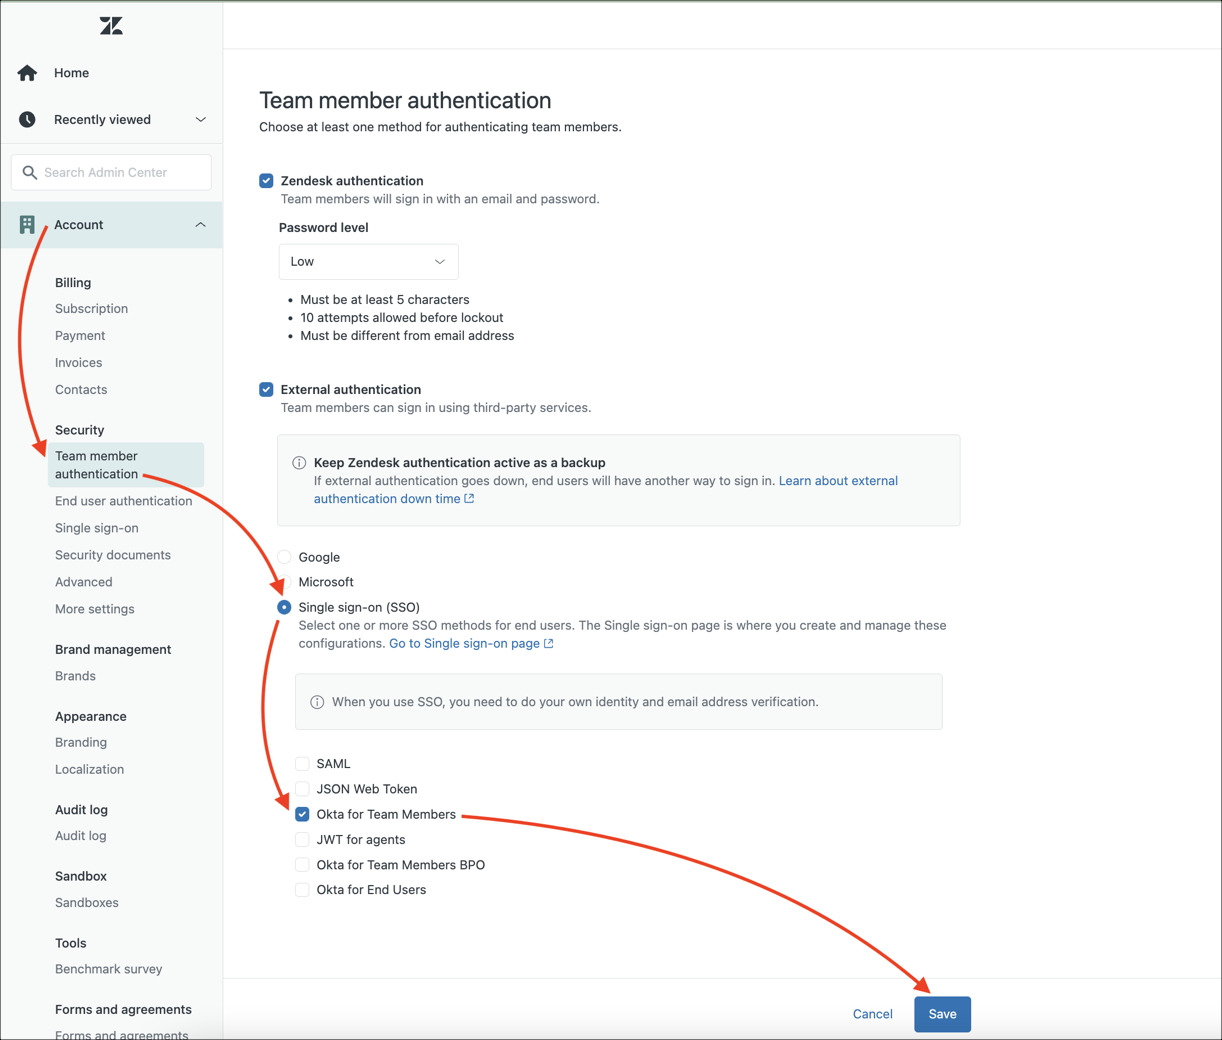
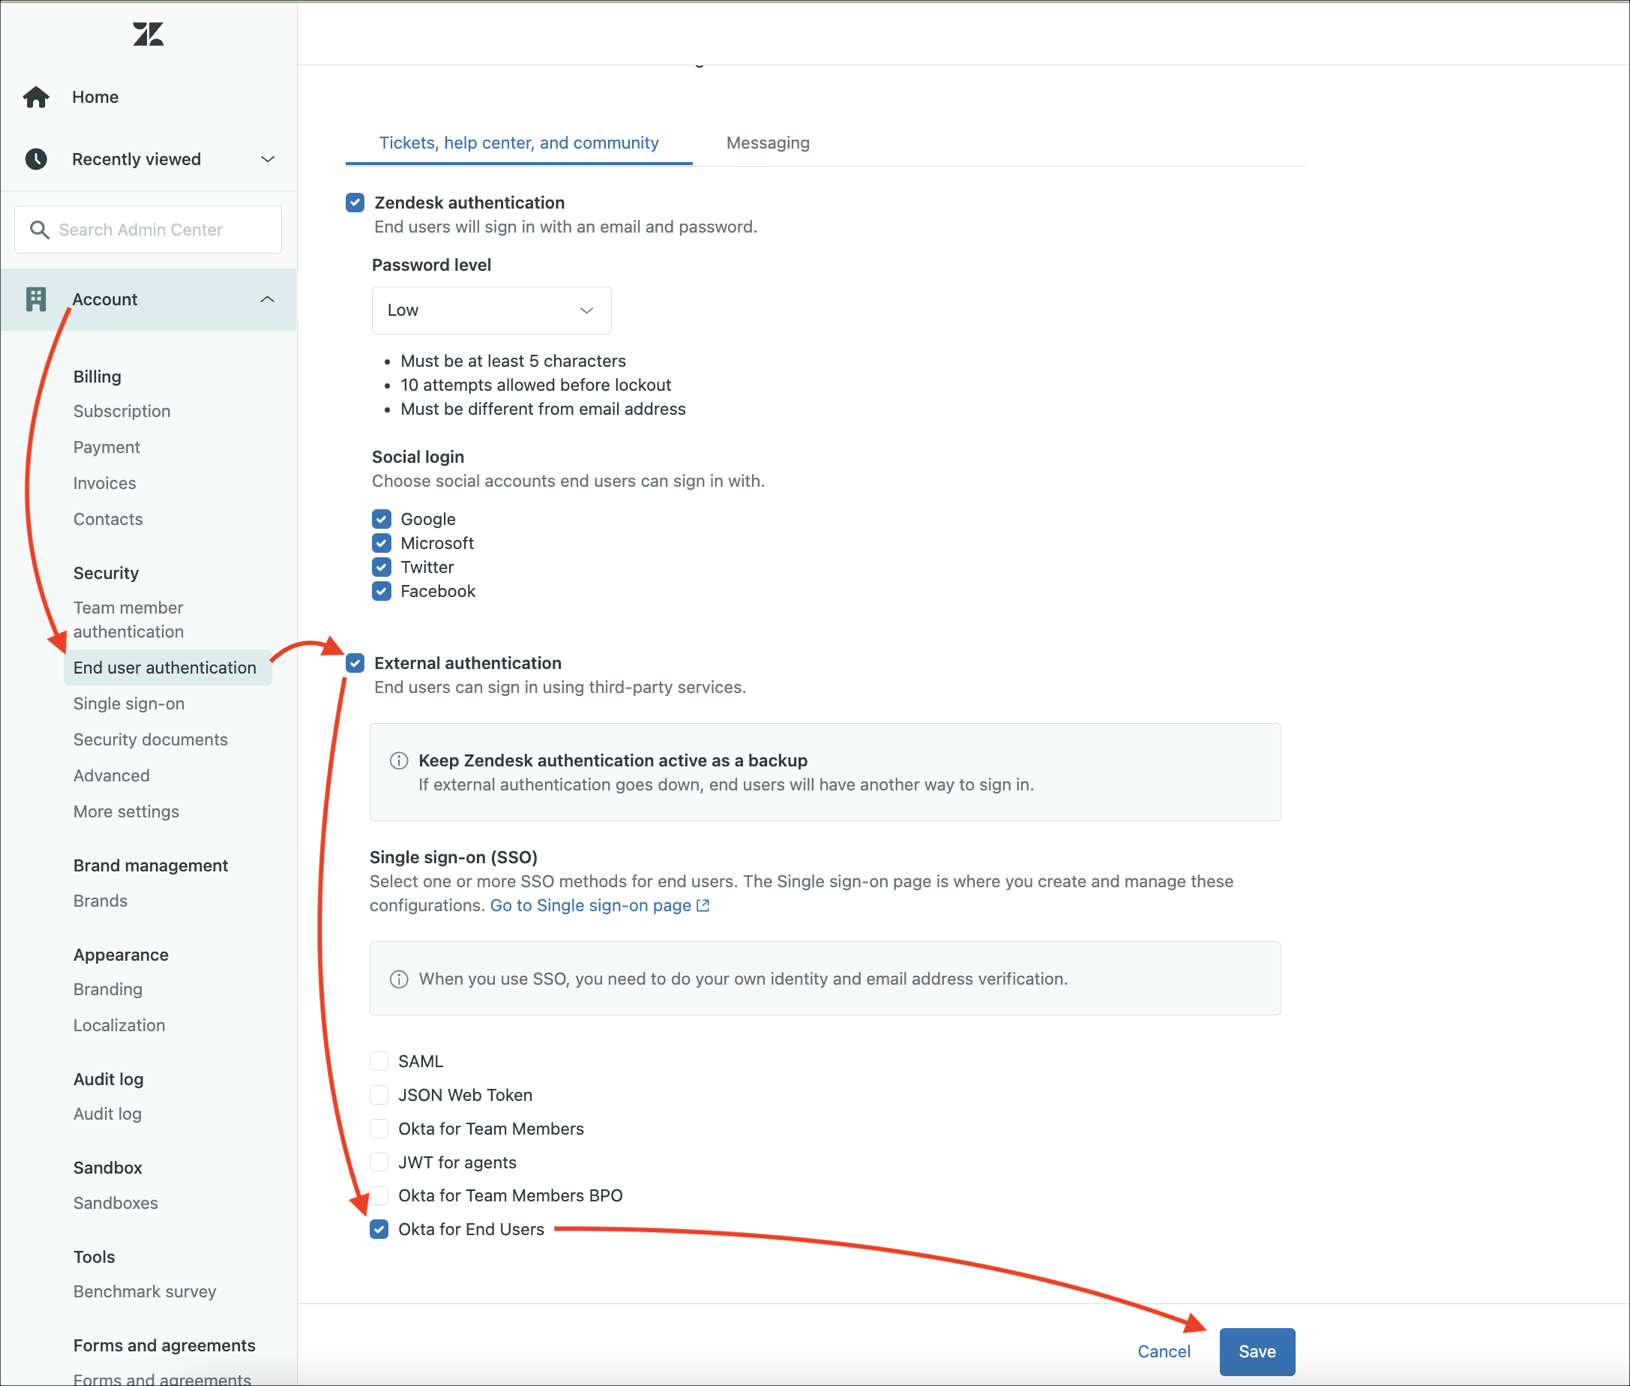
In the Zendesk Admin Center, go to Account > Security and select either Team member authentication or End user authentication.
If you're assigning the configuration to team members, select External authentication to show the authentication options. These options are already displayed for end users.
Click the Single sign-on (SSO) option in the External authentication section, then select the name of the SSO configuration you want to use.
Click Save.
Team Members:
End Users:
Done!
Make sure that you entered the correct value in the Your Zendesk company name field under the General tab in Okta. Using the wrong value will prevent you from authenticating via SAML to Zendesk.
Go to: https://[your-company-subdomain].zendesk.com URL.