The Okta/Sumo Logic SAML integration currently supports the following features:
For more information on the listed features, visit the Okta Glossary.
Sign in to your Sumo Logic instance as an administrator.
Go to Administration > Security > SAML, then click + Add Configuration.
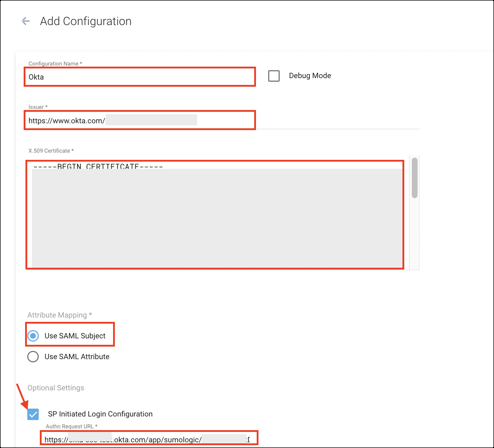
Enter the following:
Configuration Name: Enter a configuration name. For example, Okta.
Issuer: Copy and paste the following:
Sign in to the Okta admin app to have this variable generated for you.
X.509 Certificate: Copy and paste the following:
Sign into the Okta Admin Dashboard to generate this variable.
Attribute Mapping: Select Use SAML Subject.
SP Initiated Login Configuration: Check this box.
Authn Request URL: Copy and paste the following:
Sign into the Okta Admin Dashboard to generate this variable.
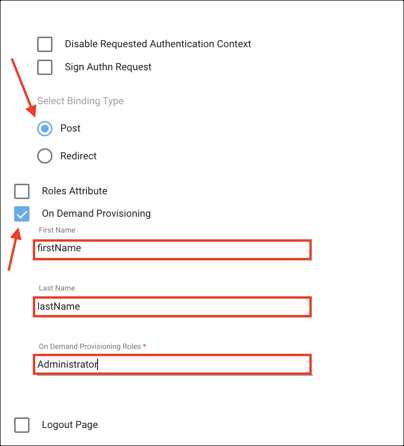
Select Binding Type: Select POST.
On Demand provisioning: Check this box to support JIT (Just In Time) Provisioning.
First Name: Enter firstName
Last Name: Enter lastName
On Demand Provisioning Roles: Specify the Sumo Logic RBAC roles you want to assign when user accounts are provisioned. (The roles must exist in Sumo Logic). For example, Administrator.
Click Add:
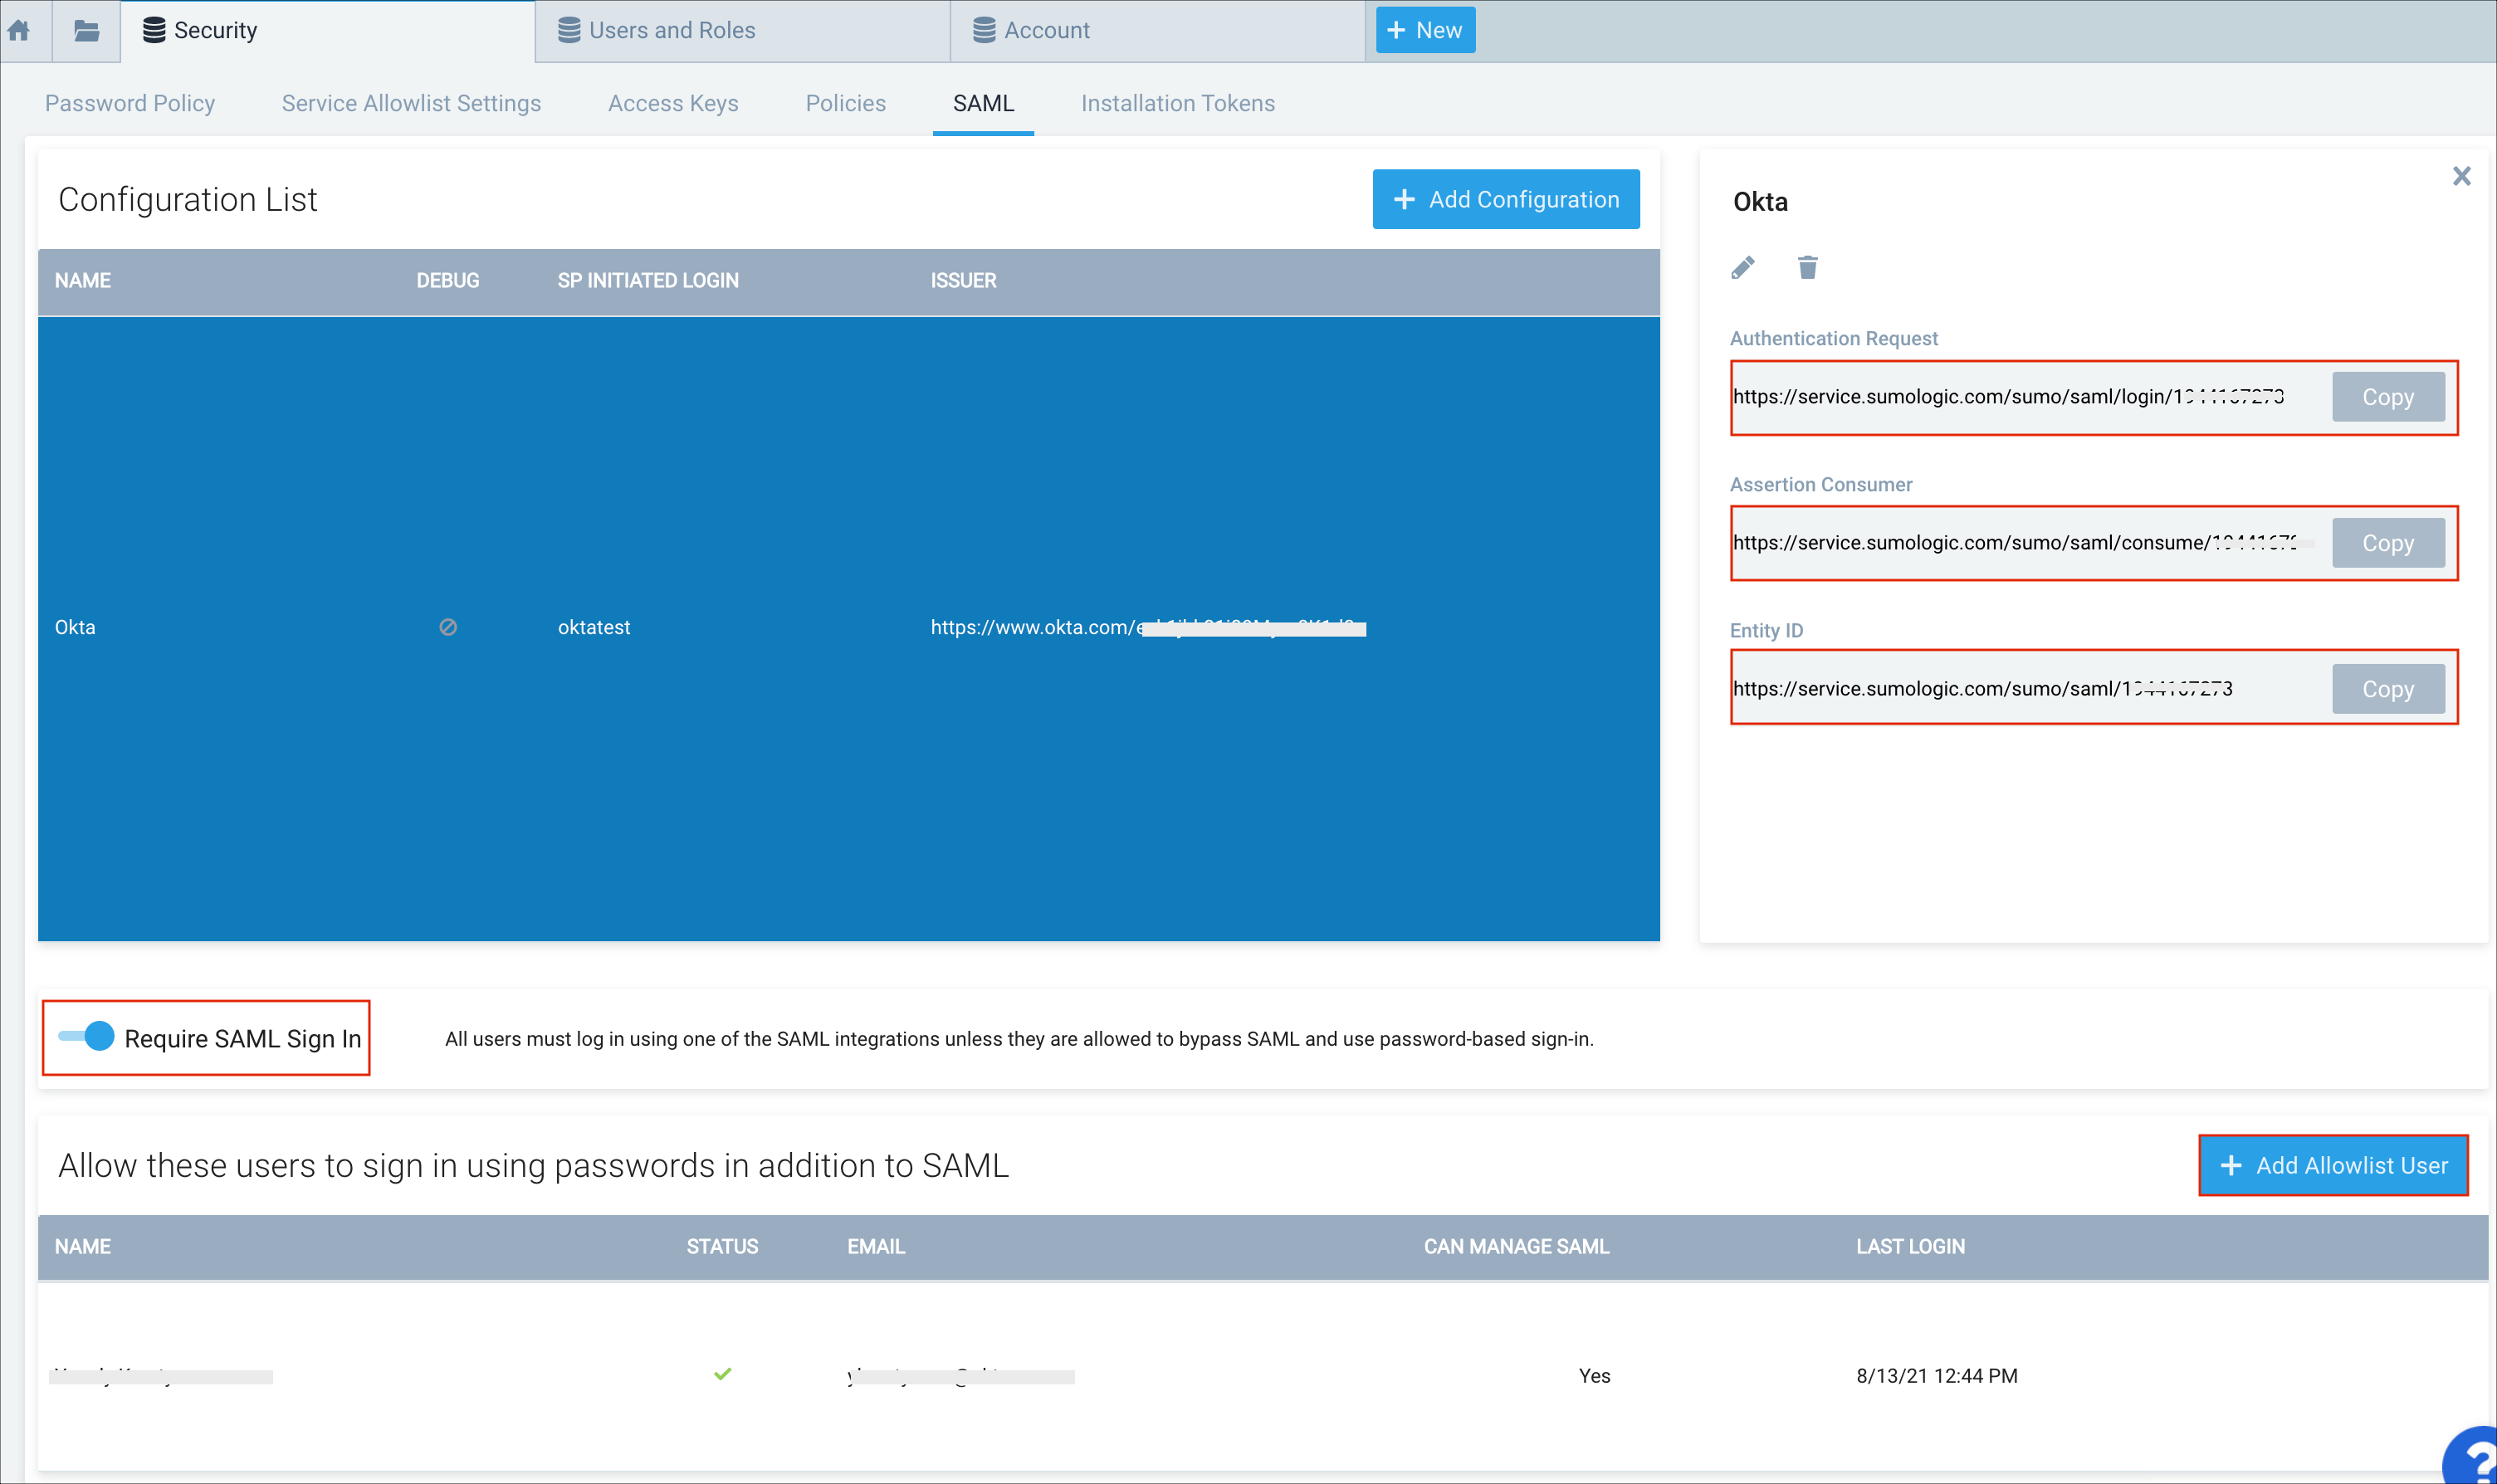
Still in Sumo Logic, select the configuration you just created.
Make a note of your Authentication Request, Assertion Consumer, and Entity ID values.
Require SAML Sign In: Turn this on if you need to disable username/password login for your users.
Allow these users to sign in using passwords in addition to SAML: Add users who you want to allow to sign in using passwords in addition to SAML.
In Okta, select the Sign On tab for the Sumo Logic SAML app, then click Edit.
Enter the Assertion Consumer and Entity ID values from step 4 into the corresponding fields.
Click Save.
Done!
The following SAML attributes are supported:
| Name | Value |
|---|---|
| firstName | user.firstName |
| lastName | user.lastName |
Go to the Authentication Request URL (step 4).