The Okta/StatusHub Admin SAML integration currently supports the following features:
For more information on the listed features, visit the Okta Glossary.
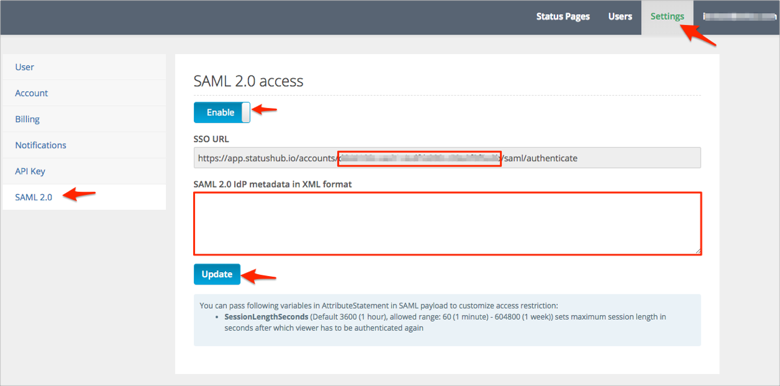
Login to your StatusHub Admin account.
Navigate to Settings > Enable, then follow the steps below:
Click Enable.
Make a copy of the portion of the SSO URL marked in red, below. This is your Customer ID.
SAML 2.0 IdP metadata in XML format: Copy and paste the following:
Sign in to Okta Admin app to have this variable generated for you.
Click Update:
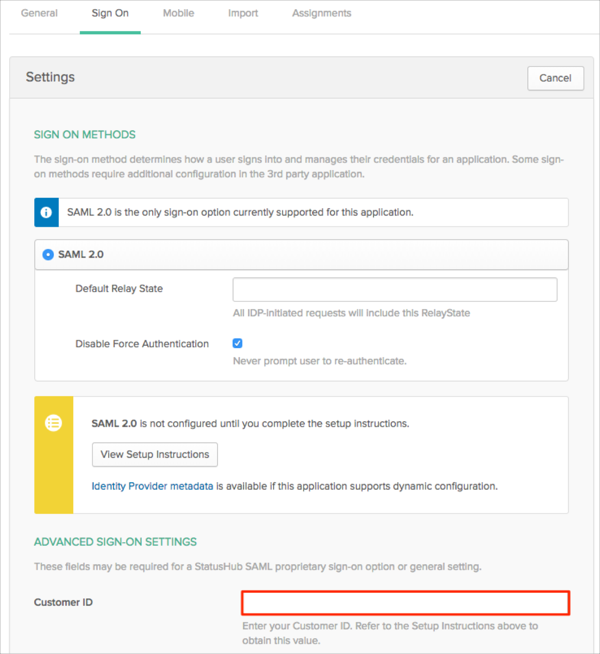
In Okta, select the Sign On tab for the StatusHub Admin SAML app, then click Edit.
Enter the Customer ID value you made a copy of in step 2 into the corresponding field.
Click Save:
Done!
Go to https://app.statushub.io/accounts/[your-CustomerID]/saml/entrypoint URL.