How to Configure SAML 2.0 for PleaseReview
This setup might fail without parameter values that are customized for your organization. Please use the Okta Administrator Dashboard to add an application and view the values that are specific for your organization.
Read this before you enable SAML
Before you can use SAML SSO to access your instance of PleaseReview, a PleaseReview administrator must install and configure the SAML2 system connector, as described below.
Contents
Supported Features
The Okta/PleaseReview SAML integration currently supports the following features:
- SP-initiated SSO
- IdP-initiated SSO
For more information on the listed features, visit the Okta Glossary.
Configuration Steps
- Contact the PleaseTech Support team directly and include the following information listed below. Also ask them to provide you with the SAML Destination endpoint value.
- If you are a hosted PleaseReview customer, email PleaseReview customer support team to open a new support ticket to enable SAML 2.0 Single Sign-on.
- If you are an on-premise customer, email your internal PleaseReview administrator to enable SAML Single Sign-on.
-
Include the following Issuer value.
Sign in to the Okta Admin app to generate this variable.
-
Copy and paste the following Identity Provider Certificate into the message. Be sure to include the Begin Certificate and End Certificate lines.
Sign in to the Okta Admin app to generate this variable.
-
Include the following Identity Provider Login value.
Sign in to the Okta Admin app to generate this variable.
-
Include the following Identity Provider Logout value.
Sign in to the Okta Admin app to generate this variable.
- The PleaseReview team (internal administrator) will process your request and provide you with the SAML Destination endpoint value.
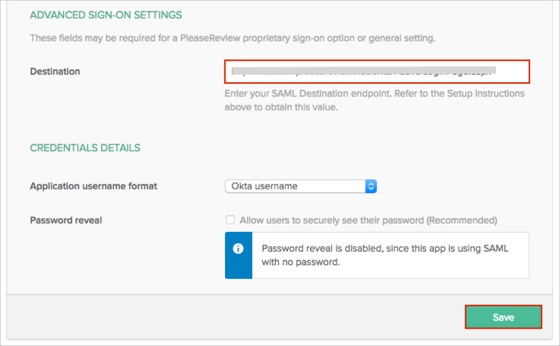
- In Okta, select the Sign On tab for the PleaseReview app, then click Edit.
- Scroll down to the ADVANCED SIGN-ON SETTINGS section.
- Enter the SAML Destination endpoint value (step 6) into the corresponding field.
- Click Save.
-
Done!
Notes
The following SAML attributes are supported:
| Name |
Value |
| uid |
user.userName |
| email |
user.email |
SP-initiated SSO
Open your PleaseReview URL.