For reference, here is documentation describing How to create a CA-signed certificate for Palo Alto Networks SAML Applications.
The Okta/Palo Alto Networks - GlobalProtect SAML integration currently supports the following features:
For more information on the listed features, visit the Okta Glossary.
In Okta, select the General tab for the Palo Alto Networks - GlobalProtect app, then click Edit:
Enter [your-base-url] into the Base URL field.
Note: If global protect is configured on port 443, then the admin UI moves to port 4443.
Click Save.
Now that you have completed the set up in Okta, login to your Palo Alto Networks application as an administrator and follow the steps below to configure Okta as your IDP.
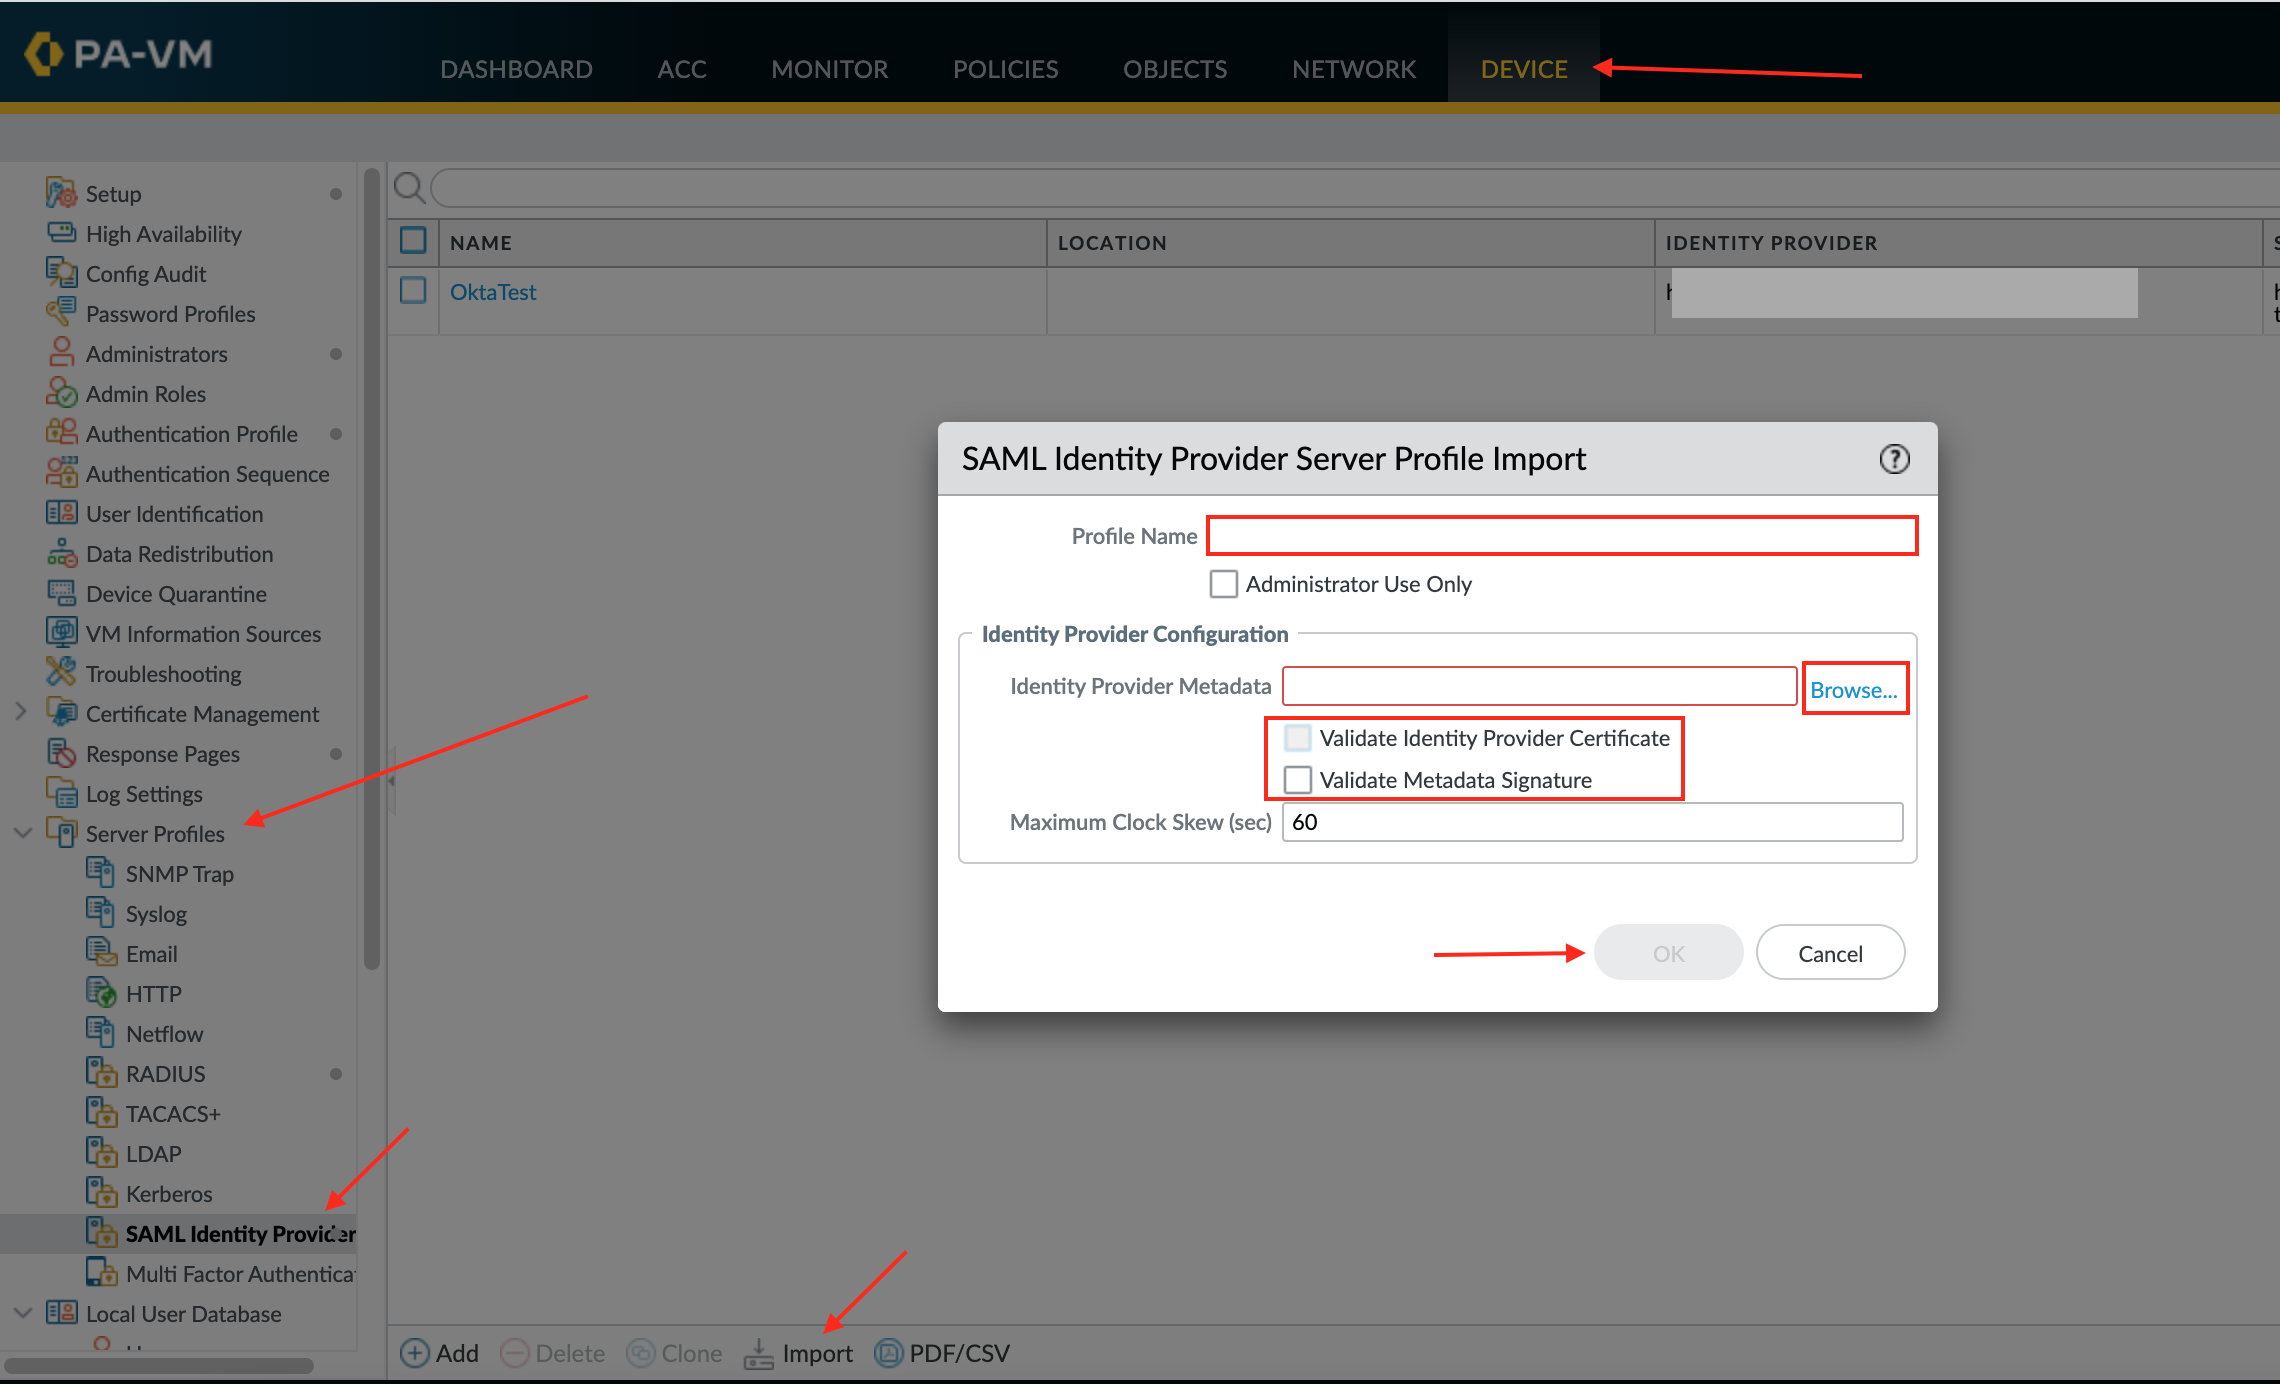
Navigate to Device > Server Profiles > SAML Identity Provider.
Select Import, then enter the following:
Profile Name: Enter a preferred profile name.
Identity Provider Metadata: Download and save the following. Then click Browse to locate and upload it to Palo Alto Networks GlobalProtect:
Sign into the Okta Admin dashboard to generate this value.
Make sure the options Validate Identity Provider Certificate and Validate Metadata Signature are unchecked.
Enter the Maximum Clock Skew, which is the allowed difference in seconds between the system times of the IdP and the firewall at the moment when the firewall validates IdP messages (the default is 60; the range is 1 to 900). If the difference exceeds this value, authentication fails.
Click OK:
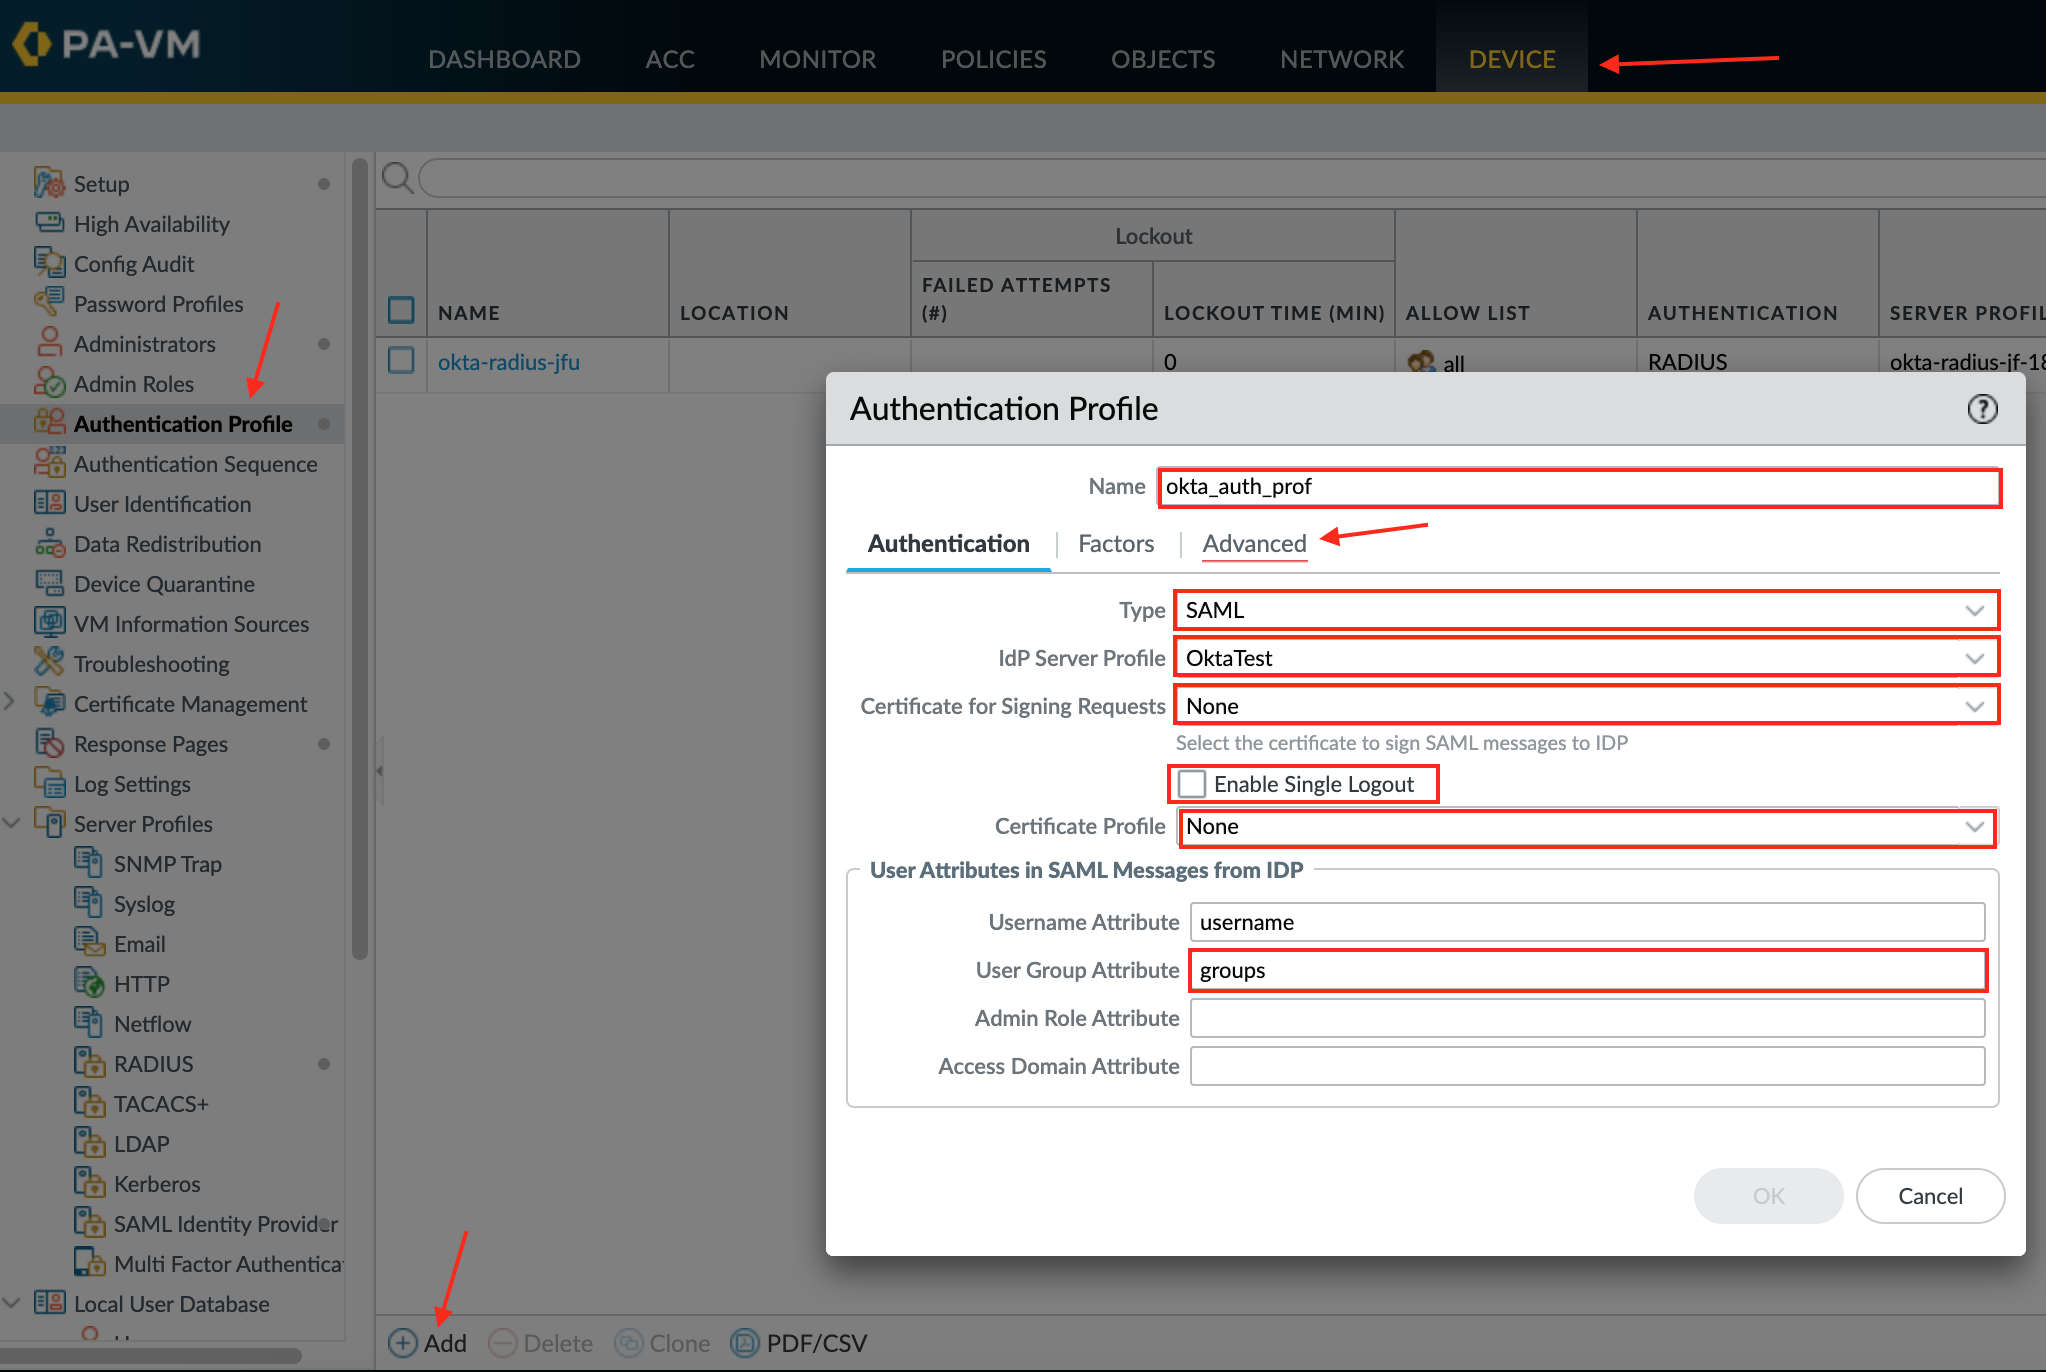
Navigate to Device > Authentication Profile, click Add, then enter the following:
Name: Provide a name for the Authentication profile.
Type: Select SAML from the dropdown menu.
IdP Server Profile: Select an IdP Server Profile created in step 4 as the IdP Server Profile from the dropdown.
Certificate for Signing Requests: Select None.
Enable Single Logout (optional): Check this option in order to enable SLO.
Certificate Profile: Select None.
User Group Attribute: Enter groups.
Select the Advanced tab in the Authentication Profile, then chose the Allow List.
Click OK:
Once you have set up the Okta as IDP you need to create either a new Portal or a new Gateway or both for the GlobalProtect components.
Refer to the following Palo Alto Networks documentation for configuring a GlobalProtect Portal:
Refer to the following Palo Alto Networks documentation for configuring a GlobalProtect Gateway:
Follow the appropriate steps:
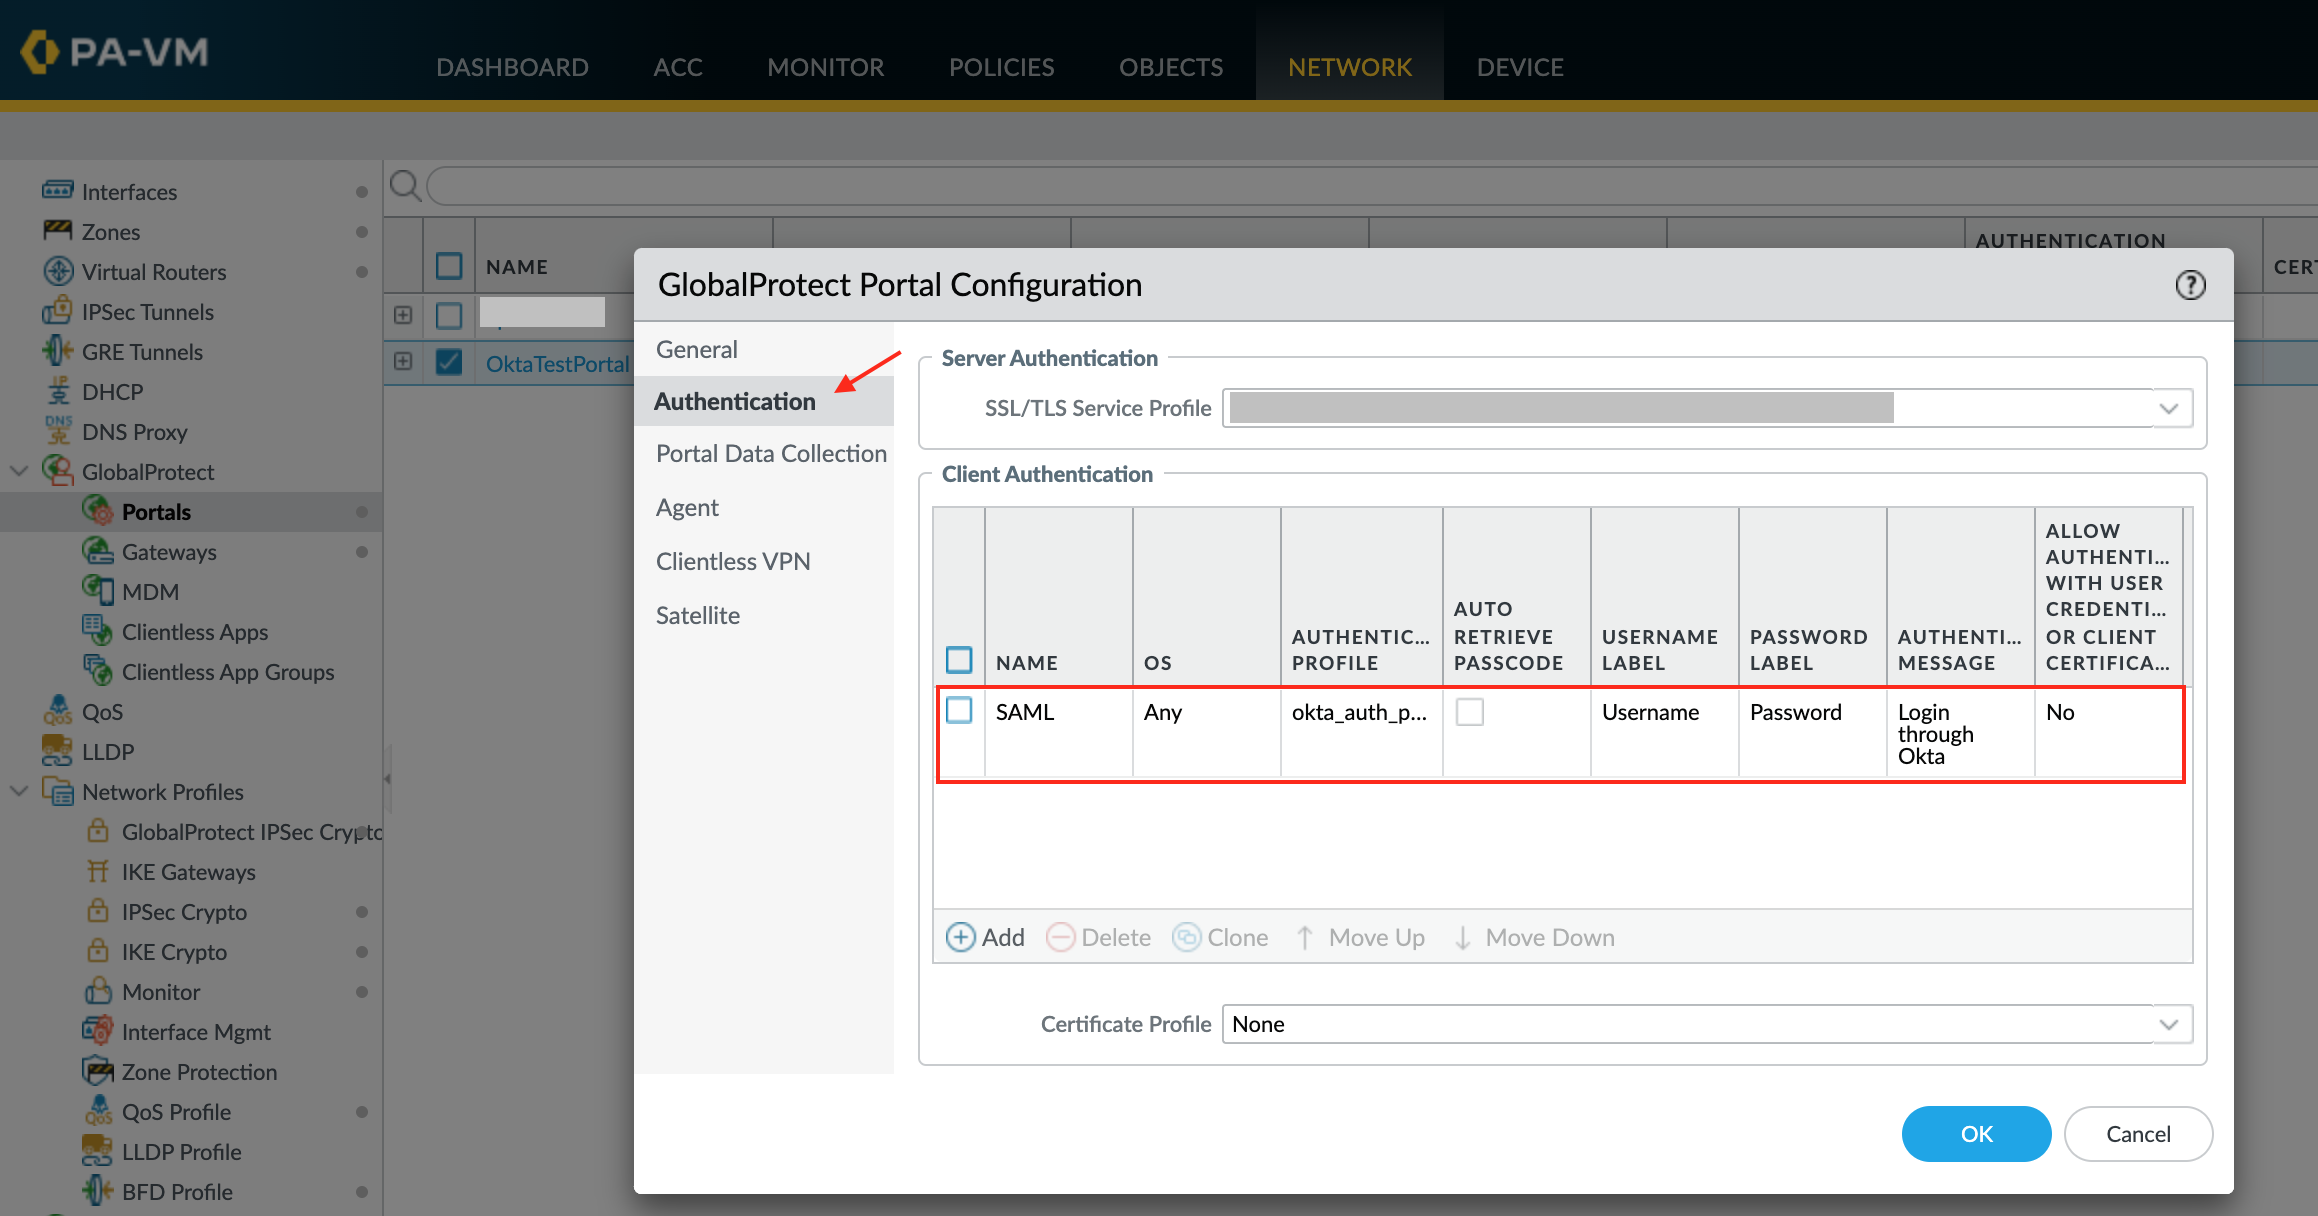
For Portals:
Go to Network > GlobalProtect > Portals.
Open the Portal you created in step 6.
Go to Authentication, then click Add.
Enter the following:
Provide a Name.
Select the OS.
Select the Authentication Profile you configured in step 5.
Define an authentication message.
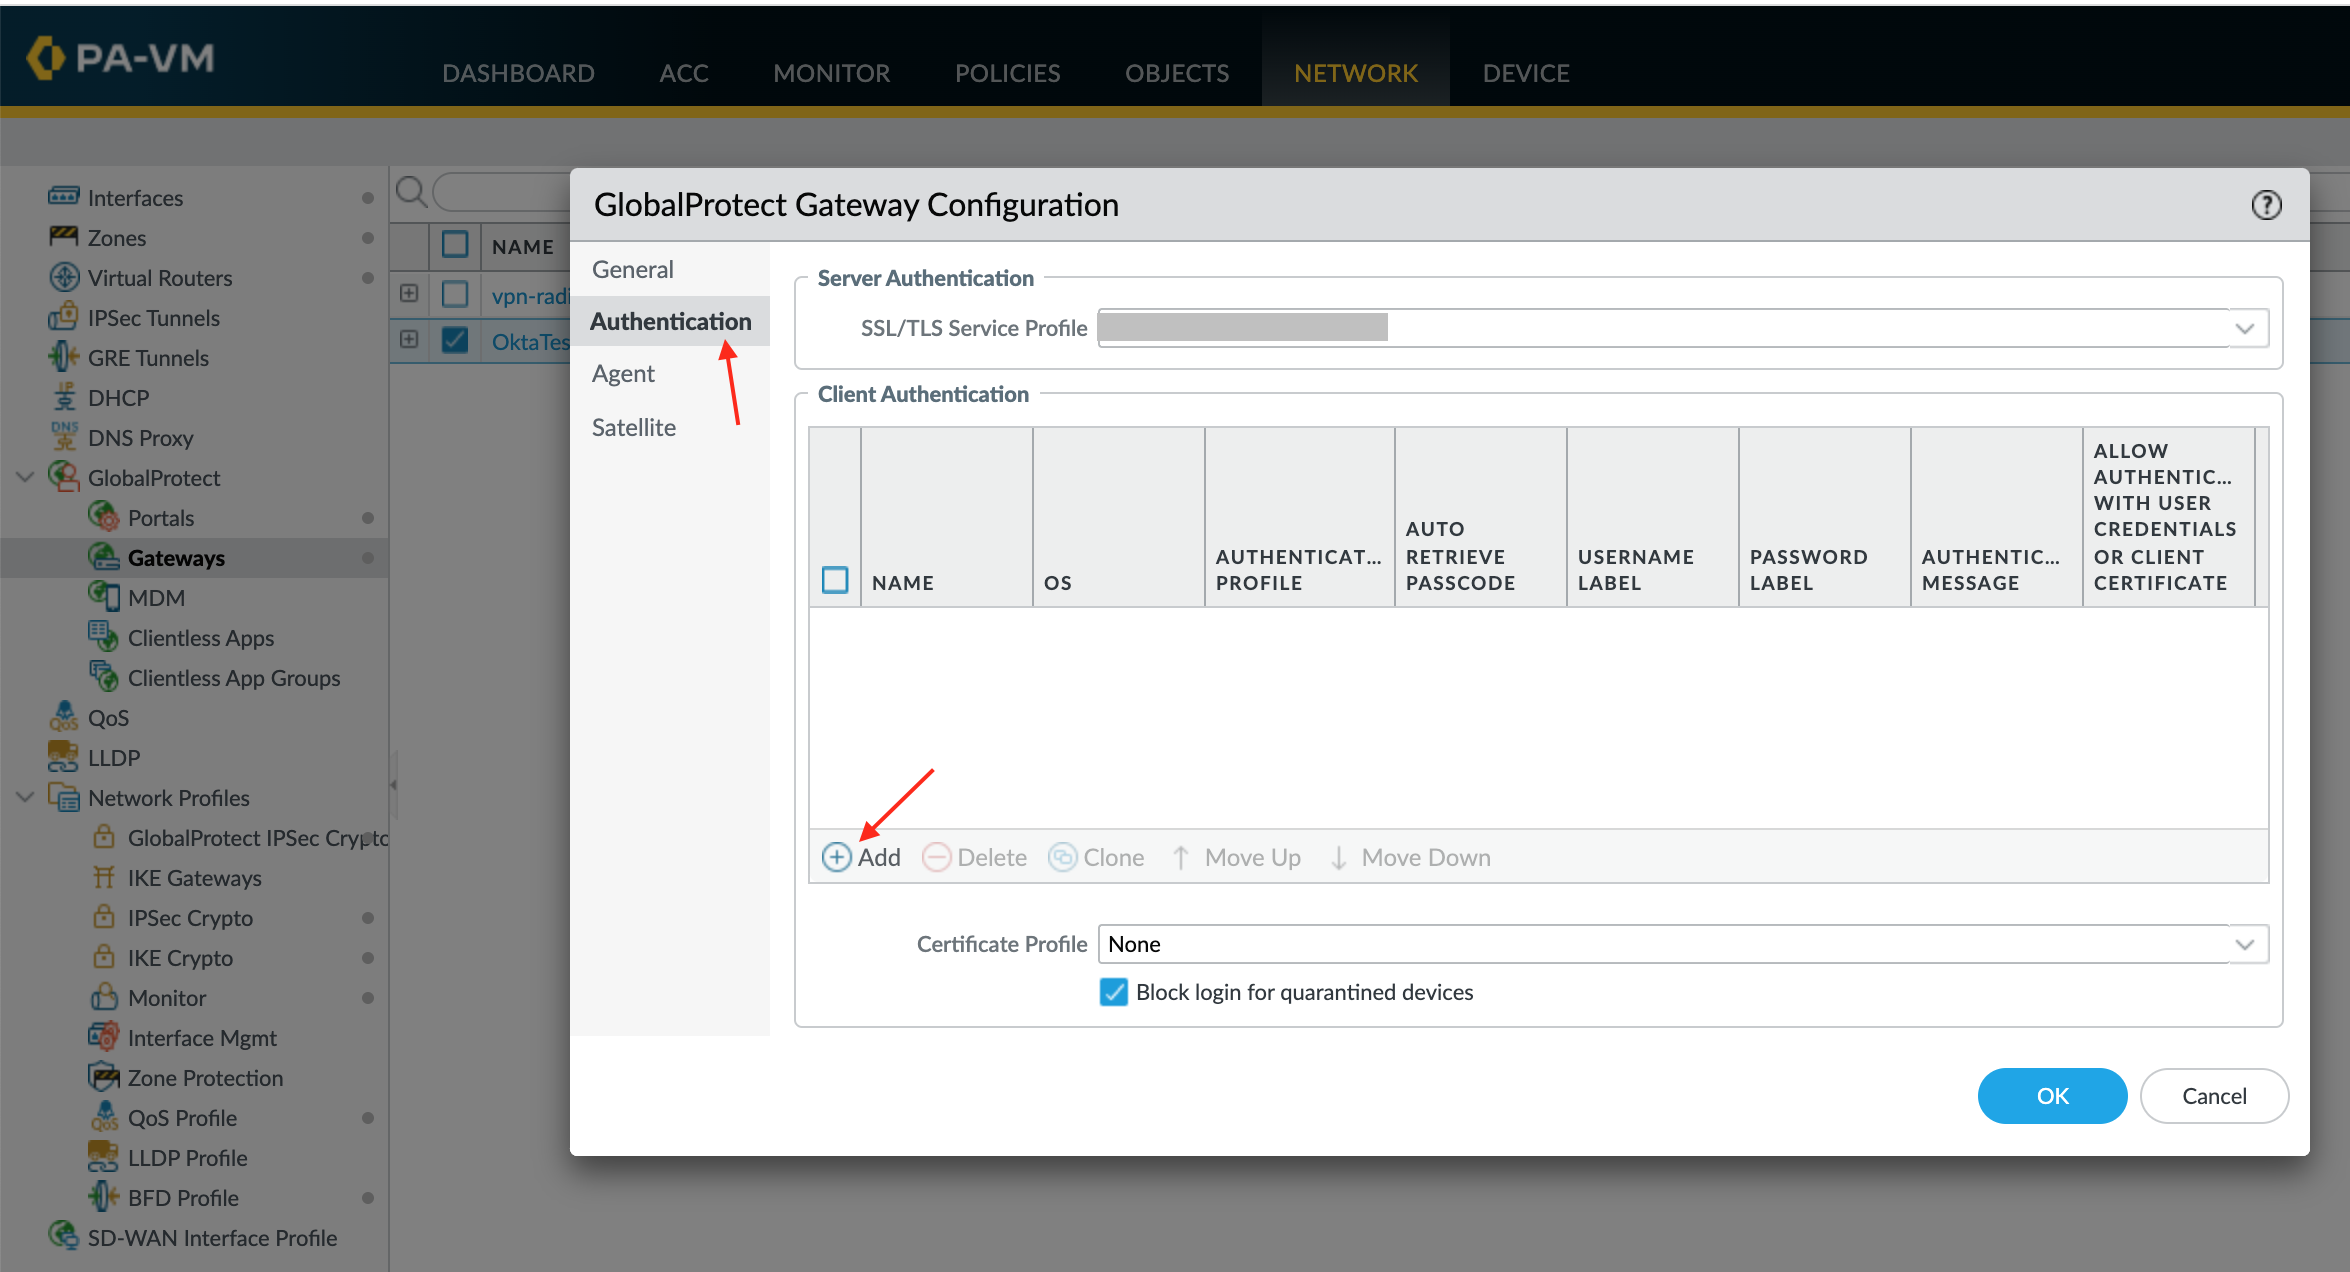
For Gateways:
Go to Network > GlobalProtect > Gateways.
Open the Gateway you created in step 6.
Go to Authentication, then click Add.
Enter the following:
Provide a Name.
Select the OS.
Select the Authentication Profile you configured in step 5.
Define an authentication message.
To send groups as a part of SAML assertion, in Okta select the Sign On tab for the Palo Alto Networks app, then click Edit:
Select the appropriate filter from the groups dropdown menu and type the preferred value into the field.
Click Save.
Done!
The following SAML attribute is supported:
| Name | Value |
|---|---|
| groups | This will be configured in the app UI; see Group attribute instructions (step 8) above. |
GlobalProtect Portal: Go to [your-base-url]/global-protect/portal/portal.esp
GlobalProtect Gateway: In the Global Protect client, enter [your-base-url] into Portal field, then click Connect.