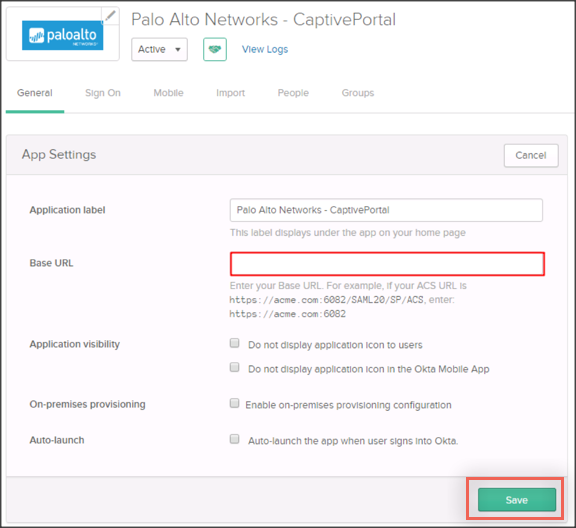
In Okta, select the General tab for the Palo Alto Networks - CaptivePortal app, then click Edit:
Enter [your-base-url] into the Base URL field.
Click Next.
Now that you have completed the set up in Okta, login to your Palo Alto Networks application as an administrator and follow the steps below to configure Okta as your IDP:
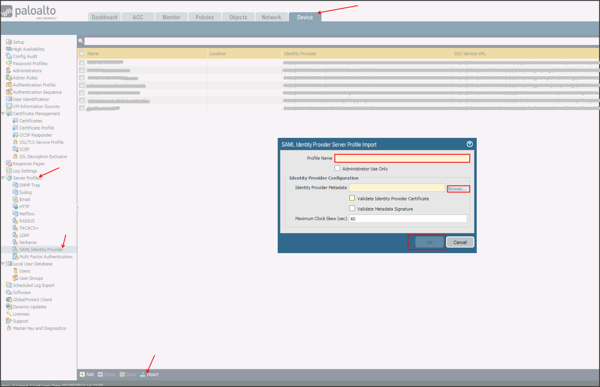
Navigate to Device > Server Profiles > SAML Identity Provider.
Select Import, then enter the following:
Profile Name: Enter a preferred profile name.
Identity Provider Metadata: Download and save the following. Then click Browse to locate and upload it:
Sign into the Okta Admin dashboard to generate this value.
Click OK.
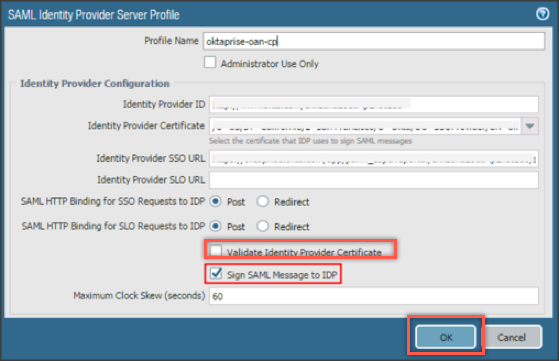
Select your SAML Identity Provider Server Profile, uncheck Validate Identity Provider Certificate, check Sign SAML Message to IDP, then click OK:
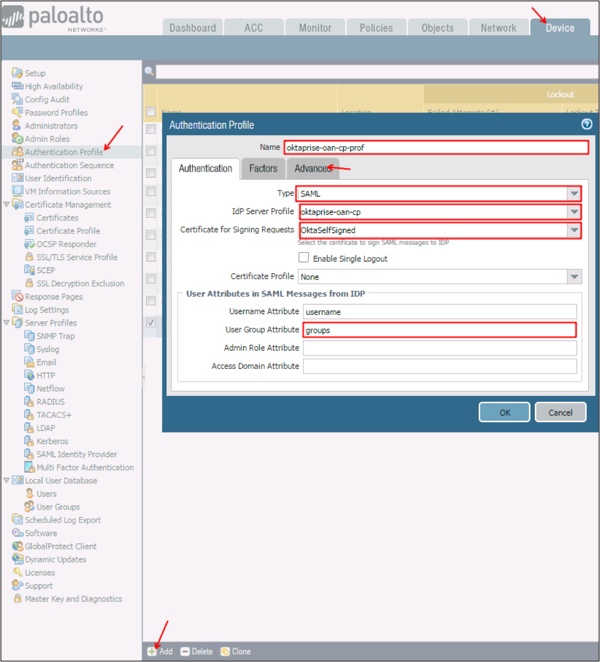
Navigate to Device > Authentication Profile, click Add, then enter the following:
Name: Provide a name for the Authentication profile.
Type: Select SAML from the dropdown menu.
IdP Server Profile: Select an IdP Server Profile created in step 4 as the IdP Server Profile from the dropdown.
Certificate for Signing Requests: Select a signing certificate from the dropdown menu.
For information about how to create a certificate, see https://www.paloaltonetworks.com/documentation/70/pan-os/pan-os/certificate-management/generate-a-certificate-on-the-device.
User Group Attribute: Enter groups.
Select the Advanced tab in the Authentication Profile, then chose the Allow List.
Click OK.
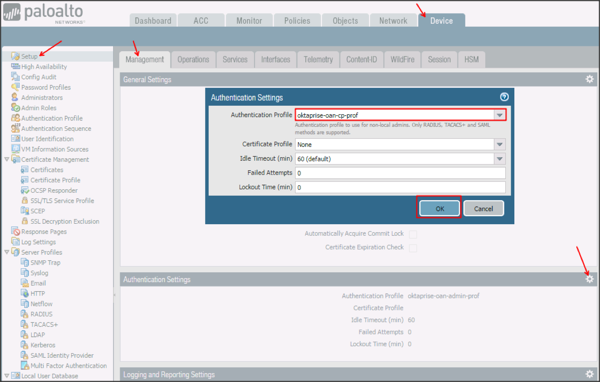
Navigate to Device > Setup > Management > Authentication Settings, then select the gear icon.
Authentication Profile: Select the SAML Authentication profile you created in step 6 from the dropdown menu.
Click OK.
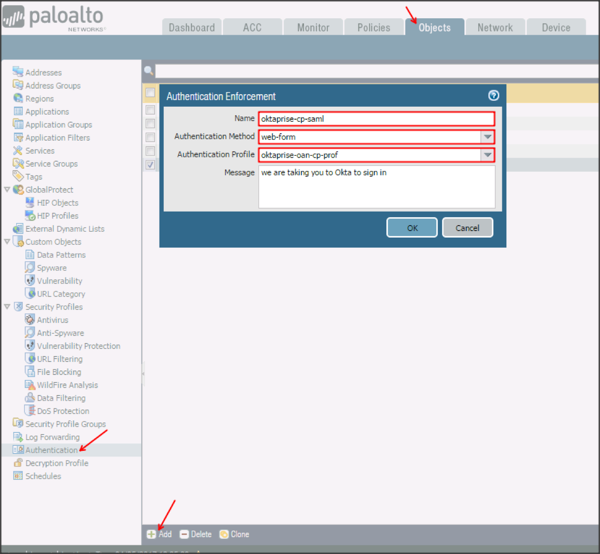
Navigate to Objects > Authentication, click Add, then enter the following:
Name: Enter a preferred name.
Authentication Method: Select web-form from the dropdown menu.
Authentication Profile: Select the SAML Authentication profile you created in step 6 from the dropdown menu.
Click OK.
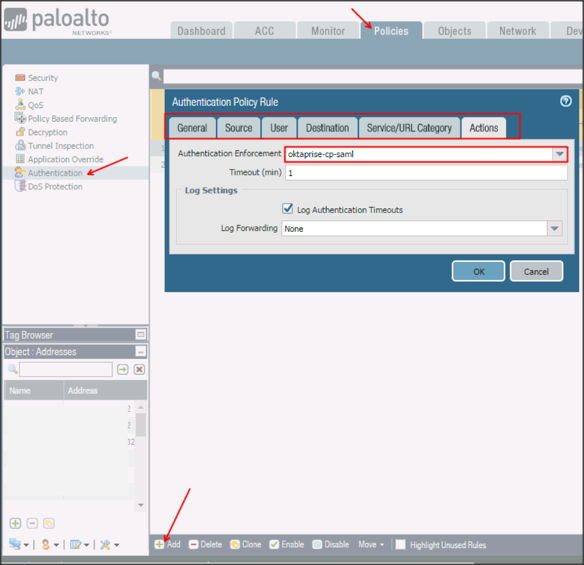
Navigate to Policies > Authentication, click Add, then enter the following:
Provide a name.
Define the rules of the source user destination and service that you require (hint: User should probably be unknown).
Under the Actions tab select the authentication enforcement you created in step 8 as the Authentication Enforcement.
Click OK.
Refer to the following Palo Alto Networks documentation for configuring a Captive Portal:
To send the groups as a part of SAML assertion, in Okta select the Sign On tab for the Palo Alto Networks app, then click Edit:
Select the appropriate filter from the groups dropdown menu, then type the preferred value into the field.
Click Save.

Done!
Notes:
The following group attribute is supported:
groups
SP-initiated flows are supported.
IdP-initiated flows and Just In Time (JIT) Provisioning are not supported.
Go to [your-base-url].