The Okta/Palo Alto Networks - Admin UI SAML integration currently supports the following features:
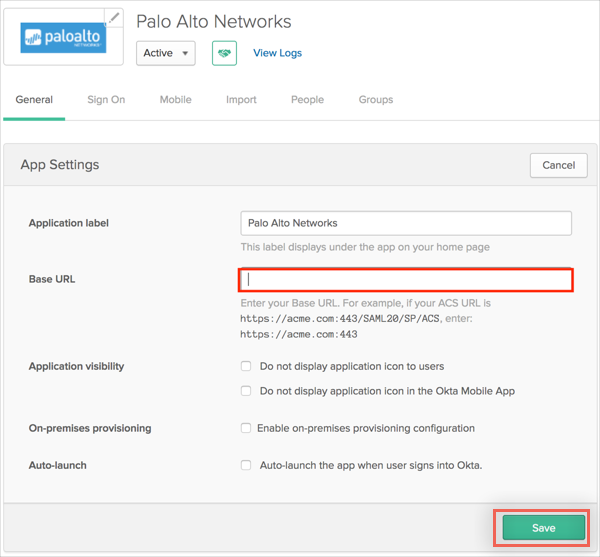
In Okta, select the General tab for Palo Alto Networks - Admin UI app, then click Edit.
Enter [your-base-url] into the Base URL field.
Note: By default the port is 443 unless global protect is configured on same interface in which case the admin UI moves to port 4443.
Click Save.
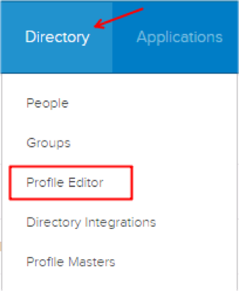
Still in Okta, navigate to Directory > Profile Editor:
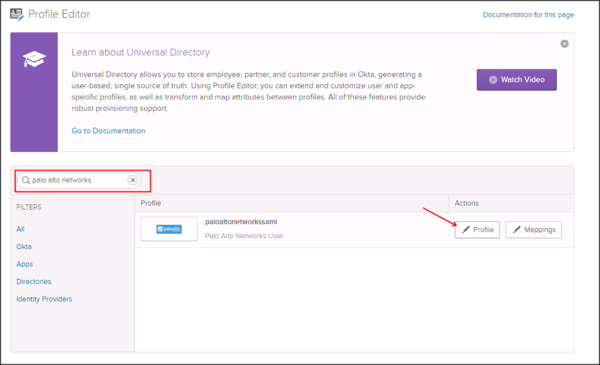
Search for the Palo Alto Networks app, then click Profile:
The Palo Alto Networks application supports the Admin role, and the Access Domain attribute. The following steps walks you through the required steps to successfully send the Admin Role and Domain attributes.
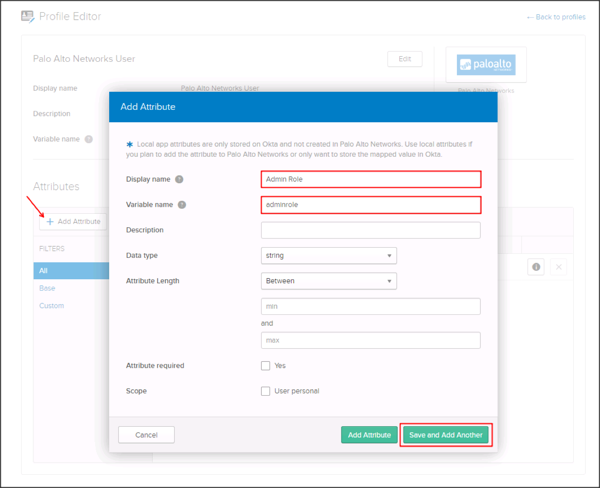
Click Add Attribute, then enter the following information:
Display Name: Enter Admin Role.
Variable Name: Enter adminrole.
Click Save and Add Another.
Enter the following information:
Display Name: Enter Access Domain.
Variable Name: Enter accessdomain.
Click Add Attribute:

For configuration mappings to new attributes, see our online documentation about mapping: About Universal Directory.
Now that you have completed the set up in Okta, log in to your Palo Alto Networks Admin UI application as an administrator and follow the steps below to configure Okta as your IDP.
Navigate to Device > Server Profiles > SAML Identity Provider.
Select Import, then enter the following:
Profile Name: Enter a preferred profile name.
Identity Provider Metadata: Save, then upload the following:
Sign into the Okta Admin dashboard to generate this value.
Click OK:

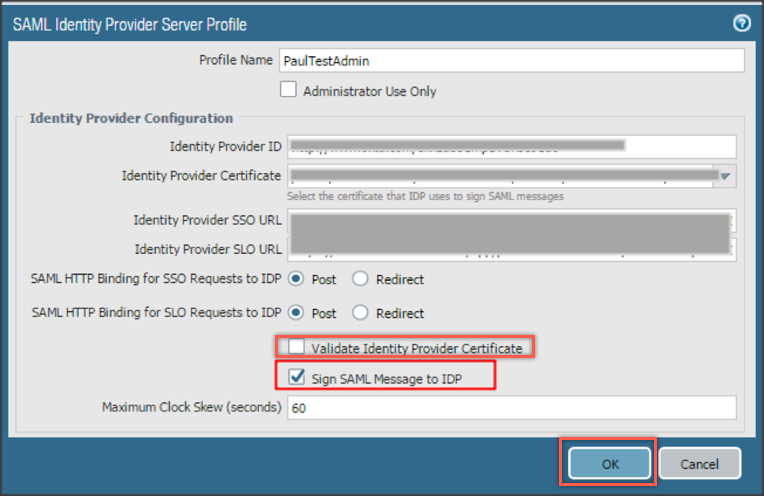
Click on your SAML Identity Provider Server Profile, uncheck Validate Identity Provider Certificate, check Sign SAML Message to IDP, then click OK:
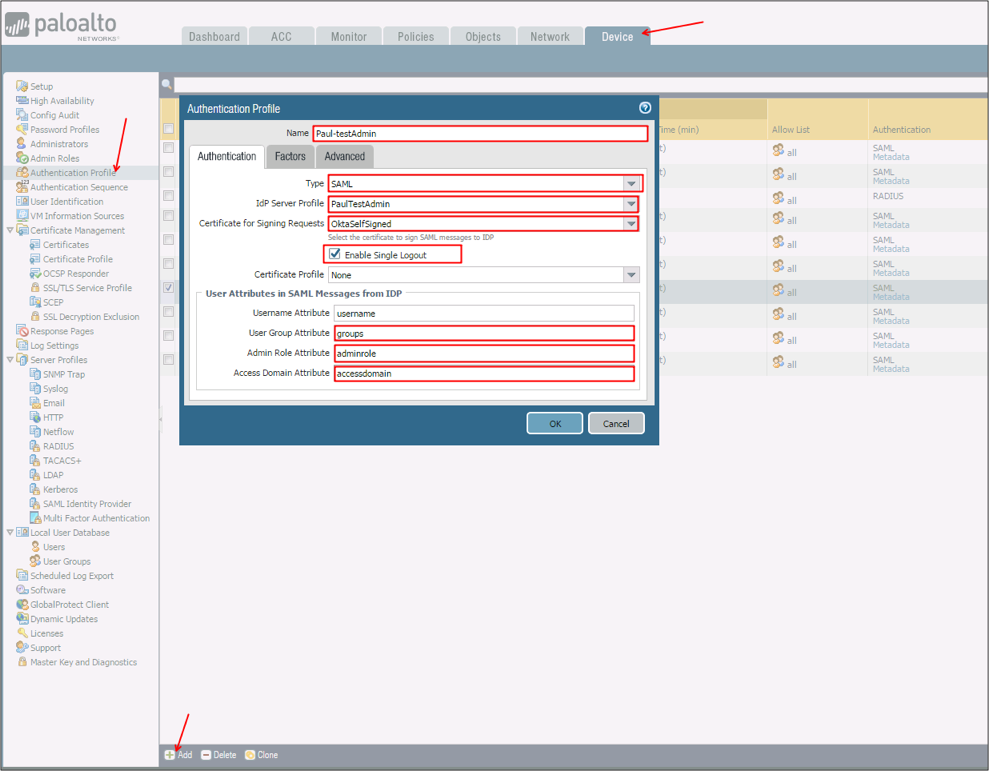
Navigate to Device > Authentication Profile, click Add, and enter the following information:
Name: Enter a name for the Authentication Profile.
Type: Select SAML from the dropdown menu.
IdP Server Profile: Select an IdP Server Profile created in step 7 as the IdP Server Profile from the drop-down.
Certificate for Signing Requests: Select a signing certificate from the drop-down. Refer to the following link for information about how to create a certificate https://www.paloaltonetworks.com/documentation/71/pan-os/pan-os/certificate-management/generate-a-certificate.
Enable Single Logout: Check this option to enable SLO.
User Group Attribute: Enter groups.
Admin Role Attribute: Enter adminrole.
Access Domain Attribute: Enter accessdomain.
Select the Advanced tab in the Authentication Profile and add the users to the Allow list.
Click OK:
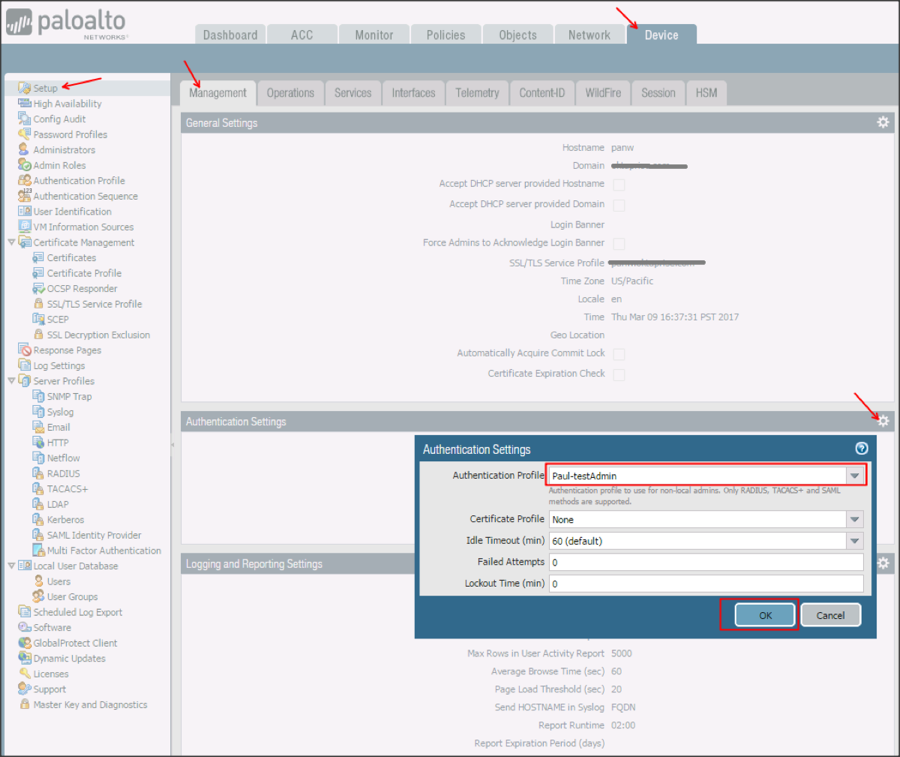
Navigate to Device > Setup > Management > Authentication Settings, then click the gear icon.
Select the SAML Authentication profile you created in step 9 from the Authentication Profile dropdown menu.
Click OK:
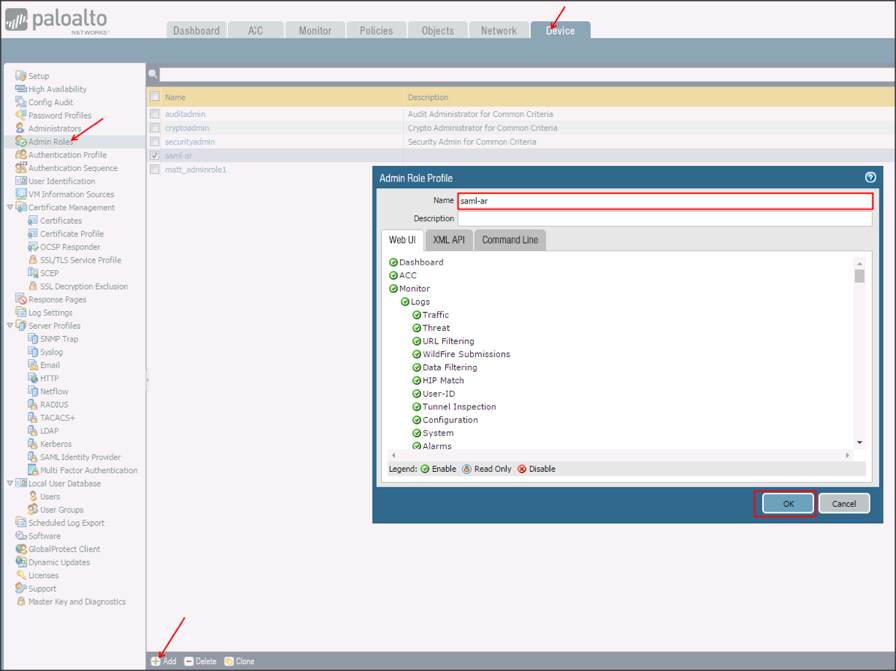
Navigate to Device > Admin Roles, click Add, then enter the following:
Name: Enter a preferred name.
Define a custom Admin Role Profile.
Click OK:
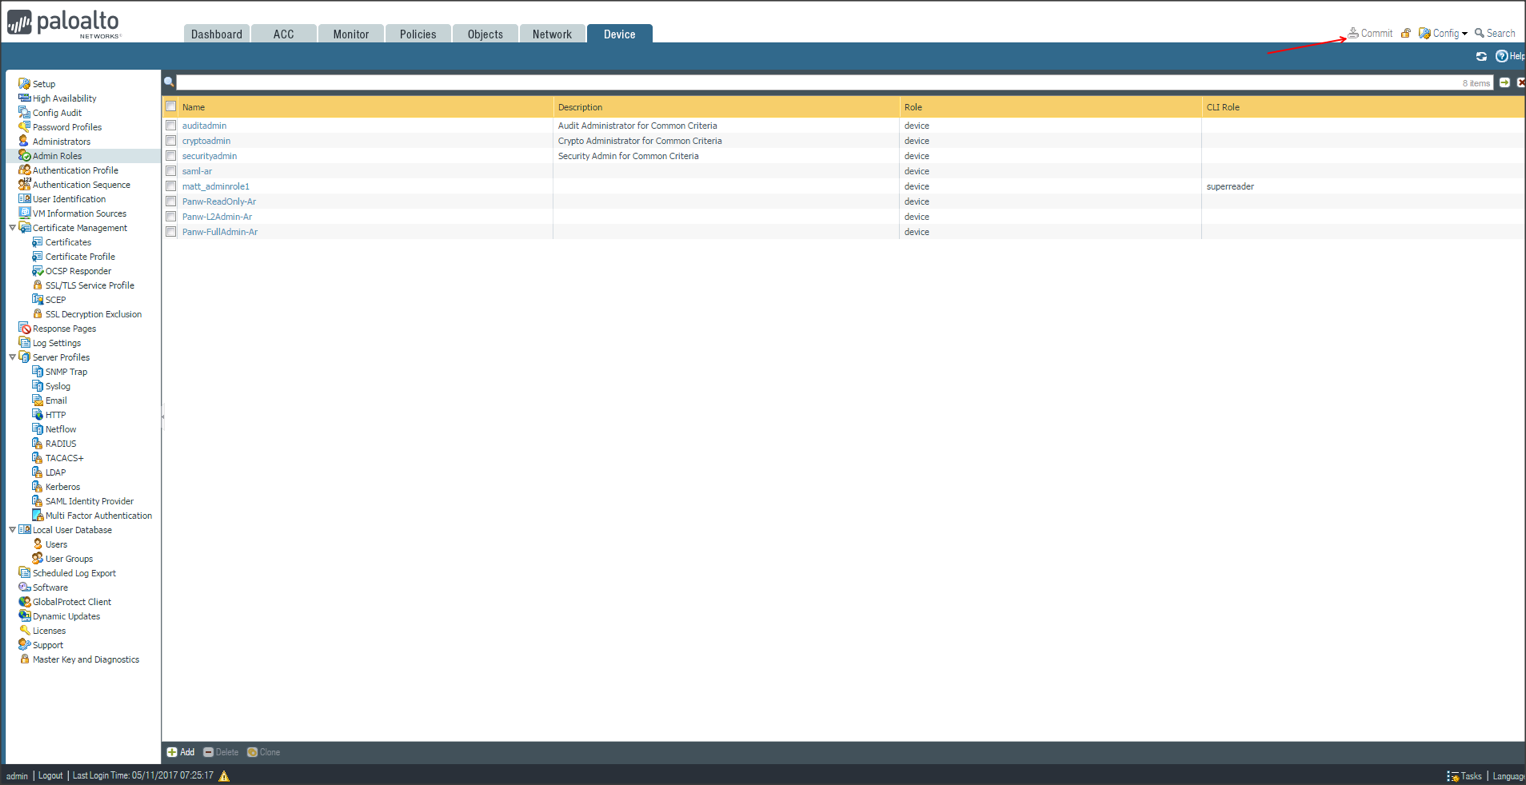
Click Commit to apply all your changes:
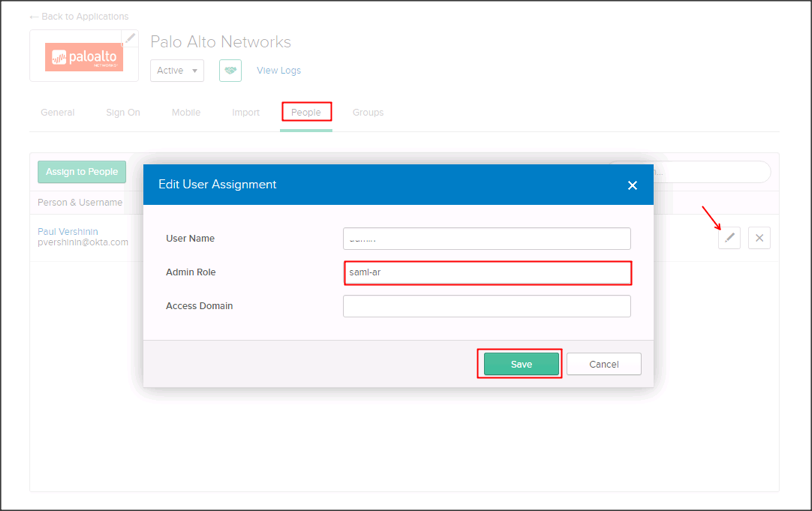
In Okta, select the People tab for the Palo Alto Networks app, then click Edit.
Click the Edit icon in front of the user assigned and enter the value you specified in step 12 for Admin Role attribute you created in step 4.
Define a custom Admin Role profile.
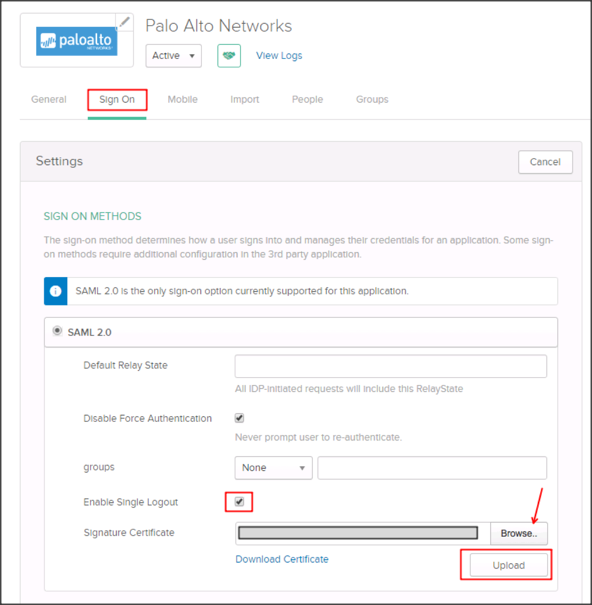
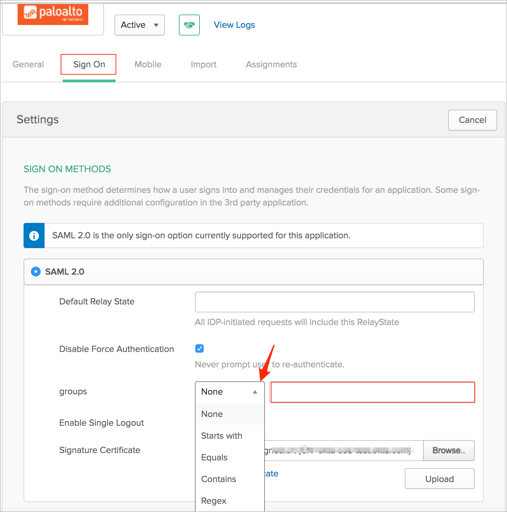
Still in Okta, select the Sign On tab for the Palo Alto Networks app, then click Edit.
Check Enable Single Logout.
Signature Certificate: Click Browse to locate, then Upload your SP certificate:
OPTIONAL: To send groups as part of the SAML assertion:
In Okta, select the Sign On tab for the Palo Alto Networks app, then click Edit.
Select the appropriate filter from the groups dropdown menu and type the preferred value into the field.
Click Save.
Done!
The following SAML attributes are supported:
| Name | Value |
|---|---|
| adminrole | appuser.adminrole |
| domain | appuser.domain |
| accessdomain | appuser.accessdomain |
| groups | This will be configured in the app UI; see Group attribute instructions (step 16) above. |
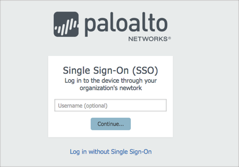
Go to [your-base-url]/php/login.php, and click Use Single Sign-On:
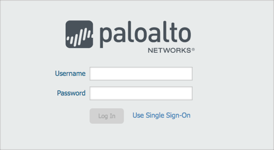
Click Continue...: