The Okta/Mulesoft - Anypoint Platform SAML integration currently supports the following features:
For more information on the listed features, visit the Okta Glossary.
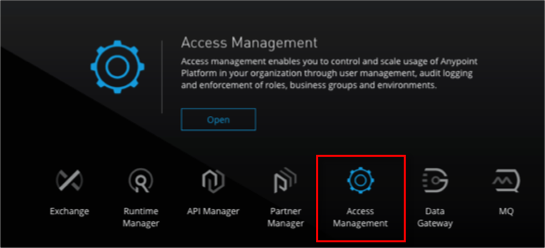
Log in to your MuleSoft – Anypoint Platform account as an administrator.
Go to Management Center > Access Management:
Select Identity Providers from the left nav, then select SAML 2.0 from the Identity Providers drop-down menu.
Follow the steps below:
Name: Enter a display name you'd like your users to see. For example: Okta.
Import IdP Metadata: Save the following as okta.xml then click Choose File to upload it:
Sign into the Okta Admin dashboard to generate this value.
Sign Off URL: Enter the URL you'd like your users to be redirected to. For example: Your Okta homepage:
Sign into the Okta Admin Dashboard to generate this variable.
Audience: Enter your MuleSoft – Anypoint Organization domain.
Single Sign-On Initiation: Specify whether SSO can be initiated by the Anypoint Platform, your identity provider (for example: Okta) or both.
Group Attribute (OPTIONAL): Enter groups to enable automated Group-Role management.
Click Create.
Click on the newly created Identity Provider.
At the end of the Assertion Consumer Service (ACS) URL line, click the button to Copy the ACS URL value.
In Okta, select the Sign On tab for the Mulesoft - Anypoint Platform SAML app, then click Edit.
Select your Email attribute value.
ACS URL: Enter the value you copied in step 4h.
Click Save.
Done!
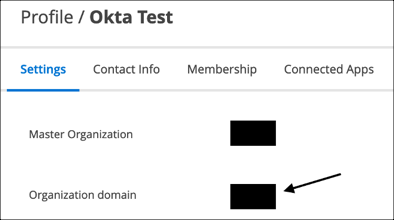
Your Organization Domain (value from step 4d) must be correctly entered in the appropriate field on the General tab in Okta or SSO may fail.
The following SAML attributes are supported:
| Name | Value |
|---|---|
| user.email OR user.userName | |
| firstname | user.firstName |
| lastname | user.lastName |
| groups | This is configured in the app UI; see Automatic MuleSoft Group Assignment – Optional section below. |
Click Custom Domain.
Enter your Organization Domain as defined in step 4d.
Click Continue with Okta (or the Display Name chosen in step 4a.
Alternatively, you can go directly to https://anypoint.mulesoft.com/login/domain/[customDomain] and click Continue with Okta.
MuleSoft supports sending user group information through the SAML assertion to assign users to corresponding Roles in MuleSoft. To take advantage of this functionality, users that you add to your MuleSoft application must belong to a group.
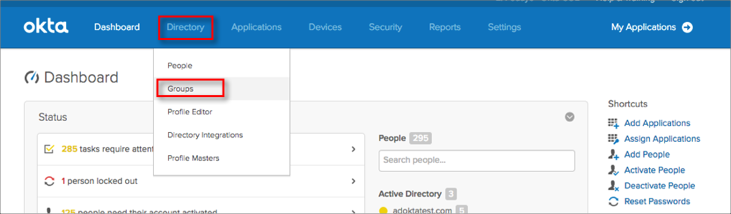
In the Okta Dashboard, select Directory > Groups, as shown below.
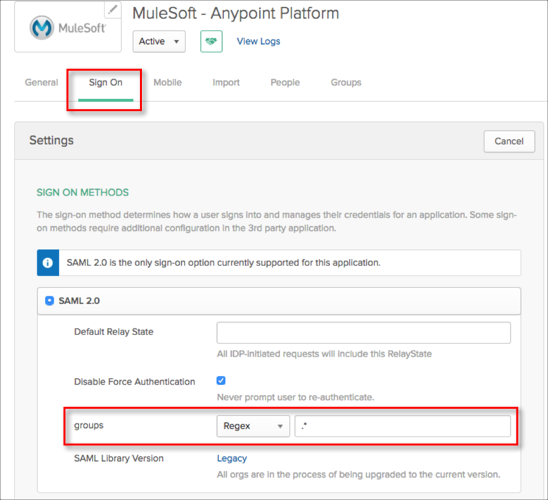
In the groups field shown above, use the dropdown menu to select the type of condition expression and the enter the condition expression that specifies the groups to send in your SAML assertion in the box.
In the example above, the condition is a regular expression (Regex) and the specification is .*. This entry specifies sending all groups to which groups the user belongs twith the assertion. You can specify the condition as needed.
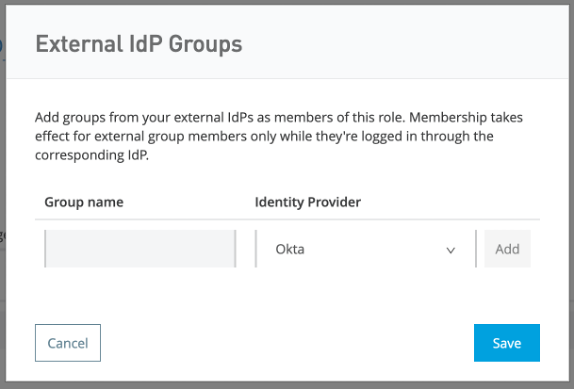
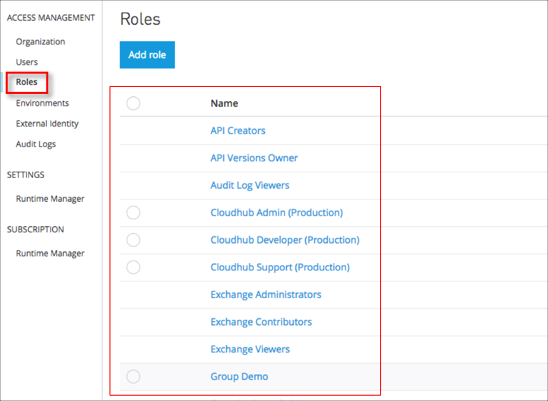
In the screen that opens, select Roles from the Access Management options in the left column. Then choose the role you want to associate with the groups that come from Okta:
In the screen that opens, Click Edit external group mapping. Enter the group name from step 2 in the Group Name field, then select Okta Identity Provider, or whatever Display Name you entered in step 4a.