SSO is available to LiquidPlanner customers on the Enterprise plan only. Contact LiquidPlanner at https://www.liquidplanner.com/contact/ for details.
The Okta/LiquidPlanner SAML integration currently supports the following features:
For more information on the listed features, visit the Okta Glossary.
Login to your LiquidPlanner account as a workspace owner.
Click on your profile picture.
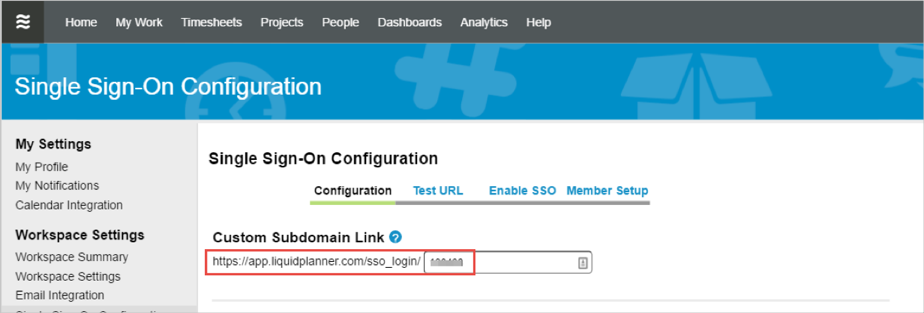
Select Settings > Single Sign-On Configuration.
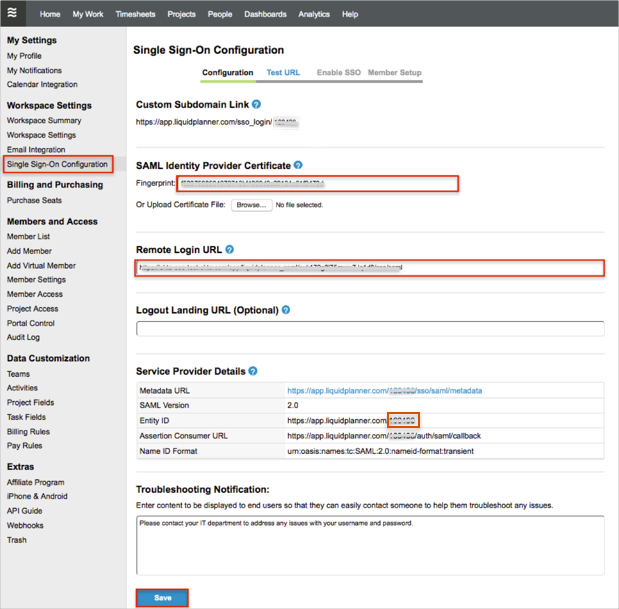
In the Single Sign-On Configuration section, enter the following (see screen shot at end of step for reference):
For example if your Entity ID is https://app.liquidplanner.com/0000, you need to save the 0000 value).
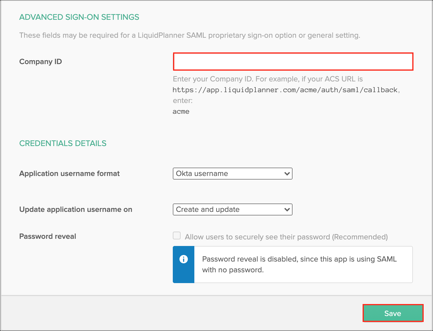
In Okta, select the Sign On tab for the LiquidPlanner SAML app, then click Edit
Scroll down to the ADVANCED SIGN-SETTINGS section.
Enter the portion of the Entity ID you saved (see step 4) into the Company ID field.
Click Save:
Back in LiquidPlanner, locate the Test Your Configuration section and click the Test Login button:
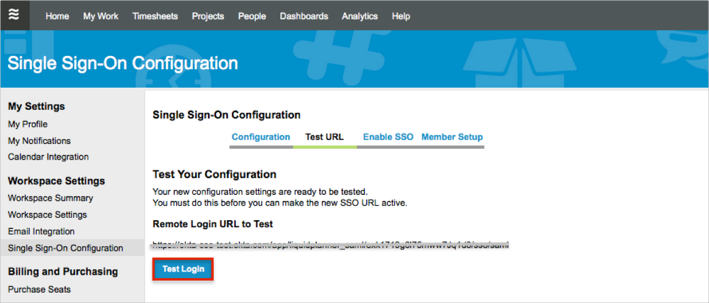
Wait for a Your test was successful. You can enable SSO for your space message to appear.
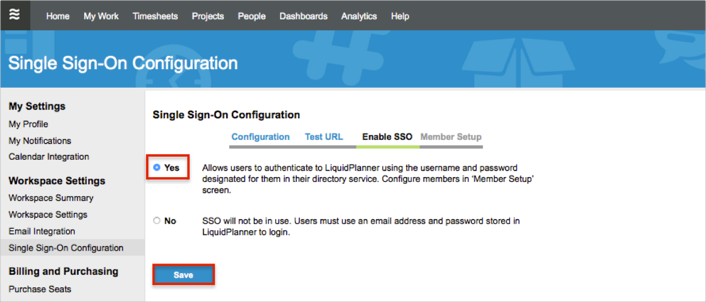
Click the Enable SSO link.

In the Enable SSO section:
Click Yes.
Click Save.
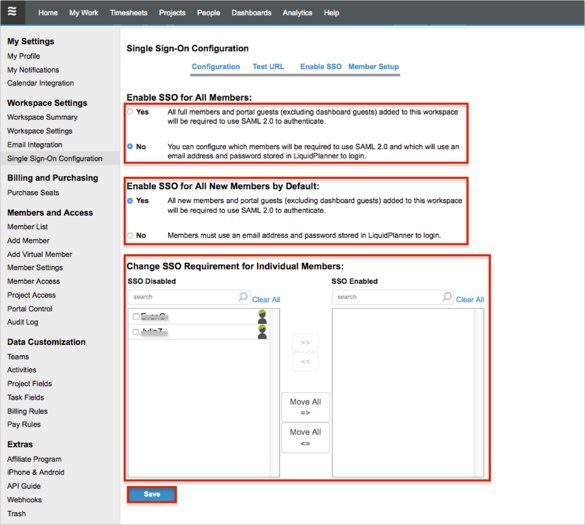
In the Member Setup section:
Under Enable SSO for All Members:
Select Yes if you need all workspace members and portal guests to be required to use SAML 2.0 to authenticate.
Select No if you need to configure which members will be required to use SAML 2.0 and which will use an email address and password stored in LiquidPlanner to login.
Under Under Enable SSO for All New Members by Default:
Select Yes if you need all new members and portal guests added to your workspace to be required to use SAML 2.0 to authenticate.
Select No if your members must use an email address and password stored in LiquidPlanner to login.
Under SSO Requirement for Individual Members:
To move specific members into SSO Enabled, select them from the SSO Disabled box and click the >> button. Alternatively click the Move All => button to move everyone at once.
Click Save:
Done!
Make sure that you entered the correct value in the Company ID field under the Sign On tab. Using the wrong values will prevent you from authenticating via SAML to LiquidPlanner SAML.
Main Flow:
Open LiquidPlanner login page: https://app.liquidplanner.com/login.
Enter your Business Email, then click Sign In:

Alternative Flow:
Open your Custom Subdomain Link: https://app.liquidplanner.com/sso_login/[yourCustomSubdomain]: