The Okta/Dialpad SAML integration currently supports the following features:
For more information on the listed features, visit the Okta Glossary.
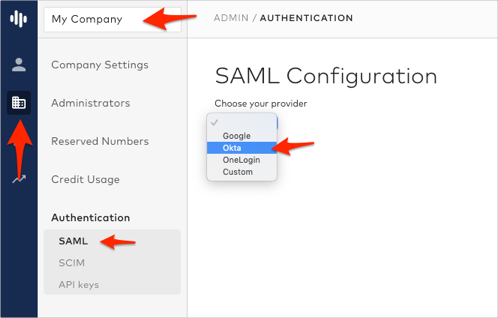
Login your Dialpad account as an administrator.
Navigate to Admin Settings > My Company > Authentication > SAML, then select Okta from the provider dropdown menu:
Follow the steps below:
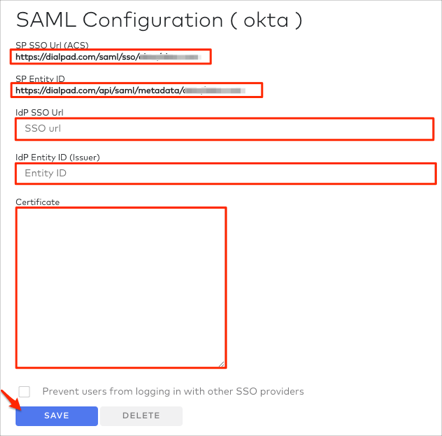
SP SSO Url (ACS): Make a copy of this value, you will need it later.
SP Entity ID: Make a copy of this value, you will need it later.
IdP SSO URL:Copy and paste the following:
Sign into the Okta Admin Dashboard to generate this variable.
IdP Entity ID (Issuer):Copy and paste the following:
Sign into the Okta Admin Dashboard to generate this variable.
Certificate: Copy and paste the following:
Sign into the Okta Admin Dashboard to generate this variable.
Click Save:
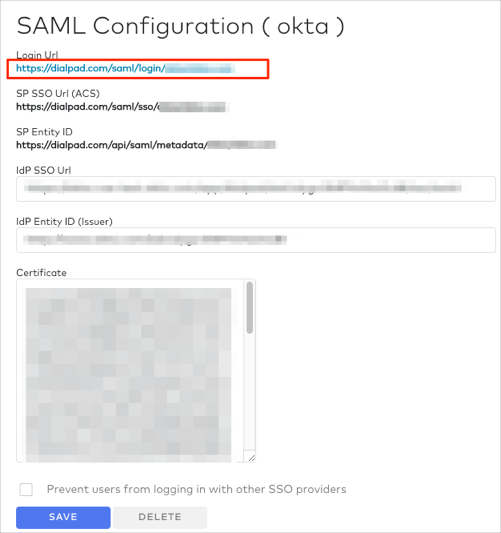
Still on the Dialpad SAML Configuration page, make a copy of your Login Url:
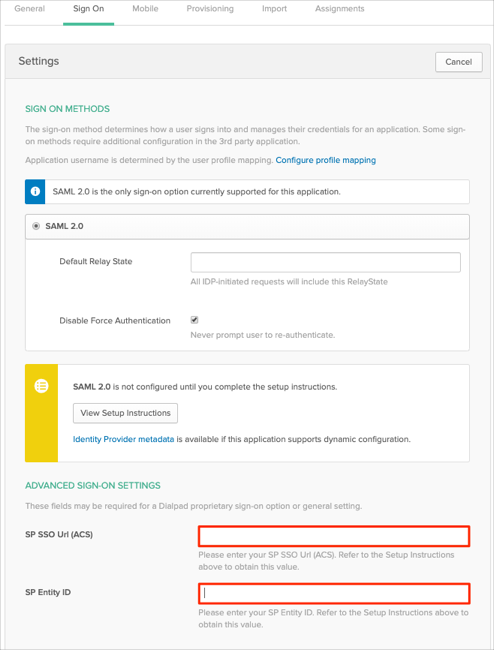
In Okta, select the Sign On tab for the Dialpad app, then click Edit.
Scroll down to the ADVANCED SIGN-ON SETTINGS section.
Enter the SP SSO Url (ACS) and SP Entity ID values (step 2) into the corresponding fields.
Click Save:
Done!
The following SAML attributes are supported:
| Name | Value |
|---|---|
| user.email | |
| FirstName | user.firstName |
| LastName | user.lastName |
Go to your Login Url you made a copy of in step 4.