Read this before you enable SAML
Enabling SAML will affect all users who use this application, which means that users will not be able to sign-in through their regular log-in page. They will only be able to access the app through the Okta service.
Backup URL
Cisco Webex does not provide backup log-in URL where users can sign-in using their normal username and password. You can email Cisco Webex support to turn off SAML, if necessary.
The Okta/Cisco Webex SAML integration currently supports the following features:
For more information on the listed features, visit the Okta Glossary.
Login to the Cisco Webex Control Hub at https://admin.webex.com as an administrator
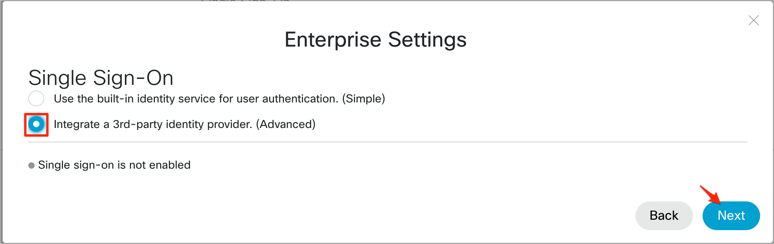
Navigate to Settings > Authentication, then click Modify:

Select Integrate a 3rd-party provider. (Advanced), then click Next:
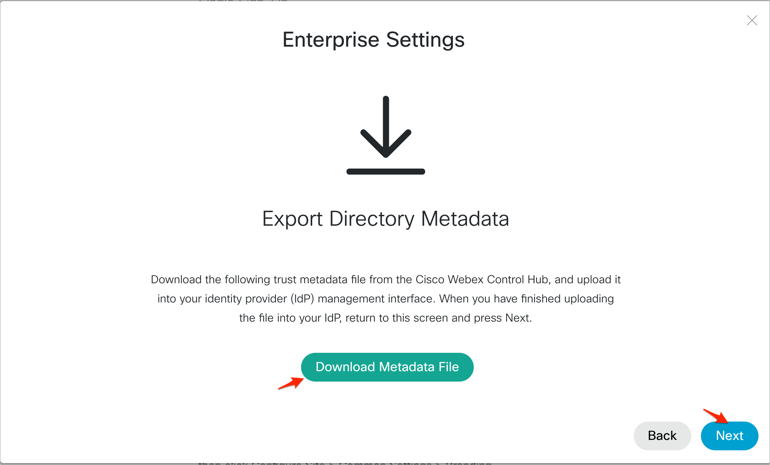
Click Download Metadata File, then click Next:
Open the downloaded Metadata file in a text editor. Locate and make a copy of the value of the following values:
entityID:
The value should look like this: https://idbroker.webex.com/1a2b3c4d...

AssertionConsumerService:
The value should look like this: https://idbroker.webex.com/idb/Consumer/metaAlias/1a2b3c4d.../sp

In Okta, select the Sign On tab for the Cisco Webex Teams app, then click Edit.
Enter the entityID and AssertionConsumerService values you made a copy of in step 5 into the corresponding fields.
uid SAML attribute: Select the value that will be used for the uid SAML attribute (either Email or Username).
Click Save:

Copy and paste the following IDP Metadata into a file and save as metadata.xml (do not use any spaces in the file name).
Sign in to Okta Admin app to have this variable generated for you.
Go back to the Enterprise Settings page. Click file browser to locate and upload the metadata.xml file you've just saved. Check Allow self-signed certificate in Metadata (less secure), then click Next:

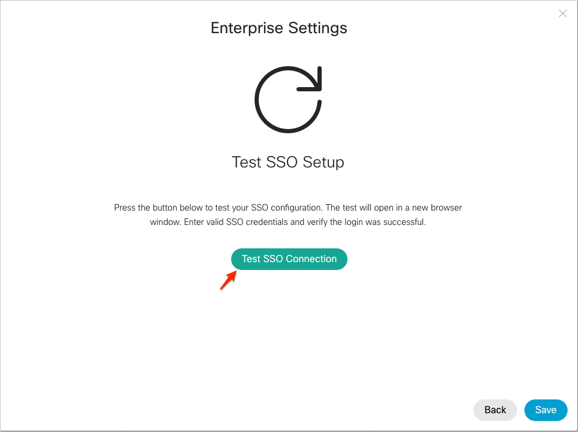
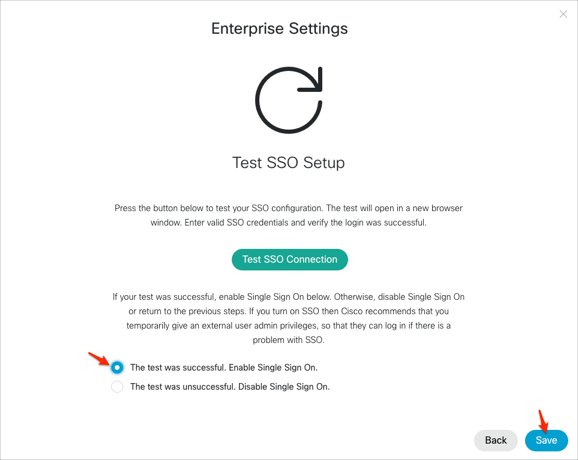
Click Test SSO Connection.
Note: A new browser window will open - make sure that your browser allows for pop-ups.
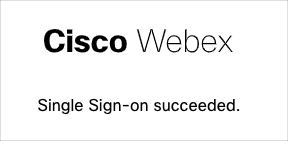
You should see a Single Sign-on succeeded message in a new browser tab. Close this tab.
Select the The test was successful. Enable Single Sign On. option, then click Save:
Done!
The following SAML attributes are supported:
| Name | Value |
|---|---|
| uid | Either user.email or user.userName (depending upon what you selected for uid SAML attribute (step 6)) |
Enter your email, then click Next:
