The Okta/BT Cloud Phone SAML integration currently supports the following features:
For more information on the listed features, visit the Okta Glossary.
Login to BT Cloud Phone as as administrator.
Navigate to Tools > Single Sign-on:

In the Set up SSO by yourself section, click Edit:

Use the link below to download and save your IdP Metadata file:
Sign into the Okta Admin dashboard to generate this value.
In the Upload IdP Metadata section, select Upload with file from the dropdown menu, then click Browse to locate and update the metadata file you just saved (step 4):

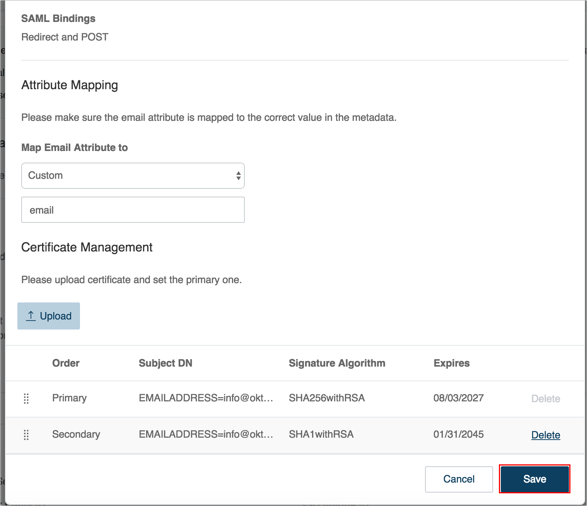
In the Attribute Mapping section, select Custom from the Map Email Attribute to dropdown menu, then enter email in the field that appears:

Click Save:
In the Set up SSO by yourself section, click Download to obtain your SP metadata:

Open the SP metadata file you just downloaded in a text editor and take note of the entityID and Location values,

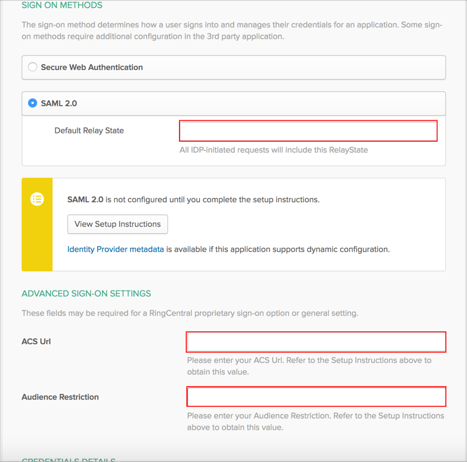
In Okta, select the Sign On tab for the BT Cloud Phone app, then click Edit:
Default Relay State: Enter: https://portal.btcloudphone.bt.com/mobile/ssoLogin.
Audience Restriction: Copy the entityID value from the metadata file (step 11) into this field.
ASC URL: Copy the Location value from the metadata file (step 11) into this field.
Click Save:
Done!
The following SAML attributes are supported:
| Name | Value |
|---|---|
| ${user.userName} | |
| number | user.primaryPhone |
Go to https://portal.btcloudphone.bt.com/login/startupSSOLogin.html.
