The Okta/Anodot SAML integration currently supports the following features:
For more information on the listed features, visit the Okta Glossary.
Log in to your Anodot account as an Administrator.
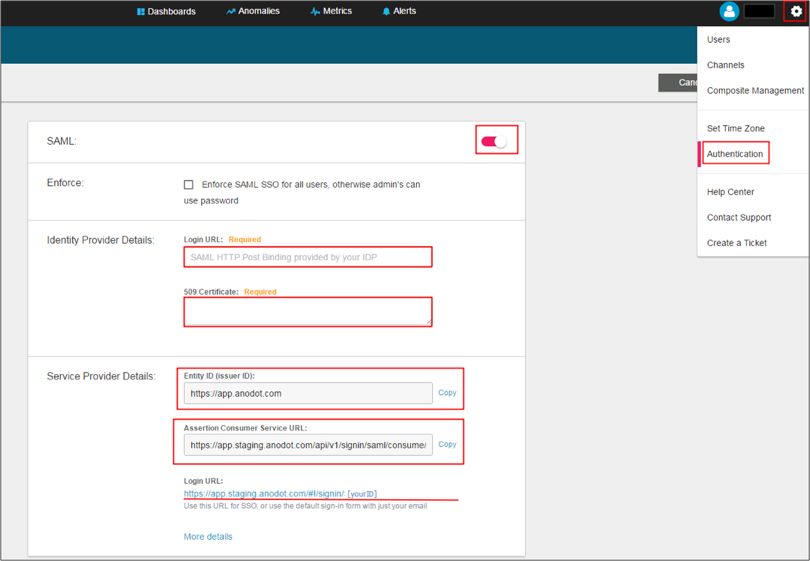
Navigate to Settings > Authentication.
Enter the following (see screen shot at end of step for reference):
Turn the SAML switch on.
Login URL: Copy and paste the following:
Sign into the Okta Admin Dashboard to generate this variable.
509 Certificate: Copy and paste the following (in PEM text format):
Sign into the Okta Admin Dashboard to generate this variable.
Make a copy of the value for Entity ID (Issuer ID).
Make a copy of the value for Assertion Customer Service URL.
Click Save.
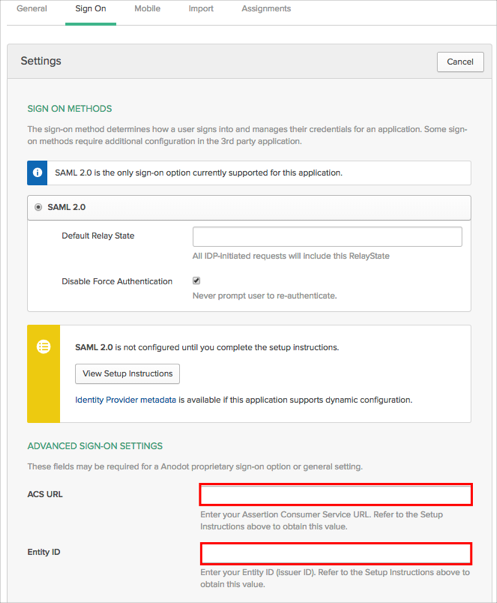
In Okta, select the Sign On tab for the Anodot app, then click Edit.
Enter the Entity ID (Issuer ID) and the Assertion Consumer Service URL values you made copies of in step 3 into the corresponding fields..
Click Save.
Done!
The following SAML attributes are supported:
| Name | Value |
|---|---|
| firstName | user.firstName |
| lastName | user.lastName |
CASE 1:
Open this URL https://app.anodot.com/#!/signin/[yourID].
CASE 2:
Open this URL: https://app.anodot.com/.
Enter your Email (password is ignored and can be left blank).
Click Sign in.