This guide provides the steps required to configure Provisioning for ServiceNow.
This guide provides the steps required to configure Provisioning for ServiceNow and includes the following sections:
The following provisioning features are supported:
Push new users
New users created through OKTA will also be created in the third party application.
Push user deactivation
Deactivating the user or disabling the user's access to the application through OKTA will deactivate the user in the third party application.
Push profile updates
Updates made to the user's profile through OKTA will be pushed to the third party application.
Import new users
New users created in the third party application will be downloaded and turned in to new AppUser objects, for matching against existing OKTA users.
Import profile updates
Updates made to a user's profile in the third party application will be downloaded and applies to the profile fields stored locally in OKTA. If the app is the system of record for the user, changes made to core profile fields (email, first name, last name, etc) will be applied to the Okta user profile. If the app is NOT the system of record for the user, only changes made to app-specific fields will be applied to the local user profile.
Group Push
Groups and their members can be pushed to remote systems. You can find more information about using group push operations (including Group Push enhancements) here: Using Group Push.
Group Push enhancements for this application are currently generally available in all Preview orgs. For Production orgs, contact Okta Support and ask them to enable the following feature flag:
Reactivate Users
Reactivating the user through Okta will reactivate the user in the 3rd party application.
Sync Password
Pushes user password from Okta to the 3rd party application.
Before you configure provisioning for ServiceNow:
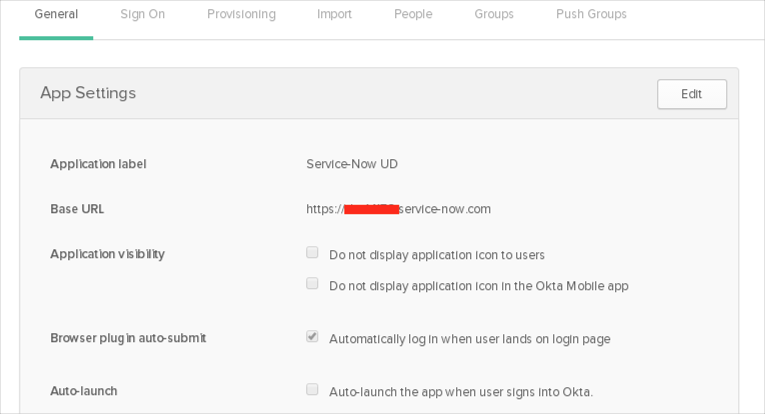
Make sure you have configured your complete Base URL under the General tab:
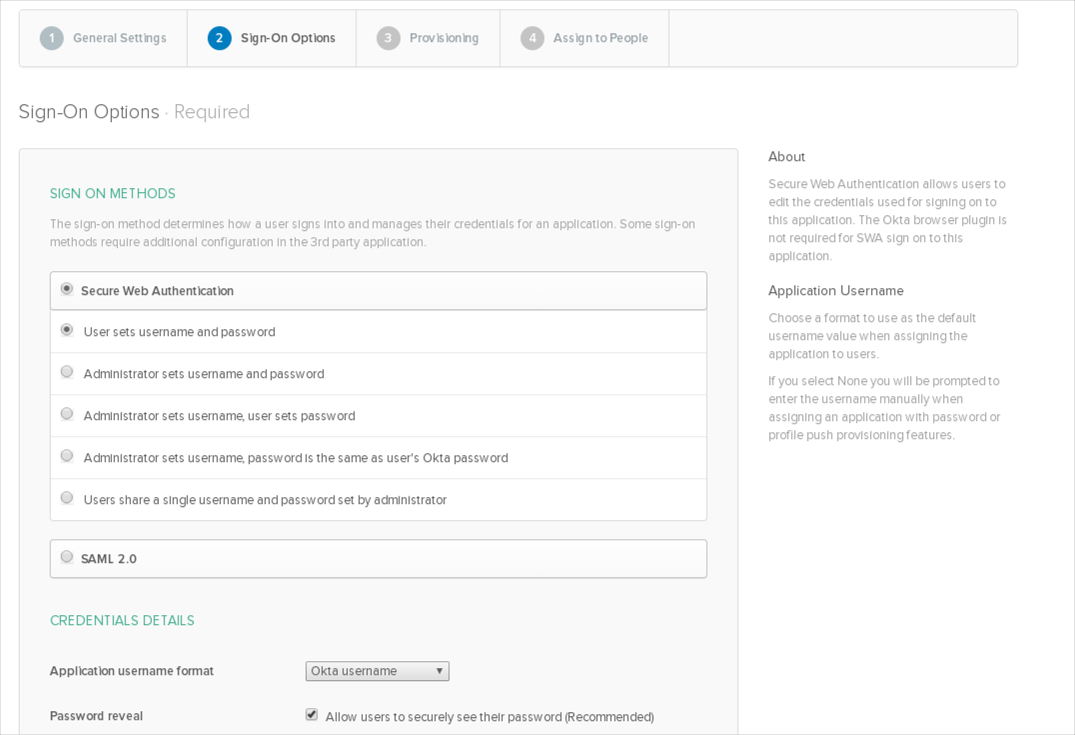
Configure your Sign-On options on the next tab:
Click Next to take you back to the Provisioning tab:
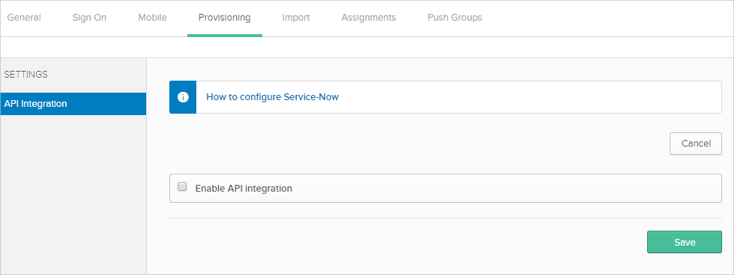
Configure your Provisioning settings for ServiceNow as follows:
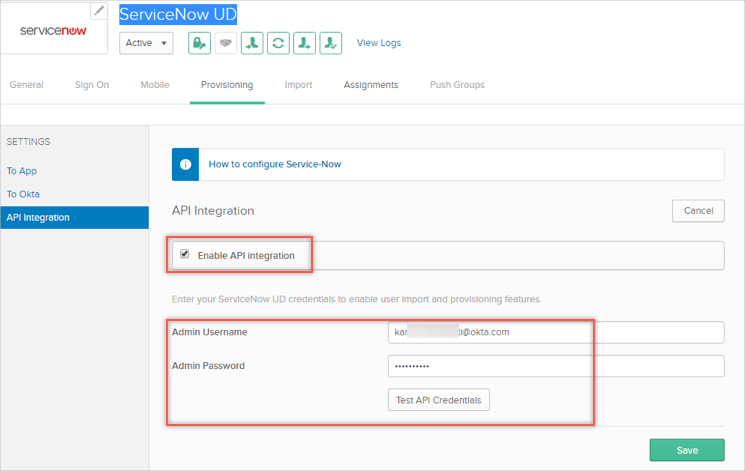
Check the Enable API Integration box.
Enter your ServiceNow API Credentials:
Admin User Name: Enter a ServiceNow username with administrator permissions for your organization.
Admin Password: Enter a password for your administrator account (above).
Validate the credentials by clicking Test API Credentials.
Select To App in the left panel, then select the Provisioning Features you want to enable.
You can now assign people to the app (if needed) and finish the application setup.
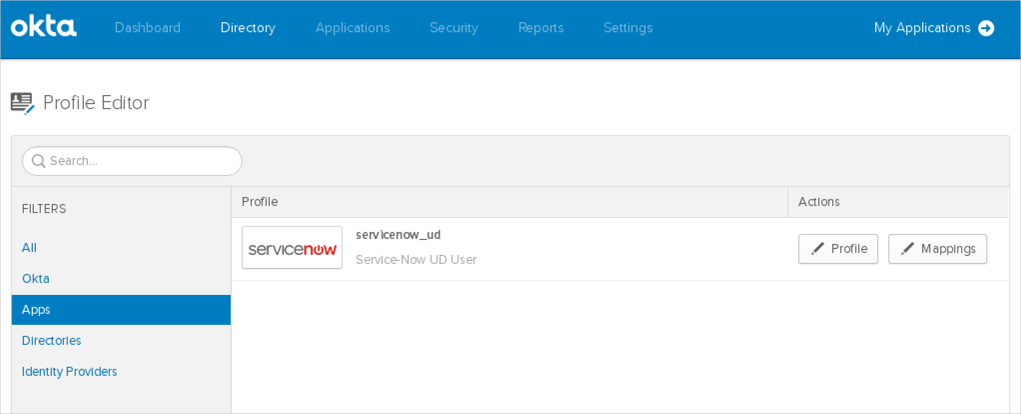
You can check your default attributes in Directory > Profile Editor>APPS section in the left navigation pane, then find your app in the list:
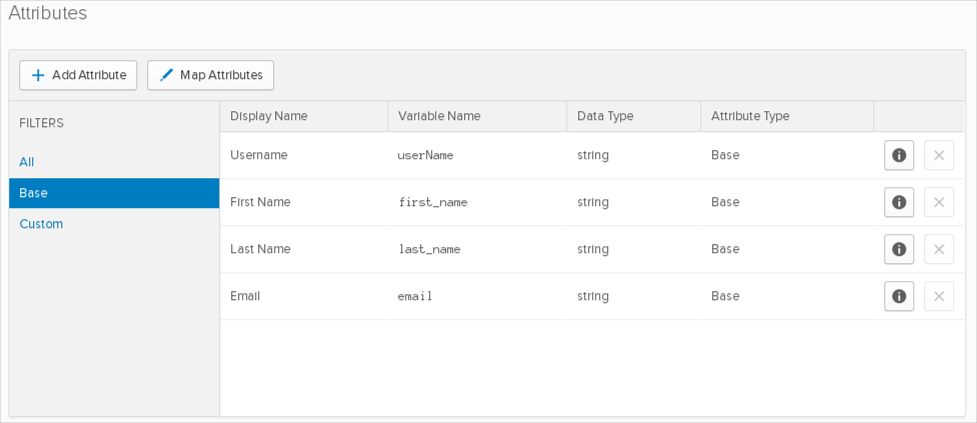
The total count of default attributes is 20.
Base Attributes
Custom Attributes
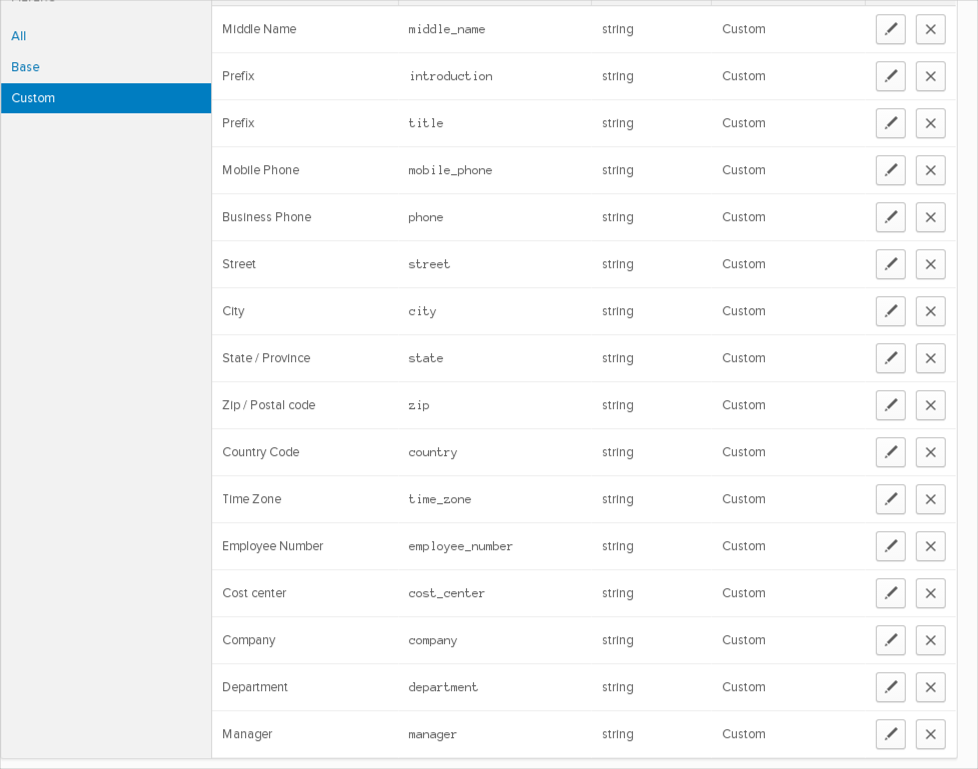
You can now provision custom attributes to ServiceNow with Schema Discovery.
To add extra attributes to a User’s Profile, follow the instructions below:
In Okta, from the Admin dashboard, select Directory > Profile Editor.
Select the APPS section in the left navigation pane, then find your app in the list.
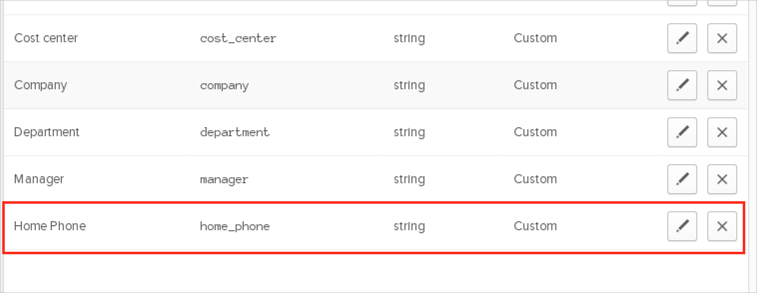
Check the list of attributes, and if you decide you need more, click Add Attribute. A list of extended attributes will appear:
Select the attributes you want to add (for example Home Phone), then click Save.
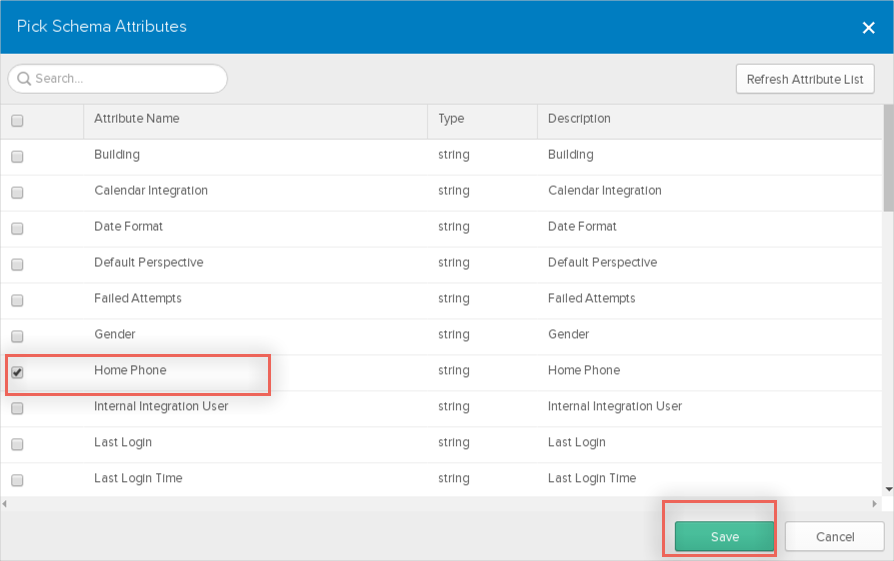
The added attribute(s) should be present after refreshing the page in the list of Custom. You can now import and push these user attribute values to/from ServiceNow.
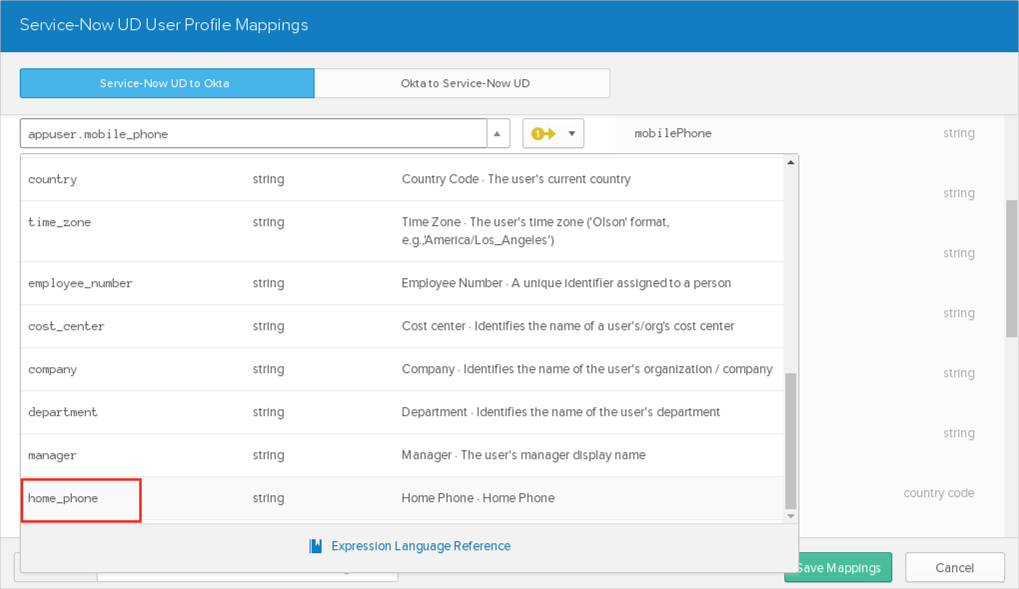
You can now create mappings for your custom attributes:
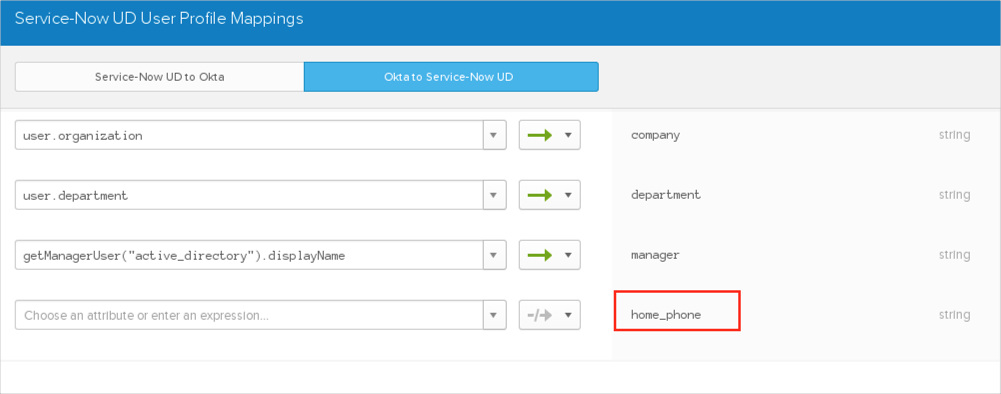
There are predefined Active Directory (AD) mappings for certain fields that are not modifiable and used only in cases where AD is configured as the source.
AD.managerDn > ServiceNow.manager
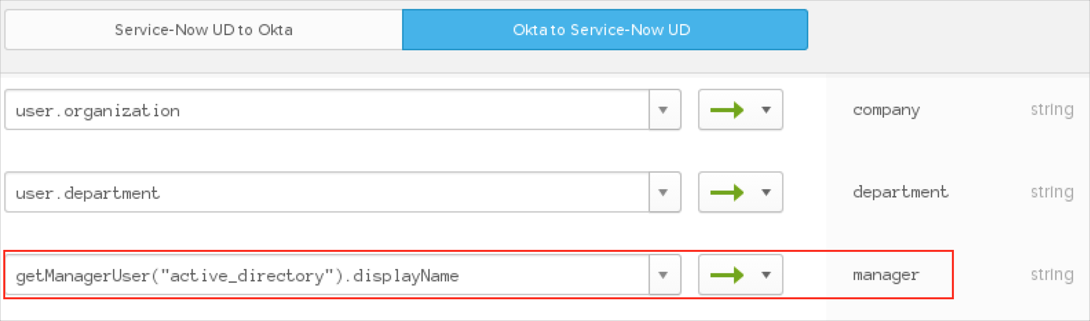
In case the AD.managerDn value does not exist in ServiceNow and was set in AD for a certain user, the manager field value for this user will have the old value in ServiceNow.
getManagerUser(managerSource).$attribute |
Gets the manager’s Okta user attribute values |
getManagerUser("active_directory").firstName |
getManagerAppUser(managerSource, attributeSource).$attribute |
Gets the manager’s app user attribute values for the app user of any appinstance |
getManagerAppUser("active_directory", "google").firstName |
getAssistantUser(assistantSource).$attribute |
Gets the assistant’s Okta user attribute values |
getAssistantUser("active_directory").firstName |
getAssistantAppUser(assistantSource, attributeSource).$attribute |
Gets the assistant’s app user attribute values for the app user of any appinstance. |
getAssistantAppUser("active_directory", "google").firstName |
Pass the correct app name for the managerSource, assistantSource, and attributeSource parameters.
Note: At this time, only active_directory is supported for managerSource and assistantSource.
| Function | Description |
|---|---|
hasDirectoryUser() |
Checks whether the user has an Active Directory assignment and returns a boolean |
findDirectoryUser() |
Finds the Active Directory App user object and returns that object, or null if the user has more than one or no Active Directory assignments |
If you have custom mapping for your existent ServiceNow app.
If you map the custom attribute from Okta profile to a field that is hard-coded in the ServiceNow connector and not used by the org, then assign that hard coded field to the appropriate column name in ServiceNow - make this mapping manually for new ServiceNow app (as described in Schema Discovery).
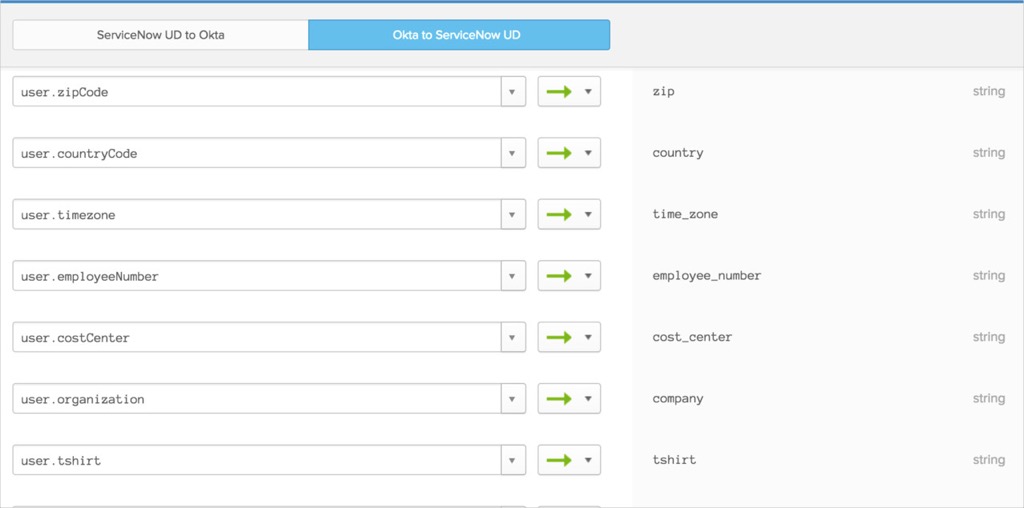
For example, let's say there is a T-shirt Size attribute in the Okta profile. And the title attribute is not used by the org today:
The customer maps the user.tshirt to ServiceNow appuser.title:
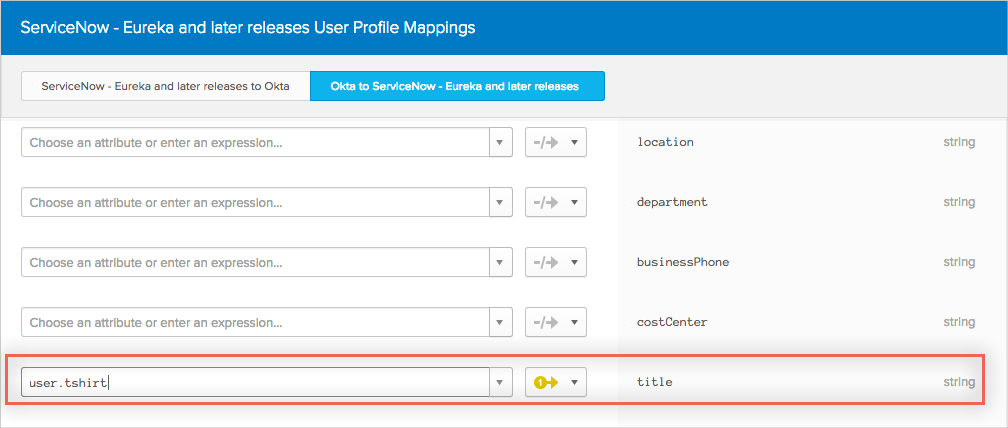
In the Provisioning section of the ServiceNow app, the user then enters tshirt as the column name that title maps to.

Now, (after adding attributes as described in Schema Discovery) it should looks like:
Follow the steps below to migrate from ServiceNow Eureka and earlier versions, to ServiceNow UD-enabled:
Disable provisioning for your old ServiceNow (at a minimum, turn off user deactivation under the Provisioning tab) instance.
Configure your new ServiceNow UD app instance and enable provisioning it.
Select Advanced: Configure Import Matching Rules, then in the EXACT IMPORT MATCH section, select Auto-confirm match from the When exact match found dropdown menu:
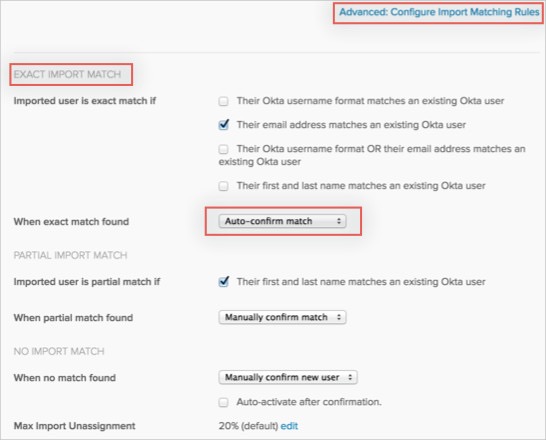
Go to your new ServiceNow UD app instance and perform an import new user. All existing users will be auto-confirmed.
After successful migration, disable your old ServiceNow app instance or hide it for end users to avoid confusion for having duplicated chiclets for ServiceNow on their dashboards.
Users without First Name/Last Name/Email in their ServiceNow profiles cannot be imported to Okta as new users.
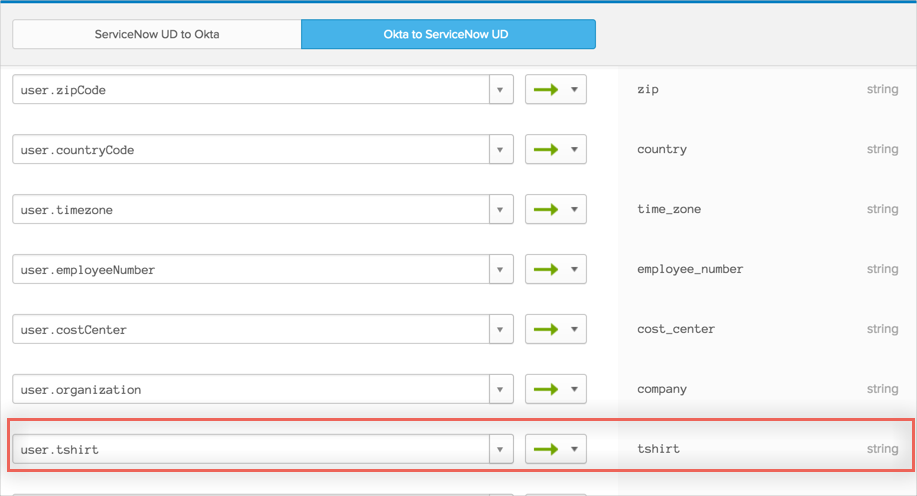
If you have custom mapping for your existent ServiceNow app such as adUser.tshirt > oktaUser.title > snowUser.title and configure tshirt as the column name for title attribute in ServiceNow Provisioning, you should configure the same mapping for new app instance as follows:
Import user attributes from ServiceNow.
Add tshirt attribute to user profile.
Configure mapping like adUser.tshirt > oktaUser.tshirt > snowUser.tshirt.
For example, assume there is a T-shirt Size attribute in the Okta profile. And the title attribute is not used by the org today (current behavior).
Map the user.tshirt → ServiceNow appuser.title:
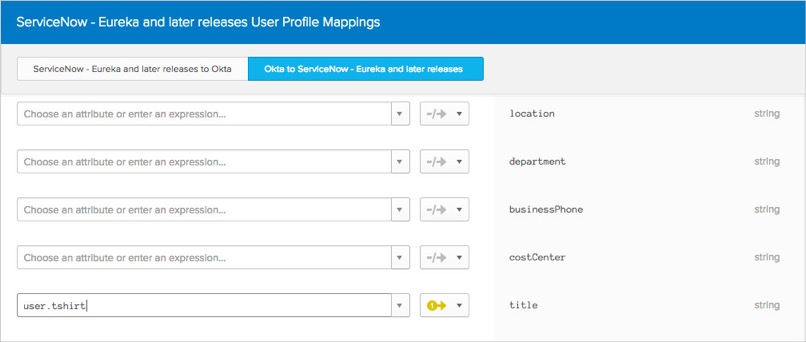
In the Provisioning section of the ServiceNow app configuration, enter tshirt as the column name that title maps to:

This results in the following:
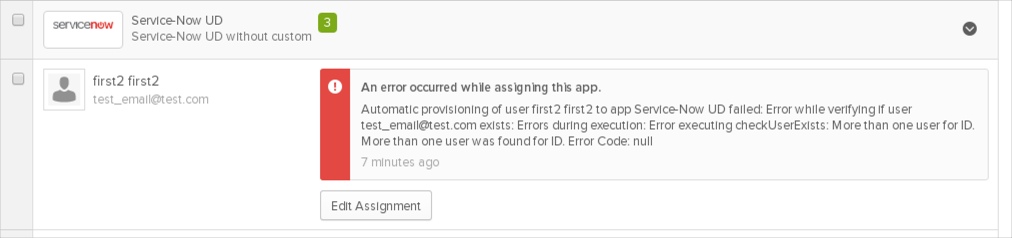
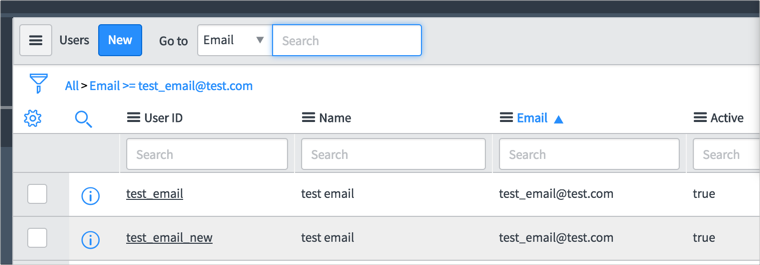
If the ServiceNow app contains two users with different User IDs and the same email (for example email=test_email@test.com), and we try create user with the same email and username (for example Okta UserName=Okta email = test_email@test.com) from Okta side, we will see the following error:
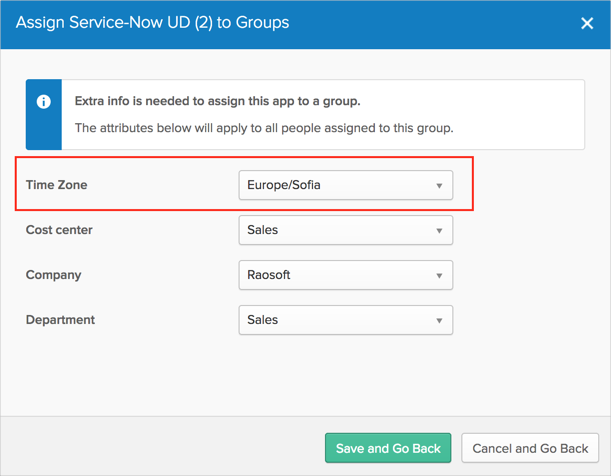
In ServiceNow UD.1.0.4 version, the Time Zone user property was moved to user group level: once the ServiceNow UD app is assigned to a user group, the admin can select the Time Zone value for all users in this group. Also the value now is populated from dropdown list instead of regular text field as before.
The change above will be applied for all applications created with new connector version. For existing connectors there are two options:
Ask support to migrate UD schema for this app to updated version. Note that all imported custom user attributes will be dropped and you should re-add them and re-import users to fetch attributes data from ServiceNow.
Continue using connector without update.
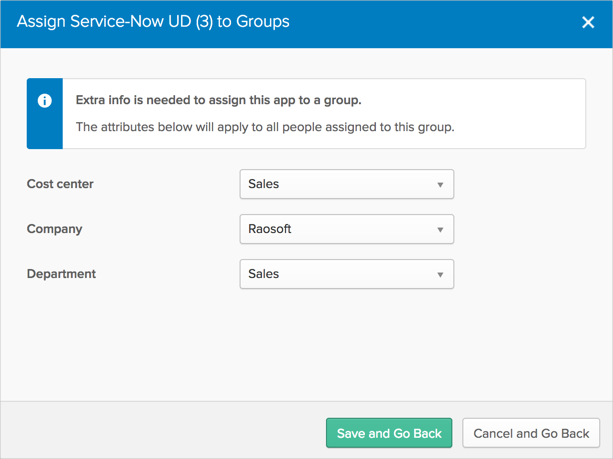
To determine if you have the Time Zone attribute on group level, try to assign the ServiceNow application to a user group:
No Time Zone (old version):
With Time Zone (new version):
Comparing with the ServiceNow - Eureka and later releases app, the following are new:
Geneva, Helsinki, Istanbul ServiceNow versions support
User Schema Discovery support with unlimited custom attributes
Flexible user attribute mapping support
Okta ServiceNow plugin isn't required for provisioning