This guide provides the steps required to configure Provisioning for Roambi Business and includes the following sections:
The following provisioning features are supported:
Push new users
New users created through Okta will also be created in the third party application.
Push user deactivation
Deactivating the user or disabling the user's access to the application through Okta will deactivate the user in the third party application.
Reactivate Users
User accounts can be reactivated in the application.
Push profile update
Updates made to the user's profile through Okta will be pushed to the third party application.
Push password update
Changes made to the user's password will be pushed to the third party application.
Import new users
New users created in the third party application will be downloaded and turned in to new AppUser objects, for matching against existing Okta users.
Import profile updates
Updates made to a user's profile in the third party application will be downloaded and applies to the profile fields stored locally in Okta. If the app is the system of record for the user, changes made to core profile fields (email, first name, last name, etc) will be applied to the Okta user profile. If the app is NOT the system of record for the user, only changes made to app-specific fields will be applied to the local user profile.
Complete the following before you configure provisioning for Roambi Business:
To create a new API client in Roambi do the following:
Go to the Administration module.
Select API Clients.
Click Create new API Client.
Provide any name for this client.
Input redirect URI (by default http://okta.com).
Click Save.
Open the client you just created.
Make a copy of the Consumer Key, the Consumer Secret and the Redirect URI.
For API access your admin user should be configured to use explicit password, not SAML authentication, as follows:
Use a Roambi username with administrator permissions for your organization.
A password for your administrator account.
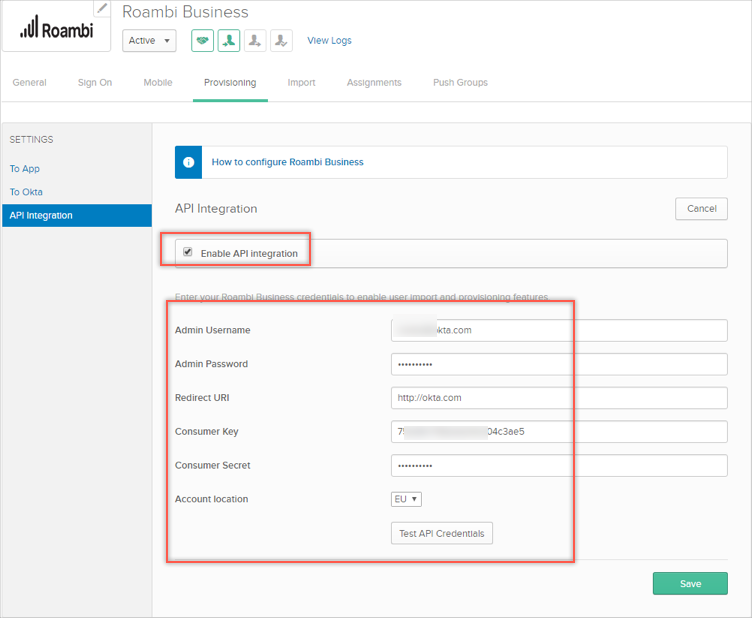
Configure Provisioning for Roambi Business as follows:
Check the Enable API Integration box.
Enter the following credentials:
Admin Username: Enter a Roambi Admin username.
Admin Password: Enter the password for the above Admin user.
Redirect URI. Consumer Key, Consumer Secret: Enter the values you copied for these fields as described in Requirements, above.
Account Location:
Select US if you're using https://business.roambi.com.
Select EU if you're on https://eu.roambi.com.
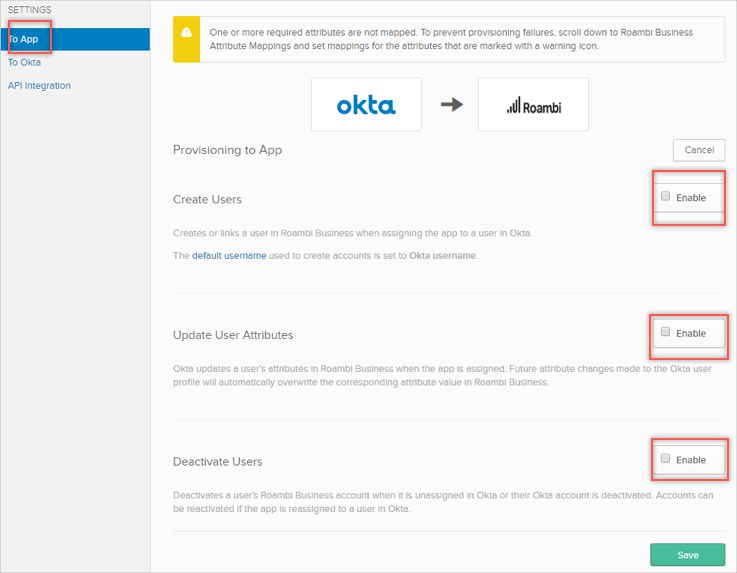
Select To App in the left panel, then select the Provisioning Features you want to enable.
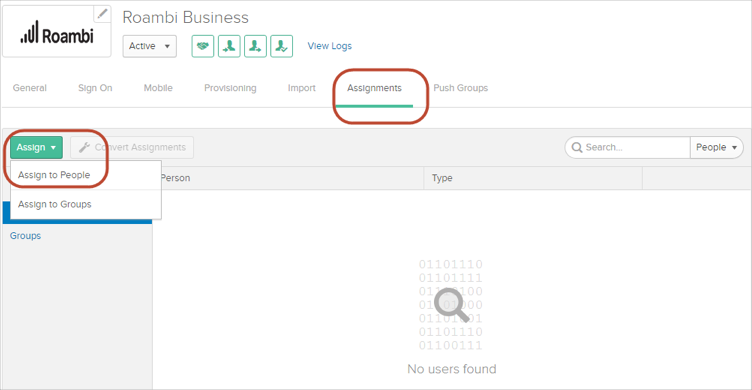
To assign users to the Roambi Business app:
Open the Roambi Business app, select the Assignments tab, click Assign, then select Assign to People:
In the Assign Roambi Business to People dialog, select a user, then click Assign:

You can select which User Role to assign to a user by selecting corresponding value from the User Role dropdown list:
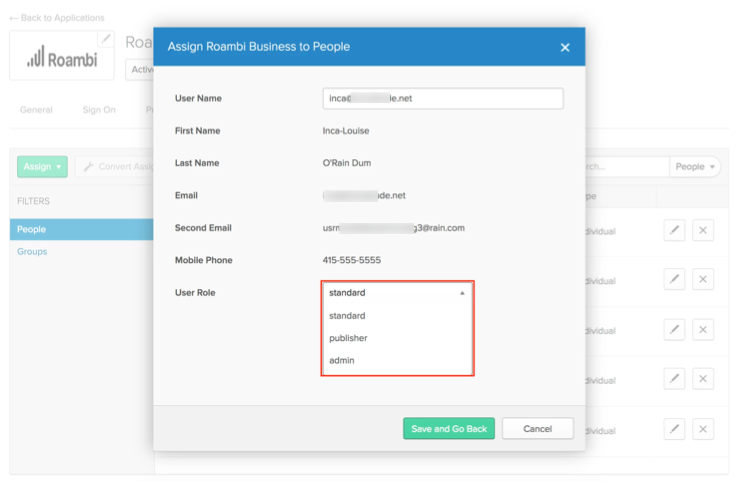
Click Save and Go Back.
Api token issues:
If you see any errors related to token validity, go to the Provisioning tab for your Roambi Business application and re-save this tab (click Edit, then Save).