In addition to providing the JIRA Cloud Web application through the Okta Application Network (OAN), Okta also supports single sign-on integration between Okta and the JIRA On-Premises SAML app. To configure the integration, you must install Okta's custom JIRA authenticator on your JIRA server.
The Current JIRA JAR Version History article lists the JIRA on-premise versions that support recent versions of the JAR. You can access the latest version of the okta-jira.jar file from the Okta Downloads page. Download the file before you begin the integration.
For more information about JIRA custom authenticators, see Single Sign-on Integration with JIRA and Confluence. For information about configuring provisioning for the app, see Configuring Provisioning for Jira On-Premise.
Note: To add the JIRA Cloud web app, see Applications.
Note: Steps 5 and 8 below provide links to other documents for additional instructions.
Download the appropriate version of the okta-jira.jar file from the Okta Downloads page. For information about which version of the JAR to download for use with your JIRA On-Premises SAML app, see Current JIRA JAR Version History. Later you will copy this file to your JIRA server.
Select Applications from the Applications.
Click Add Application, then search for Atlassian Jira Server.
Click Add.
Follow the onscreen prompts. Detailed instructions for this part of the installation here: Applications.
When you have completed initial installation, the Home page of the newly-created app appears.
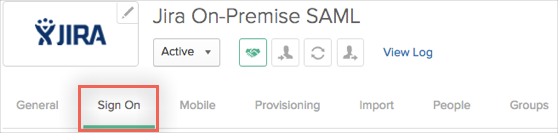
Click the Sign On tab:
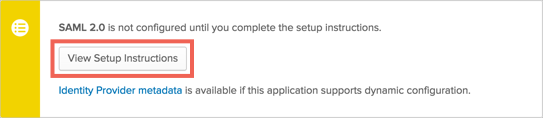
In the Settings section, click View Setup Instructions to open the article How to Configure JIRA On-Premise SAML Application:
Perform the steps in How to Configure JIRA On-Premise SAML Application. The procedure is summarized as follows:
Create a file okta-config-jira.xml on the JIRA server.
Paste the provided configuration into okta-config-jira.xml.
Update your [jira_webdir]/WEB-INF/classes/seraph-config.xml.
Copy okta-jira.jar to the [jira_webdir]/WEB-INF/lib directory.
Create a file okta-login.jsp in the [jira_webdir]/atlassian-jira directory and paste provided content into it.
Restart your JIRA service.
You can perform additional configuration by modifying okta-config-jira.xml.
Short summary of configurable functionality:
Prevent authentication with SAML for users with specific IP addresses
Prevent authentication with SAML for users by username
Prevent authentication with SAML for users by group name
Prevent authentication with SAML for JIRA resources with specific URL pattern (spUrls block)
Firing extra events (LoginEvent and UserAuthenticatedEvent)