This guide provides the steps required to configure Provisioning for Atlassian Jira Server.
The following provisioning features are supported:
Push new users
New users created through OKTA will also be created in the third party application.
Push profile update
Updates made to the user's profile through OKTA will be pushed to the third party application.
Push password update
Changes made to the user's password will be pushed to the third party application
Import new users
New users created in the third party application will be downloaded and turned in to new AppUser objects, for matching against existing OKTA users.
Push Group
Groups and their members can be pushed to remote systems. You can find more information about using group push operations (including Group Push enhancements) here: Using Group Push.
Import profile updates
You are now ready to configure your Provisioning settings as follows:
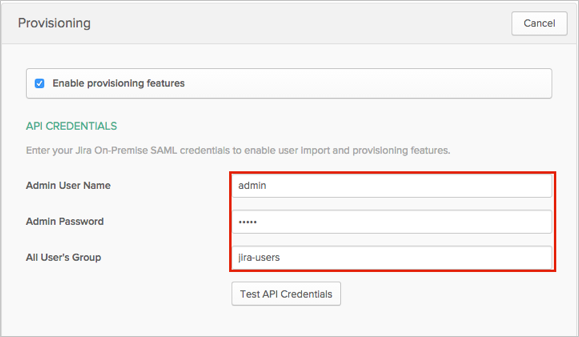
Check the Enable API Integration box.
Enter the following:
Admin User Name: An admin username, with rights for user provisioning.
Admin Password: The admin password.
All User’s Group: A group name, from which users are imported.
Note:
The default group for Jira Software is jira-software-users or jira-users depending on your Jira instance. Check your default group by navigating to Jira site administration > User Management > Groups.
Select To App in the left panel, then select the Provisioning Features you want to enable:
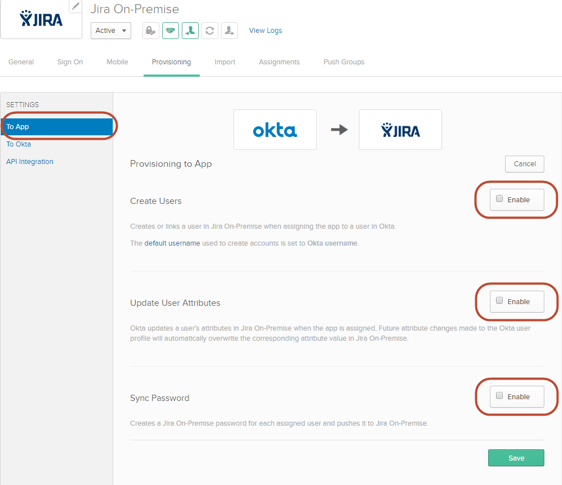
Click Save.
Atlassian Jira Server SAML does not support User's Schema Discovery.