Notes
Although the secondEmail attribute is listed in the Box User Profile (appuser), this Box provisioning integration does not currently push this attribute value into Box.
This guide provides the steps required to configure Provisioning for Box and includes the following sections:
The following features are supported:
Push Groups
Groups and their members can be pushed to remote systems.
Import New Users
New users created in the third party application will be downloaded into Okta.
Import Profile Updates
Updates made to a users profile in the third party application will be downloaded and applied to the profile fields stored locally in Okta.
Push New Users
New users created in Okta will be pushed to the application. Also have the ability to create personal folders for these new users in Box.
Push Profile Updates
Changes made to a users profile in Okta will be pushed to the application.
Push User Deactivation
Deactivating users in Okta will deactivate the users account in the application. Also have the ability to transfer/delete deactivated user's folders in Box.
Reactivate Users
User accounts can be reactivated in the application.
Configure Provisioning for Box as follows:
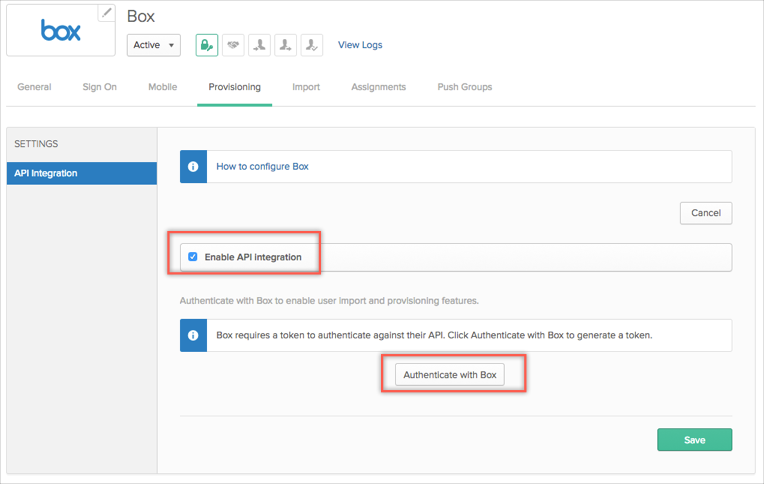
Under the Provisioning tab, click Configure API Integration.
Check the Enable API Integration box.
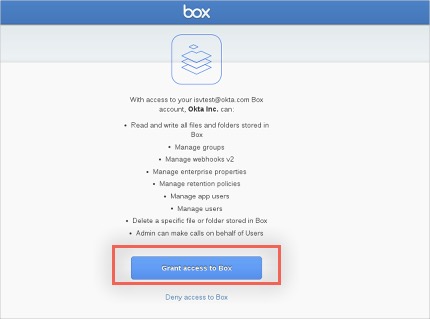
Box uses Oauth to integrate with its API, the integration uses the Box admin's credentials during setup to authorize Okta to perform actions on the Box admin's behalf.
Click Authenticate with Box.

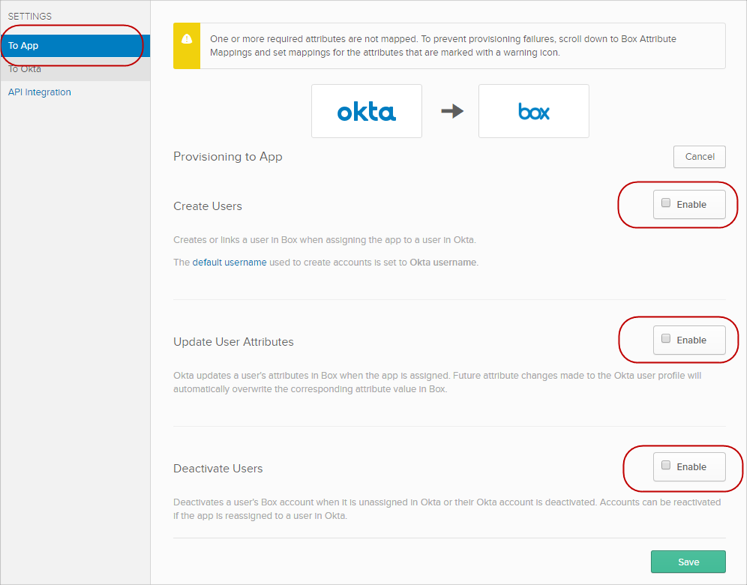
If you enable the Create Users feature, you need to make some further configurations:
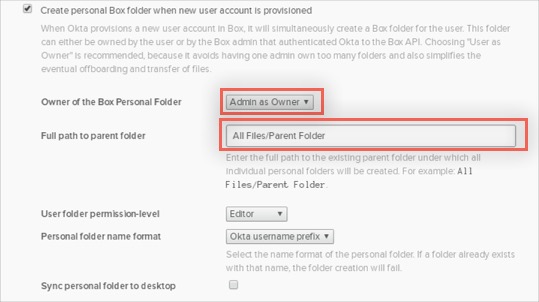
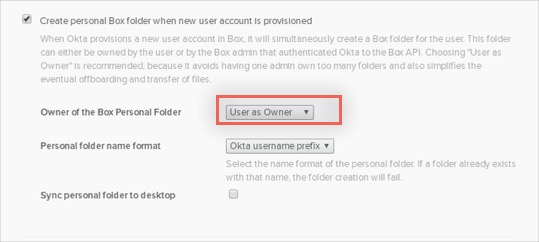
When Okta provisions a new user account in Box, it will simultaneously create a Box folder if the Create person Box folder when new user account is provisioned option is selected.
Owner of the Box Personal Folder: Either:
Admin as Owner (default). When this option is selected the owner of the folder is the Box admin that authenticated Okta to the Box API and is assigned to the newly provisioned user account at the chosen permission level (Editor, Co-Owner). For this option, you would also need to specify the Full path to parent folder where you want the folder to be created in your Box tenant, for example All Files/Parent Folder.
User as Owner. When this option is selected, the owner of the folder will be the new user provisioned to Box. You do not to need to specify a folder path, as the folder will be created in the User's root directory. The advantage of this setting, is that it prevents the Box admin from being owner of large number of folders, thus preventing any errors caused by the admin being the owner of too many folders.
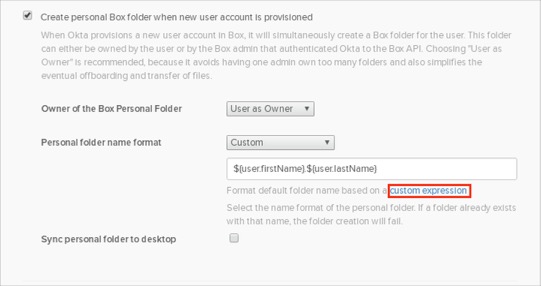
Personal folder name format:
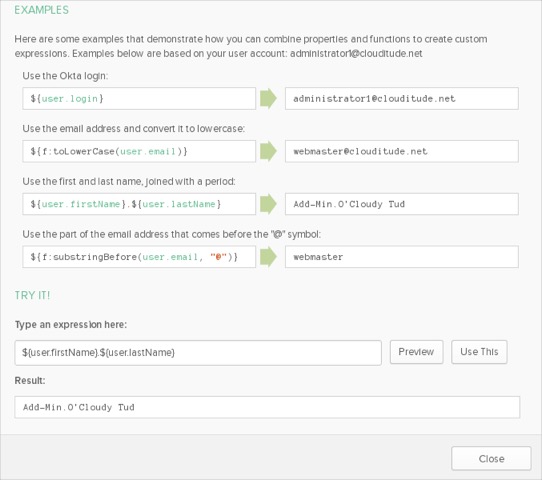
Both of the above methods of folder creation (Admin as Owner and User as Owner), allow you to create Personal Folder with a name based on the personal folder name format setting. By default this setting is set to use the Okta Username Prefix, but you can create custom expressions, with the help of Okta Expression Language.
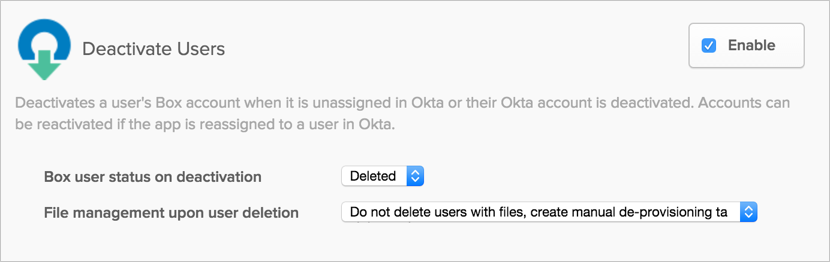
If you enable the Deactive User feature, you need to make some further configurations:
The default status upon deactivation is to make a user Inactive:

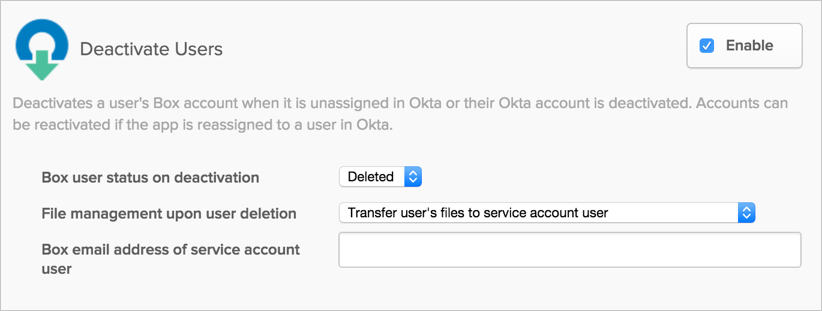
To change to a different status upon deactivation, select the Deleted option from the Box user status on deactivation dropdown menu.
Once you select the Deleted option, you need to specify the File management upon user deletion action:
The first file management action once a user is deleted is to Transfer user’s files to account user. If you select this option, you need to enter a valid, active Box account in the text field to which a user's files will be transferred when they are deactivated:
The second file management action once a user is deleted is Do not delete users with files, create manual de-provisioning task. If you select this option, only users with no files in their account will be deleted when deactivated through Okta. A task is also generated when deactivating a user with files requesting manual de-provisioning:
The third file management action once a user is deleted is to Delete all files - are you sure?. Note that if you select this option, files will be permanently deleted from a user's account when they are deactivated:

This is an Early Access feature, contact Okta Support to enable it.
Box supports User's Schema Discovery, so you can add extra attributes if available to User's Profile. To do that in Okta:
Navigate to Directory > Profile Editor.
Select the APPS section in the left pane, then find your app in the list.
Check the list of the attributes and if you didn't found what you need, click the Add Attribute to display the following list of extended attributes:
Check the attributes you want to add, then click Save.
You are now able to import and push these User's attributes values from/to Box.
With the personal folder creation feature, OKTA creates a personal folder for users during provisioning through the admin account. This makes the admin the owner of the created folder, and a copy of the folder is available in the admin account. The new user can be made either an editor or co-owner. If the user is later deactivated with the option to transfer files enabled, this folder is not transferred because it is not owned by the user. The admin's copy of the folder and its contents remains accessible in their account and is not deleted.
Personal folders are usually named after a user's username. If a folder with this name already exists, a user is still created but a personal folder is not be created for them. A task is generated with an explanation of the conflict – after manually addressing the issue, you may resolve this task to complete successful provisioning of this user.
The rest of this document provides information about how to manage Groups with Box, and includes the following sections:
Note: The functionality to assign group membership as a user attribute has been deprecated.
There are two ways you can manage your groups when using the Box application. The method you choose primarily depends on whether or not you have preexisting groups in Box, whether you want to manage groups in Okta or Box, and whether certain caveats with each method apply to your deployment. The three group management methods are
The following sections describe when and how each group management method should be used.
Before you configure group management in Box, you can integrate Active Directory (AD) as a source of both groups and users. AD integration requires that you install the AD Agent. See Installing and Configuring the Okta Active Directory Agent.
You can manage your Box groups by adding groups to your Box app in Okta and then configuring group push.
Group Push works best when your Box app has no preexisting groups and you want to have AD or Okta manage groups and group memberships in Box. In this scenario, you do not use Box to manage groups or group membership.
If you have an existing Box app that has groups configured, but you want to have AD or Okta manage groups and group membership, you must first migrate your preexisting Box groups into Okta and then push them back into Box as new groups. After you perform this migration, you no longer use the preexisting Box groups. This migration is required because Okta cannot modify and control preexisting groups that were imported from Box.
If you do not want to perform this migration, you can push groups via SAML instead. See Managing Groups in Box Using Push Groups via SAML below for more information.
To add your groups to the Box app, do the following:
Push the groups whose members you added above to Box using the group push feature. See Group Push for more information.
You can manage your Box groups by configuring push groups via SAML.
Use this method when you have preexisting groups in Box and you want to be able to do the following:
Do the following:
With push groups via SAML configured, group memberships in Okta are updated in Box whenever an Okta user signs into Box via SAML. Box assigns new users to the appropriate groups or, when the group does not already exist, it creates a new group and assigns the user to it.